Pin It button on image hover

Thursday 30 April 2020

Florals and Marks (by Sandra)

Hello

I am sharing some more of my cards made for the March shows on Hochanda.

My first card is a clean and simple card using stamps from the  Make Your Mark set.   These are stamps that I would normally use in mixed media, but it just goes to show how versatile and fun these stamps are.  I stamped with Archival Ink and masked each circle off with Masking Tissue.


This is the beautiful Poppy Ledger set. I love how the fresh poppies work so well with the old ledger background. The background is made with Distress Inks and the poppies are coloured with watercolour pens.


Here, I have cut a section of the Poppy Ledger with a scalloped die and layered up onto some card. I have made a background using the small stamp from Make Your Mark which Lesley made from sticky tape!


My last card is the Floral Study set.  I stamped in Versafine Clair ink and used Distress Inks to colour in the flowers. 


Thanks for looking
Sandra x

Tuesday 28 April 2020

Flower Power by Rachel

Hello there - Rachel here today with some more samples from the March shows - this time using the poppy ledger and floral study stamp sets.


In this one I stamped in versafine on white card then heat set in black embossing powder. I coloured the flowers in using water colour pencils then mounted on black card and added the words.


In this one I stamped in versa mark onto some of the papers from the January shows heat set it with white embossing power. I then repeated this on another piece of paper and fussy cut the flower heads. I also used the dotty stencil on the backing card. 


In this one I used the poppy ledger stamp onto a pre coloured inky background and painted the flowers using luscious powders. In the background I used the dotty stencil and a stamp from the make your mark set.

I hope you have a good day.

Hugs

Rachel x

Sunday 26 April 2020

First Stamps -- (by Magda)

Hello,
Which are your first stamps you bought from Chocolate Baroque ?
I am fond of mine  "Serenity and " Gothic Fragments" both bought in 2011 and that I use every time with a particular sense of respect.

I propose you today a card and a page of my Journaling Book, in oder to arrive soon at the last page of it and I can start a new one.


Serenity Gothic FragmentsArchival Jet Black,  Distress Ink Pad,  stencil


Gothic Fragments,   Words to Dazzle and Sparkle, Archival Jet Black,  Distress Ink Pad, stencil


Thank you for passing by, and see you next month again.
Magda. 


Saturday 25 April 2020

gelli seedheads (by Veronica)

 Good morning everyone - today I am sharing some of the samples using the seed heads image from the glorious set of stamps. I loved this large stamp - my samples were done using a 7" square card base, to give an idea of the size - and it was the perfect image to go with a stack of backgrounds I had.  The backgrounds were all made using inks and brusho powders on a gelli plate - I really liked the random nature of the results, even using the same colour combinations gave totally differing results.
For my first card I used an autumn colour background, stamped the complete image using versafine onto the background and again on white card and clear embossed this one. I coloured the spare one with alcohol markers, cut the seed heads out and glued over the original image. I also added glossy accents to the front image to make it stand out a little.

The second background was more spring tones,and I stamped the words and the cracks from make your mark in grey ink round the edges before stamping the seedheads in black ink and clear embossing them. Seed heads coloured with alcohol markers - the centre of the background was light enough that the markers covered it quite well. Again i added glossy accents to the front image.
 Here I added the circles and cracks from make your mark, and the words from both of the main images of glorious randomly across the background. Seed heads stamped in black and clear embossed onto spare card, coloured with alcohol markers, cut out and glued in place.
 This version I stamped the image and words in black ink, onto  another gelli plate background, clear embossed, then used bleach on the seed heads. I used similar shades of distress ink to create a background for the base card using random stamps from make your mark.
 I just had to do a candle as well .......


When I cut the stamps out, I carefully cut between the main images and the words, so I could use the words separately if I wanted, but still line them up with the image as they were originally.....a tip from Judith that really works, it's a bit hair-raising the first time you do it though!


Wednesday 22 April 2020

Steampunk Scene (by Kim)

Hello everyone, today sees the last post this month from our Guest Design Team member Kim. She has created a fabulous Steampunk themed project to inspire you.

Kim writes:

Hi there everyone, one of my loves is Steam Punk and what better to use than Chocolate Baroque's Steam Punk stamps.

Punky Flowers & Steampunk Funky Fish


I first brushed Vintage Photo through a stencil then stamped my images onto separate pieces of card. With the Seahorse I also masked him and extended his wing with adding a leaf from one of the punky flowers. The main punky image was stamped onto the flat image. I then stamped the image again onto the card - coloured them in - carefully cut them out - edged with more Vintage Photo. I did the same for the flower heads.

I then put the card together - foam mounting the seahorse, the flower heads and the focal image of the main punky flower.

Lastly, I die cut some cogs.


Then the last finishing touches mounted on to gold mirror card and on to my base card. Voila!

Hope you are all keeping well

Kim x


Tuesday 21 April 2020

Fabulous Floral and Beautiful Seedheads by Penny

Goodly morning everyone, I hope you are all still keeping well and having lots of crafty fun while at home.  I'm here with my second post this month and I have a couple of quick designs for you today.  

Fabulous Floral.

I have used stamps from the GloriousHoney Bee, and Make your Mark sets; Distress Inks, black Versafine ink, clear EP, white paint pen, CB Textured Art Card, and a previously made background from my stash.   


I took another of the backgrounds that I had made on a CB Craftalong, created with a Gelli plate and acrylic paints.  This one was a lovely mixture of yellows and oranges I felt it only needed black, white and a touch of green.  I stamped and embossed the large floral image and a sentiment onto the background and a couple of leaves on a spare piece of card.  I used a white paint pen to colour the tiny flowers and  painted the leaves with green DI before cutting them out and attaching them to the flower.


I trimmed the background panel and added black pen around the edges.  I took a piece of CB Art Texture card which I had made into a base card and stamped two images from the Make Your Mark set using DIs around the edges.  I stamped and embossed a large Bee image, coloured it and cut it out, then attached it to the card.


Beautiful Seedheads.

For my second project I have used stamps from the Glorious and Make Your Mark sets; Distress Inks, alcohol markers, sepia Versafine ink, clear EP, and a CB stencil from my stash.


I began by stamping and embossing the seedheads, masking them and repeating the step.
  I then coloured the images with alcohol pens.  I used DIs to stamp and stencil a background, then blended ink around the edges of the panel.  I matted the focal panel onto black card, and created a sentiment panel in the same way


I took a white base card and stamped the seedheads in DI on one side.  I used a brush and water to colour the image then attached the focal panel and sentiment panel.


Thanks for dropping in, I hope you've enjoyed this post and maybe got some ideas to try yourself!  I'll be back next month with some more craftiness.

Take care everyone and stay safe,


                                x x Penny x x

Sunday 19 April 2020

Book Making and Making Marks (by Judith)

Hello everyone, I have a few more projects to share with you today showcasing the fabulous stamps that we brought to last month's TV shows on Hochanda. The collection of stamps had a little bit of something for everyone, and I enjoyed working with them so much. I am sure that you will love them too!


My first project is a handmade book, I love books, and used to buy so many of them. Nowadays, I like to make my own, from simple accordian books, to fabric covered books that I have stitched together and used more complicated bookbinding techniques. This project uses a corrugated cardboard envelope that I received from a mail order company, and I have simply taken advantage of the fold of the envelope to create the spine of the book. I folded twelve pieces of drawing cartridge in half, splitting them into three groups, and these became the signatures of my book. I popped the pieces inside each other, so that I had four pieces of drawing cartridge sitting neatly inside each other, in groups of three. I made three holes up the fold of each group of paper.

I cut the cardboard envelope to make a cover so that it was slightly larger than the drawing cartridge, and made three lots of three holes in the spine, which would enable me to sew each signature into the cover in a simple bookbinding method. There are lots of You Tube tutorials for this, just do a search online for 'simple bookbinding', and you will find lots of help. If I were to make another one of these books, I do think that I would put washi tape on the spine for added strengthening, but I am not intending to put this book through a lot of tough use, so it will probably be okay.

I used bookbinding thread to sew the signatures into the book, but you can used dental floss if you do not have any specialist supplies.


I used black card as a matting layer, this really sets off the zingy colours that I chose for my masterboard background. I used Distress Inks to blend across some drawing cartridge, and added tone on tone stamping using the bubble wrap effect stamp from Make Your Mark stamp set. I added the cracked stamp and circles in grey ink, and some of the word clusters to build up the background. To finish, I stamped the large circle using black ink onto a piece of scrap card, added the words once more, and matted it onto black card, to create a topper. I felt that these words were perfect for a journal, and especially in these uncertain times, they can remind us that life is not so bad after all.

You could create lots of these masterboard backgrounds and cut them up to make cards, bookmarks, book covers, all sorts of projects, it just goes to show that these mark making stamps can be the stars of the show and not just for backgrounds.


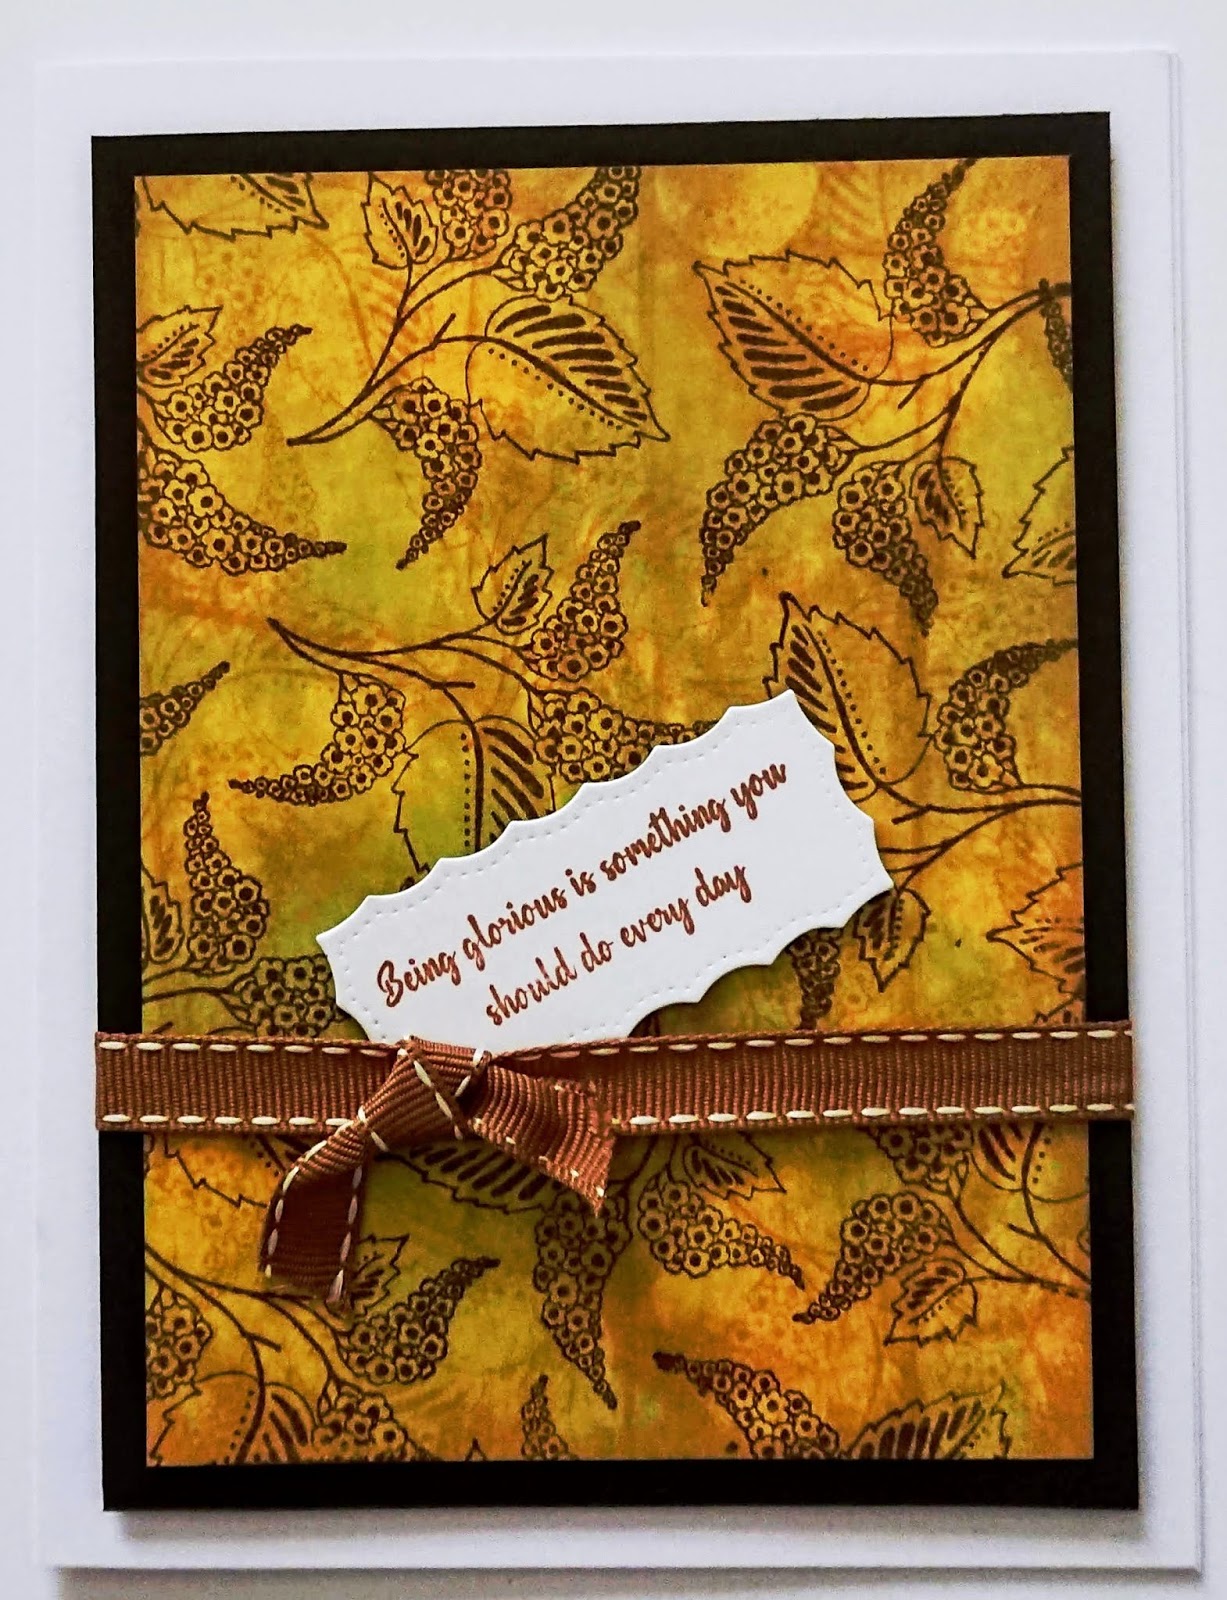
For my next project, I created a background of soft greens, and added leaves and a word cluster from the Glorious stamp set using a darker green ink. I stamped the Floral Study onto a smaller piece of card, and coloured the image using watercolour pencils. I edged both pieces of card with Seedless Preserves Distress Ink.


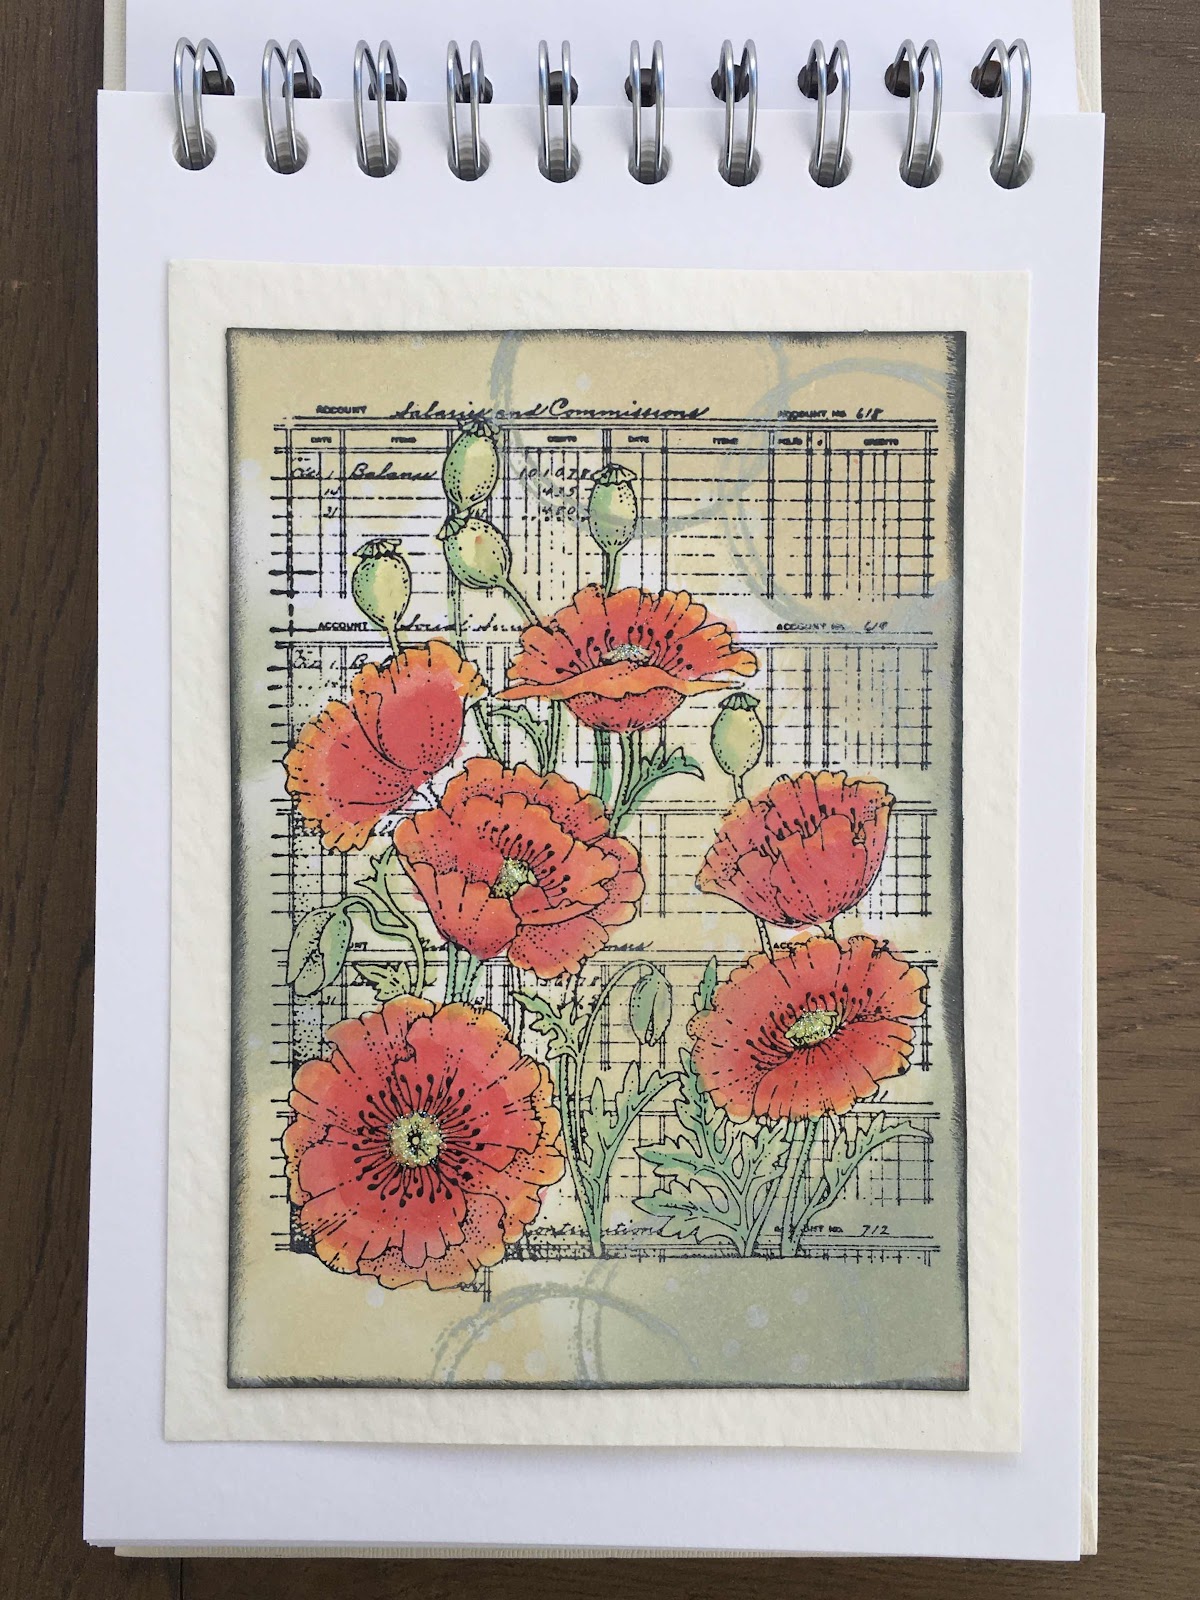
The background on this card contains a bit of everything! I coloured the drawing cartridge using Distress Ink, and added some stamping using the Large Crackle Background stamp. The circles,words and bubble wrap image are from the Glorious stamp set, and I have used the Chocolate Baroque Strip Stencil set. I have stamped and embossed the Poppy Ledger image onto kraft card using white embossing powder, and coloured it using Koh-I-Noor paints.

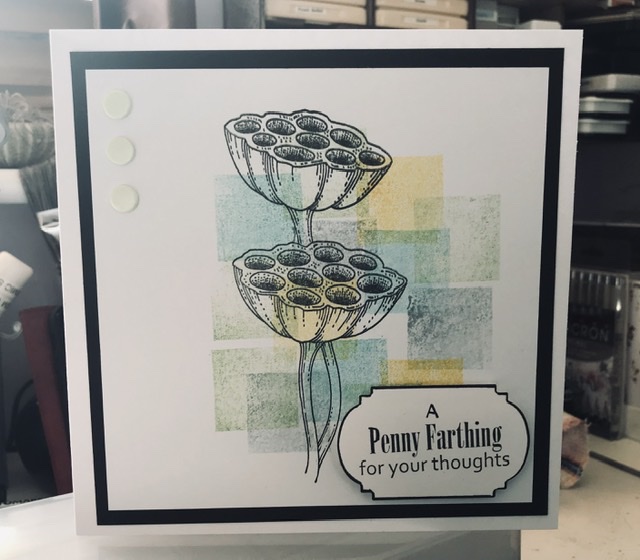
Finally, a super quick little masculine card using kraft card once more. I used the tape image from Make Your Mark and three different colours of ink; red, brown and white. I then stamped the sentiment onto one of the strips, which is something that Lesley had always envisaged with this strip image. You could change the colours, as some of the other Team members have done, and make really colourful versions of this type of design.


Thanks for stopping by,

Judith xx


Saturday 18 April 2020

Journal page by Zoe

Good morning once again Lovelies.

 I’ve scheduled this post so I’m unaware if we are still in lockdown or not? Hoping we’re not, but by the way things were sounding this was going to be a while. 

I do hope you’re all managing to keep well, active and occupied, by now I imagine it’ll be almost second nature, let’s hope it changes soon and life can get back to some sort of normality.

I was sadly unable to make samples for the Hochanda shows when these amazing stamps were launched.

I have had a little play and created a journal page which I used Oxide to create my background and colour in plus a bit of Watercolour markers to brighten the colours a bit more, some glitter glue in the centres and Voila! I incorporated the amazing “make your mark” stamp set into the background, I love this set, so versatile.


Sorry it’s only one to show, hope it was worth a look lol.

Take care and stay safe, big virtual hugs xx Zoe xx

Thursday 16 April 2020

Colour bursts by Brenda


Hello everyone, I never make any secret of the fact I love using colour in my work and today I have a collection of vibrancy to share.

Starting with the Whiteboard tag at the top which I treated to generous amounts of acrylic pain and gesso added with a brayer, pattern added using the square mask from Strip Stencils and random patterns using Make your Mark. Next I stamped seed heads from Glorious, sentiments and flicks of white pen.


The background was the brayer 'waste' from making the above tag and the same stencil set used to add some patterns, I like to apply paint or ink or in this case gesso to the stencil, dampen with water and then place onto the background and gently rub to release the patterns. The flower is from Glorious and some added background using Make your Mark. The sentiment is stamped onto a lolly stick which I painted with gesso to bring down the colour.


A Whiteboard Tag inked with Oxides and stamped with Floral Study coloured with watercolour pens. Again I have used the Strip Stencils in the background. I added some seam binding and a few sequins.


The seed heads from Glorious stamped onto a Gelli Plate background, coloured with pencils and stamps from Make your Mark around the edge. As with one of my cards earlier in the month the strip across the bottom is a scrap of pea netting from the garden, I rather like the organic feel it gives.


And finally there had to be another using the lovely Poppy Ledger which I stamped with Versafine Claire, coloured with Distress Markers and used a die set to create the card.

Stay safe and well everyone.

Wednesday 15 April 2020

Sparing a Thought (by Kim)

Hello everyone, here is the second blog post this month from our Guest Design Team member Kim. She has created a thoughtful card for your inspiration.

Kim writes:

This is blog number two for the Design Team blog whilst the lockdown continues- can it really be another week that has gone by?

As I sit in my craft room looking out on the sunny day the overall air is quiet- not the usual hustle and bustle of life. I suppose if I think back this is how Sundays used to be before Sunday Trading came in- the only difference was that we could go out a bit more than we can now.

So I find myself thinking of loved ones and in particular my Mum who is on her own down in London- and I thought I would make her a card- just letting her know that I am think of her.

I used a 7 x 7 card base for this make and made a white layer approx 6.6 x 6.5 with a slightly bigger black mat.

Then I turned to Distress Inks- I think they get a little forgotten these days. I used Peacock Feathers, Weathered Wood, Mustard Seed and Mowed Lawn. Then finding a small acrylic block to act as a stamp- inked it up with ink- took one impression off on to scrap paper and then second generation onto my white card. I built up my background layers until I was happy, overlapping them as I went.

Next I took the wonderful seed head from the Glorious rubber stamp set- I particularly loved this stamp from the set- I feel that it is elegant and needs very little to show itself off. I stamped it using Versafine Clair.

Next I needed a sentiment, now that took me ages to find the one I felt was right. The normal Thinking Of You did not quite cut it for me- so I needed something a little more quirky but meaningful. After a lot of searching back and forth I came to this one 'A Penny Farthing for your thoughts'- as I think we all spend quite a lot of time these days thinking a lot about what is happening around us. This stamp comes from the Punky Expressions set..... a little odd for some maybe but it suited my thoughts.

Hope you like this little make- cards do not always need to be complicated. Let the stamp do the talking and I think this one does that- it is deatailed and elegant.

Thanks for reading

Kimmy x

Monday 13 April 2020

How Glorious! (by Sandra)

Hello,
I hope you are keeping well.
Today I am sharing my cards made for the March shows on Hochanda.

My first card is the lovely fantasy flower from the Glorious stamp set. I have stamped  in Archival and used water colour pens. The background is a gelli print.


My next card is a bit more grungy! I stamped the Lotus seed pod stamp from the Glorious set with archival ink and used Masking Tissue to protect the image. I used Distress Inks Tea Dye and Gathered Twigs to create the background. I stamped the inky blots from Make Your Mark set, removed the masking tissue and coloured the image with Distress Inks.


In contrast, this one is  quite clean and simple. I stamped and masked the image as before. I then used  a stencil and Distress Inks for the background. I removed the mask and coloured the image with alcohol pens.


My last card to share uses one of the smaller stamps from Glorious.   I inked a piece of card with Distress Inks and stamped the small flower and leaf randomly with a light brown ink, I then over stamped with a darker brown.


Thanks for looking
Sandra x

Sunday 12 April 2020

Glorious marks (by Rachel)

Good Morning! Rachel here with the first of this months inspiration from last months shows. Today I want to show samples using the Glorious and also the Make your mark stamp sets.


To make this I used a black board and metallic green paint. Next I used white paint and stamped the circles and dots from the Make your mark set. I also added stamped cracks from the same set. Next I stamped the flower and the seed head from the glorious stamp set and fussy cut the images. I coloured the flower stamp using luscious powders but left the seed heads plain. Lastly I added them to my background.


For this one I stamped onto a ceramic tile and then painted in glaze before firing in the kiln.


For this card I used some of the small stamps from the Glorious set and also the triple stamp stencil. I used distress inks to complete the background and coloured using pencils.

I hope I have given you a few ideas of ways to use your stamps! 
Hugs
Rachel x

Saturday 11 April 2020

Easter Cards (by Magda)

Hello girls

Tomorrow we will celebrate Easter in a very different way and here below I want to show you the cards I created for this first post of April

I used Chocolate Baroque  Glorious Spring, Eastern Grasses and Russian Exquisite Egg,
the other items are  Distress Ink Pad, Archival Jet Black,  Versamark, mica and  stencils


I wish you all a Happy Easter and take care, hugs
Magda


Thursday 9 April 2020

summer poppies

Poppies always remind me of summer and sunshine,  and I think we all need a reminder of better times now .
I have  two versions of a card using the lovely poppy stamp from last month's Hochanda shows to show you today. I adore poppies, so I really loved this one, and kept things fairly simple.
For this first one I used a sheet of card that had been coloured with a very dilute walnut stain spray and stamped the image using black versafine ink and clear embossing powder.
The poppies were coloured with alcohol markers to make sure they stood out from the background.
The base card was randomly stamped with just the poppy part of the stamp using distress ink and holding the stamp in my hand. The mat is a dark brown card


For the second card I wanted the poppies to really stand out, so stamped in black onto white card, and then just part of the poppies in black onto a Tando  circle . I coloured just the poppies with alcohol markers then lined the circle up with the base image before adding a black mat layer.
Base card was sponged with hickory smoke distress oxide round the edges and parts of the ledger stamp stamped randomly to create the background.


Wednesday 8 April 2020

Pretty in Pink (by Kim)

Hello everyone, today sees the first of three blog posts this month by Kim Shaw, who is joining our Guest Design Team. Kim will be known to you already, as she regularly makes TV samples for our shows on Hochanda. Kim has created a pretty floral card for your inspiration.

Kim writes:

How is everyone coping in this strange new way of living we find ourselves?

As I write this life is very unknown- will my place of work survive? I work for a Charity Heritage Railway in Peterborough. We have had to close our doors given all that is going on- so that is very worrying. I find turning to craft will be one of the ways forward to seek some solace and calm my wandering thoughts!

I made this card today using Chocolate Baroque's wonderful Freesia Blueprint set- such a beautiful flower in real life with a lovely fragrance, and speaks of pleasant sunny days and happy times.

This card is on an 8x8 card base - I used a white layer measured at 7.5 x 7.5, for stamping on and then mounted on to a piece of red card measured to 7.75 x 7.75 (all measurements are inches).

On the white layer I first used a circular mask- you could use a stencil or paper with a circle cut out. I found a size that enabled me to make it as though it was a snapshot of the focal point of the main flower.

I then used Spun Sugar Distress Ink and with a soft brush built the colour up in several layers- lifting the stencil/mask to check my progress until there was enough colour to my satisfaction. Once I was happy with the level of colour I then stamped my focal image through the stencil/mask and then carefully removed the stencil, using Black Versafine- I find that Versafine brings the delicate lines of the image right out.

My next step was to colour in the flowers- I am a lover of Faber Castell as they just suit me- however you could just use any medium of your choice or indeed watercolour paints. I gently built the layers of colour slowly and steadily until I was happy with my focal image.

My next step was to stamp the corner with the stamp set is the ideal selection of a section of a protractor perfect for the job in hand. I used the same Spun Sugar, but this time in Oxide Ink- this complemented perfectly as the chalkiness of the ink makes it perfect to stamp with. If you used the ordinary Distress Ink the image would not be as crisp- it would be distressed as the ink has an almost split effect when used for stamping.

I then took a black fine liner pen and went around the circle- I did not want a perfect circle I wanted the wobbly look- probably reflects my current state of mind!

Lastly I used one of the sentiments from the set- perfect!

Finally I layered everything up- the red card complemented the pink perfectly.

I hope you like my card and cannot praise the set of blueprint images enough- they stamp beautifully- every fine little detail- exactly how you would see a blueprint!

Keep safe and well everyone

Kim xx

Tuesday 7 April 2020

Glorious Circles and Kraft Poppies

Good morning peeps, I hope this finds you all healthy and happy.  This is my first post this month and I have two very different cards to share with you.   


Glorious Circles.

For this project I have used stamps from the Glorious and Make your Mark sets;                   Chocolate Baroque Strip Stencil, acrylic paints, Distress Inks, black Versafine ink, clear EP.


I had some backgrounds already made from the second CB Craftalong so I took one of them to use for this project.   I used  one of the CB stencils to apply white gesso randomly over the background.  I then stamped the two circle images in black ink and embossed them with clear EP.  I stamped and embossed the floral sprig in the same way in the center of the larger circle.  I then painted the flowers with DI, stamped and embossed a couple of leaves then painted and cut them out.  I attached them to the background with 3D glue.     


On a white base card I stamped the dotty image around the edges in  one colour and then the smaller circle image in another.  I trimmed the background panel and added ink around the edges and attached it to the base card.  I added a sentiment panel to complete the project.


Kraft Poppies.


For this project I have used stamps from the Make Your Mark and Poppy Ledger stamp sets; CB Kraft Card, Distress Inks, sepia Versafine, black Versafine, clear EP, and a black pen from my stash.


I began by taking a piece of Kraft card and stamping the Poppy Ledger image in black then embossing it with clear EP.  I used  DIs to paint and colour the image. 


I then used the crackle and smaller ring images around the edges of the card, stamping them in sepia ink repeatedly and in first and second generation ink.  I added a border with black pen around the edges of the Kraft card, then attached it to a white base card.  I created a sentiment panel in the same way and attached it to the card.


Thank you for stopping by today, I hope you have found this post inspiring and enjoyable.  I shall be back later in the month with more crafty fun to share!

Until then take care and stay safe,


                                  xx  Penny  xx