
Multi-coloured stamping
An easy way of colouring your cards quickly is multi-colour stamping. To do this accurately, you need a good quality stamp platform so you can stamp in exactly the same place. I also keep a cotton bud handy to clean up any excess ink.
Simple multi-colour stamping
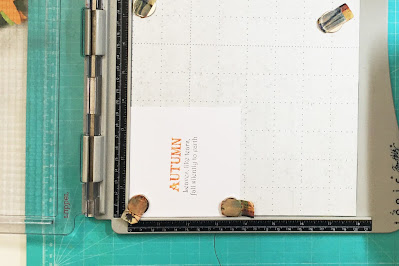
You will need: a stamp platform, cotton bud and 2 or more colours of ink.
1. Place your card into your stamp platform. Align your stamp onto your card and close the lid to pick up your stamp. As we are working with rubber stamps, you may need to remove an inner shim in your platform or swap the lid around (each platform varies).
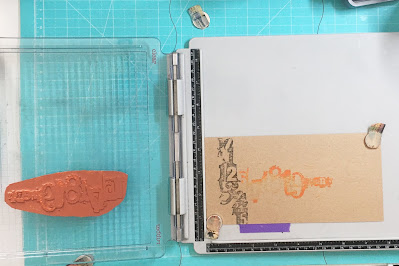
2. Next, tap your first colour of ink into your chosen area. Use the cotton bud to mop up any excess to other areas of your stamp. Stamp this first impression and reink and stamp again if required.
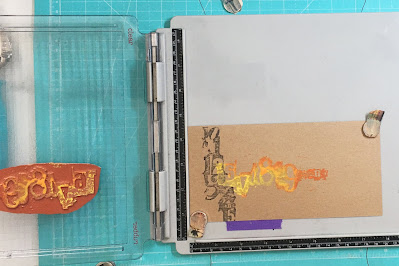
3. With the second colour, apply colour to the other areas of your stamp. Again, use the cotton bud if required. Stamp your sentiment and repeat if required.
You can then decorate the rest of the card as required.

Distress Oxide Blending
Once you have practiced the above technique, we can move onto image stamps. Bolder designs will work better for this technique so you can see the colour blending. The "Numerology" number stamps are ideal for showcasing this technique due to their bold appearance and larger stamping area.
You will need: a stamp platform, blending tool (such as sponge or blending brush), cotton bud and 2 or more Distress Oxide pads. You can also add a water spray for use with these inks; otherwise, you could also do this technique with other wet pigment pads.
1. Place your card into your stamp platform. Align your stamp onto your card and close the lid to pick up your stamp. As we are working with rubber stamps, you may need to remove an inner shim in your platform or swap the lid around (each platform varies).
2. Next, tap your first colour of ink into your chosen area. Use the cotton bud to mop up any excess to other areas of your stamp, but this time we are going to create a fade off with our ink. Using your blending tool, tap at the edges of the applied ink to soften the transition from ink to no ink. Stamp this first impression and reink, blend and stamp again if required.
3. Clean your stamp with a damp cloth carefully so the stamp doesn’t shift.
4. With the second colour, apply colour to the next area of your stamp. Again, use the cotton bud if required, but this time we are going to create a fade off to both ends of the ink. Using your blending tool, tap at the edges of the applied ink to soften the transition from ink to no ink. This fade should overlap the previous blended area of your image. Stamp your sentiment and repeat if required.
5. Repeat for each colour you wish to use in your blend.
Optional: With Distress Oxides, you can lightly mist your stamp before stamping with colour to activate the oxidisation. This particularly pops on coloured card and especially on kraft card.

Distress Oxide Resist
Distress Oxide has a particularly cool effect when dye ink is applied over the top as it acts as a resist to the dye. I use this technique a lot for giving a distressed look to my stamping using shades of brown, oranges and teals. It works even with detailed stamps, making it a great technique to use with the intricate detail of Chocolate Baroque stamps.
In the sample below, you can see both bold and detailed designs from Punky Romance. They both use the same colours but notice how the detailed image looks lighter. You can vary your ink colours between images if you wish to compensate for this.
You will need: a stamp platform, cotton bud and 1 or more colours of Distress Oxide and a dye based pad.
1. Place your card into your stamp platform. Align your stamp onto your card and close the lid to pick up your stamp. As we are working with rubber stamps, you may need to remove an inner shim in your platform or swap the lid around (each platform varies).
2. Next, lightly tap your first colour of Distress Oxide loosely into your chosen area. You want areas where the ink doesn’t hit to make the resist effect more obvious. Use the cotton bud to mop up any excess to other areas of your stamp. Stamp this first impression. Do not be tempted to reapply at this stage.
3. Use this same technique for other Distress Oxide colours you wish to include, applying colour lightly to the other areas of your stamp. Again, use the cotton bud if required. Stamp your image.
4. When your Distress Oxide stamping is complete (you should have a light all over image), clean your stamp and ink it up with your dye ink. Stamp and reapply if required. The Distress Oxide will then reveal itself through your ink.

There are many more multi-coloured stamping techniques I look forward to introducing you to over the coming blog pieces.
This is a great technique and works well on all the cards Natalie, but I particularly like the first and the three different colours combine beautifully, and a pretty leafy background to go with it too. x
ReplyDeleteOooh, that's clever. Thank you for sharing how your makes were made Natalie. I love them all and the last one makes a great masculine card x
ReplyDelete