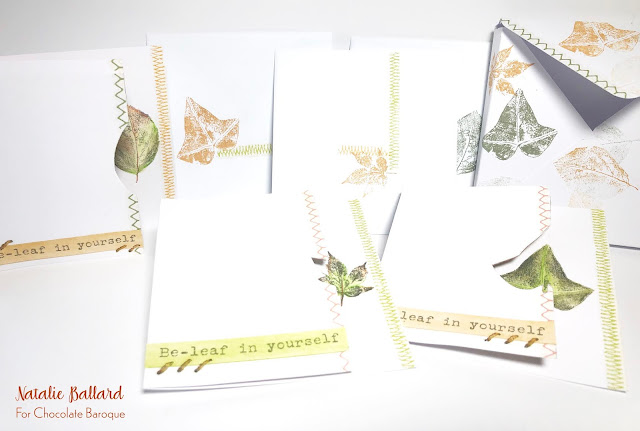
Sketchy, textured or broken image stamps all look fantastic when combined with masking techniques. There are a number of masking products you can use to achieve this but I tend to stick to paper based products when working with inks. There are two approaches: positive and negative we shall call them.
Positive Masking
This is where most beginners start with paper masks. You can stamp your image onto masking paper, tissue or tape and then cut it out to create your mask. You should trim slightly inside the image to prevent a halo when apply another image or ink to your design. The resulting mask then masks the original image so you can ink outside of the image for background techniques, glows or shadows. It is also how we can build scenes using multiple stamps.
Using From Nature 1, stamp and cut out the mask of your chosen leaf image. Depending on your material, you may want to allow the paper to dry before cutting out to save inky fingers.
Stamp your image onto your card blank using any stamping ink and even embossing powder if you wish. Heat set the ink and apply your mask. Using a blending brush, sponge or dauber apply ink over the top - Distress Oxides were used in the sample below. Stamp any textural images you want to add using any inks; you could even stencil over the top.
Peel off your mask and allow to dry. Stamp and mount a sentiment to complete the card.
Negative masking
This is where we mask the background instead; this makes colouring your images a much quicker process. This time trim slightly outside the image to prevent an inner halo using a craft knife or scalpel using a cutting mat beneath your masking material.
This process enables us to then apply colour to our stamped images quickly. Stamp your image onto your card, in the above sample this was inside a card blank. Apply the mask to your card carefully, working from the aperture outwards. Apply dye based inks over your image; this prevents your original stamped image looking faded.
In the sample above, I then used a light box to sketch the outline of the stamping trimmed the card about 1 inch shorter to the front and around the image. I then applied some rub on stitching designs as well as a sentiment border from the stamp set. Then use the same inks you coloured with to add leaf designs to your envelope.


Thank you for the great inspiration Natalie and love the look of the cards with the inserts and the leaves in such pretty colours. This leaf set is definitely on my wish list. x
ReplyDeleteSimply beautiful x
ReplyDeleteOH! These are so lovely, I needed a few of those tips! Thank you.
ReplyDeleteFaith x