Pin It button on image hover

Friday, 18 May 2012

Imagine a Butterfly Cage


Hello, everyone!  These two new stamp sets have really inspired me, and they're right up my alley, too!  I love the old fashionedness of the dressform shown here - it reminds me of the old hoopskirts from, as they say here in the USA, "back in the day."  Originally, I had thought, and did, put a little yellow bird in the cage, but then I happened to find some printed butterfly images that were 3-D, and I thought it looked better than the birdie.  I love to sew, and I love birds, so this was so apropos. 

The original with a yellow bird.

My husband has told me many times that I should have been born in the Victorian era, because I love the jewelry and clothing from that era.  I've never actually used a dressform to make a dress, but maybe I should. 

I've put the directions on how to make this card below.  I've used Chocolate Baroque's newest stamp sets, Haberdashery and Lace Fragments.  I also added the word 'Imagine' from the Chocolate Baroque stamp set Artistic Expressions, which is what you have to do on this card! :)  The background was stamped with the large lace flower in the Lace Fragments set, and colored in with Prismacolor pencils, and I love the way they came out, subtly in the background.  The flowers were made from scraps from different punches, and I used Flower Soft in the center of the yellow ones.  Two dressmaker pins, a green button, and some eyelash trim finished off the embellishments.  The complete directions are below.
Silver embossing powder was used on the scissors stamped with Versamark ink.


Dress Form Birdcage

Supplies –

Stamps from Chocolate Baroque Haberdashery, Baroque Lace, and Artistic Expressions
     Coloring medium of choice (I used Prismacolor Pencils)
     Versafine Onyx and Versamark inkpads, gray and peach inkpads
     Silver embossing powder and heat gun
     Hobby knife
     Printed butterflies from purchased sheet
     White, Silver, yellow, peach and green cardstock
     Dry embossing strip, your choice
     One green button
With butterfly instead of yellow bird
     Eyelash string
     2 dressmaker straight pins
     Fiskars 'Stitch' border punch
     1/8” high pop-up dots
     3-D flowers of choice

     Directions –

Cut white cardstock to 6” high by 9” wide, then score in half to make base card 6” high by 4 ½” wide.  Dry emboss decorative strip on right side of front of card (opening from the right).  Stamp the lacy flower from the Baroque Lace stamp set in various places on front of card, but not over embossing, using the gray inkpad.  Color images in with pencils, using peach, yellow and green.

Stamp the word “Imagine,” from the Artistic Expressions set onto white cardstock, using the black inkpad.  Cut word out leaving a 1 ½” border all around, then use the stitch border punch to make border.  Using a small sponge dauber, dab or rub peach ink onto word piece below the word and on the edges.  Glue to card as shown.  Thread the eyelash string through the holes in the green button and tie into a small bow, then glue to the bottom left corner of the sentiment piece.  While glue is still tacky, push two dressmaker pins, crossed, under the button with ball tips on top.

Scissors – Stamp scissors from the Haberdashery stamp set, using Versamark inkpad onto silver cardstock, and sprinkle with silver embossing powder.  Heat set.  Fussy-cut around outline of scissors, and apply pop-up dots to back.  Set aside.
Dress form birdcage – Using the dress form stamp from the Haberdashery stamp set, stamp it twice on white cardstock using the Versafine Onyx inkpad.  Cut one out on just the very outside lines, and adhere in the center on lacy flower stamped area.  Shade the second one with gray pencil, and fussy-cut out completely, including between the bars of the cage, using hobby knife.  Apply small pieces of pop-up dots to the back.

Cut printed butterflies from sheet, and arrange a larger one along with some flowers to the center of the “birdcage” part of the first image that was adhered to the card.  Apply scissors horizontally on top of card, having points towards the left, to make it appear that the cage is hanging from the shears.  Place the second birdcage over the first, matching all edges, and the scissors should appear to come out of the armholes of the dress form.  The butterfly should “appear” to be hovering in the center of the birdcage.  Apply flowers with glue, and the small butterflies with pop dots. 


Wednesday, 16 May 2012

Paper Pieced Dress form by Debbie

The Haberdashery stamps definately are versatile so that you can play endlessly with them.
I decided to go back to a technique I haven't done for a few year and paper piece the dress form and pin cushion. The papers I used for my card are from the Songbird A4 paper pad. The dress form was stamped with Versafine Onyx Black onto the green background paper and the stand was coloured with brown alcohol pens. I stamped twice more onto different papers from the pad, cut out then glued in place with silicone. I repeated for the pin cushion. The bobbins have been stamped cut out and coloured with pens. I edged the background paper with Brushed Corduroy and pricked around it using my Tim Holtz ruler. The sentiment is my favourite and was stamped onto cream card then die cut. I left the die in place and inked the inside with Adirondack Juniper. Debbie

Monday, 14 May 2012

Lace Scrapbook page (posted by Judith)

Hi folks, I thought I'd show you another use for these lovely Lace Fragment stamps recently released by Glenda. I decided to make an 8" x 8" scrapbook page, as this is a size that I am very comfortable working with. My Design Team mate Debbie is a keen quilter, and has been making some lovely quilts lately, and that is what inspired me to make this sample.

I cut four 8" x 2" strips, and embossed each one with a different stamp, three from this stamp set, and one from the Texture fragment set, using white embossing powder. I then cut the strips into 2" squares. I arranged them into a pleasing pattern, and stuck them together with double sided tape on the back. I sewed them together, using zig zag stitch on my sewing machine. I stuck the cotton ends to the double sided tape on the back, and covered the back with another piece of 8" x 8" card.

I stamped and embossed some of the buttons from the Haberdashery stamp plate, and cut these out. I used a suitable Nestability die to create a frame for my photograph, this is my Daughter and my niece. I then stamped the word 'Love' onto a Nestie shape.

This is such a simple page, but the lace background is so pretty, and makes the page really tactile. The buttons are a great little addition, they are going to be such useful stamps.

Thanks for stopping by, Judith xx

Saturday, 12 May 2012

Hello there,

Today a creation I've made using the 'Haberdashery'sheet. I also used a paper from the  Prima marketing paper called 'Meadow Lark'. Beautiful papers that matches perfectly with each other. I embossed this time with Wow Black Twinkle. you can see a little sparkle in the black........
I also combined the Lace fragments border on this card. I've coloured most of the embossed pieces with Copic markers. Added some feathers and white pen effects.


Well, see you some other creative moment........


Thursday, 10 May 2012

Another Lace Rose by Miranda

Hello there,

Today I have combined the Lace Rose with the beautiful Foxglove of the Honeybee sheet. And again I stamped on Basic Grey paper and gave some accents with Derwent colour pencils.
I've used the swirl from the Artistic Expressions sheet and if you take a closer look you can see the lace fragment on the pink Basic Grey paper background. The Rose is embossed with Wow Black glint embossing powder. It has that lovely subtle sparkle.....


Have a nice day and see you next time!

Tuesday, 8 May 2012

French Dressing Room (posted by Judith)

Hi folks, here's a cheery project combining the Lace Fragments stamp plate and the Haberdashery stamp plate. I used a colour palette of Spun Sugar Distress Ink and Paris Dusk Memento Ink, a very unusual combination for me!

First of all, I used Post it Notes to create stripes on the bottom half of the background, masking areas, and inking inbetween those areas. I dried everything thoroughly, and then I went back and masked everything again, and inked the white areas inbetween with one of the large lace stamps with Spun Sugar Distress Ink. For the top half of the card, I simply coloured the background with Spun Sugar Distress Ink, then stamped the large lace flower with Paris Dusk Memento Ink. I put a piece of dark blue ribbon across the middle. This is from one of the ribbon sets that Glenda sells on the website.

I then stamped the three mannequins with Memento Ink, and coloured them with Distress Stains before cutting them out. I added a simple sentiment from the 'Paris Postcard' stamp plate.

Don't forget to keep popping back to see what the other Design Team members have been making with these fabulous stamp sets, I'll be back in a few days. Thanks for stopping by, Judith xx

Sunday, 6 May 2012

'Lacey' moments by Miranda

Hello there,

Today another one with the new Lace Fragments. This is a bit of a scrap card with different stamped pieces and use of some Nestabilities. I also stamped the Tim Holtz flower die with the Lace fragment. I really like that effect. I kept the colours in warm browns and that gave it a sort of vintage look. I've used Brilliance Chocolate brown and black.

I also used the Elegant Iris sheet as you can see on the main image. I over stamped that on the lace pattern and coloured with Derwent Soft Colour. The word 'Dream' is from the Artistic Expressions sheet.


Well that's my inspiration for today!
Have a nice day and till next time,


Friday, 4 May 2012

A card of buttons (posted by Elaine)

When I saw the lovely downloads Lesley had designed I spotted a match with some really pretty buttons I had recently purchased. I had th idea of trying to make a card with something that looked like a pack of vintage buttons.


I cut out a panel from one of the tag envelope designs from the Chic Script 2 set and aged it with Frayed Burlap Distress Ink.  I matted this onto a brown bckground and then stuck the whole thing onto a piece of recycled corrugated card. This then gave me a nice thick backing to embed my button backs. I stiched them into place on the back to make sure they didn't come loose before matting onto a brown background. I made a label for the button card used one of the Haberdashery stamps on cream card and fixed it into place with a couple of pale green brads.

I finished off with some green paper string, the scissor charm and some die cut vintage lace courtesy of a Tim Holtz die.

Hope you are enjoying looking at these lovely stamps and the gorgeous creations my DT team mates have come up with. These new stamps really are an incredible pleasure to be working with.

Elaine

Wednesday, 2 May 2012

Lace and Haberdashery Winners announced!

Did you think I'd forgotten.  Well things just kept conspiring to keep me away from my computer this week, so the 'weekend' has overrun slightly.

By random number generator, I'm delighted to announce our two winners who are:

Aquarius who wins the Lace Fragments set

These stamps really are 'ab fab' and as you say so on trend. Just love your little 'Etsy labels' too they would grace any hand crafted article.


and Sue's Crafty corner who wins the Haberdashery set

Oh wow, these are gorgeous. They have just found their way to the top of my wish list. Can't wait to see what the design team have made with them.

Sue x
Well done ladies - please can you contact us to just confirm your address and we'll get your stamps sent out pronto!


Steampunk mannequin (posted by Judith)

Hi Folks, here's another offering combining the new Haberdashery stamp plate, and the Lace Fragments stamp plate. I've thrown some old favourites in there as well, and I'll tell you about those as I go along.

I wanted to give a steampunk feel to one of the mannequins, and set about gathering some of the other stamps that I love to use to add to the background. I created a wrinkle free distress background, using Distress Stains in Tumbled Glass and Antique Linen. Then I stamped one of the Lace Fragment stamps all over the background. I added a cog stamp from Steampunk Christmas using Perfect Medium and bronze mica powder, and a script stamp from Eccentric Edwardian. I edged the background with Vintage Photo Distress Ink.

I stamped, coloured and cut out the mannequin, and part of the heart with wings from Punky Romance, it was a perfect fit behind the mannequin.  I stamped the word 'imagine' onto shrink plastic, cut it out with a Nestie shape, and shrunk it down, before sticking it onto a piece of spare coloured background card. I added a cog with some jump rings. I stuck some mini cogs onto the mannequin's skirt. I embossed and coloured a mannequin using an embossing folder, then cut this out.

To finish, I added another metal cog for balance, and matted my background onto brown card. In real life, the wings are very dimensional, and the cogs shine, as the mica really reflects the light.

Thanks for stopping by, Judith xx

Monday, 30 April 2012

Lace Rose by Miranda


Hello there,

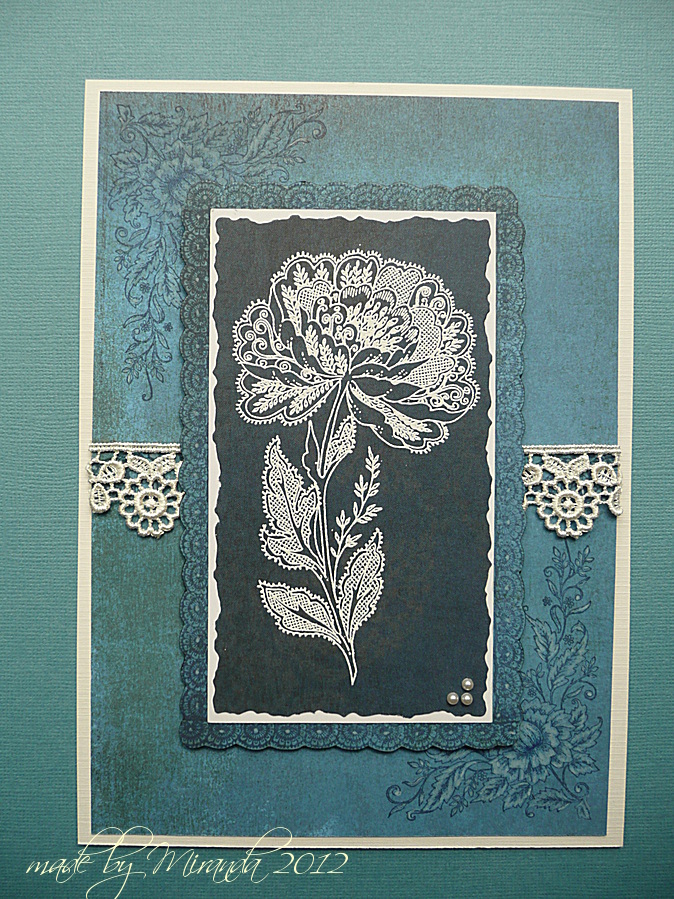
Today I will show you two cards made with that lovely elegant lace Rose from the new Lace fragments sheet. This sheet is really versatile to use and not only with vintage cards. On the first one I've embossed the flower and border with Wow Bright White. At first the background was a mess, but when I progressed it seems to work out well. I stamped the lace fragment with versamark and added perfect pearls silver pearl. After that I stamped the fragment with black. The paper itself is dark brown from Basic Grey.
Only added some ribbon and lace and pearls for the finishing touch.
The 2nd card has been made also with stamping on Basic Grey paper. I stamped the flower corner with blue and coloured with Derwent soft colour. The lace border is stamped and decoupaged. The lace rose is embossed with  Wow Vanilla White a warmer colour than the bright white. Just simple stamping but these stamps don't need much more I think........


Hope to have inspired you and happy crafting!
Till next time,

Saturday, 28 April 2012

Lacy Fragments altered bottle by Claire

Hi there, Claire here with another sample using the beautiful Lace Fragments stamps.


I really enjoyed making this project. My son and his friends kindly emptied the bottle for me and once I'd washed it I gave it a generous coating of gesso. I used an assortment of pastel coloured acrylic paints from my stash to paint the bottle, making sure my brush was loaded with plenty of water to blend the colours together. Once this was dry I overpainted the bottle with pearl acrylic medium.  

I used air dry clay to make the central image, I stamped the lovely lacy flower into the clay and left the imprint to dry. Make sure you give your stamp a good wash to remove any excess clay.
I left the clay overnight to dry and painted it with distress inks before attaching it to the bottle with strong pva glue. 

I added some white raffia as a finishing touch and a couple of little paper roses.

Claire xx

Thursday, 26 April 2012

Coffee and Cream Lace Flower (Posted by Judith)

Hi folks, I love the new Lace Fragments stamp plate that Glenda has just released. I wanted to use the large lace flower as a focal point for one of my samples, and decided to emboss it with a vanilla white embossing powder on a coffee coloured background. I matted this onto a piece of black card. I then stamped one of the lace fragments randomly over a larger piece of card, and again embossed it with the vanilla white embossing powder. I also added a black lace strip at this point which I embossed with clear embossing powder at the same time.

I cut two butterflies from a Crealie die, and stamped them with one of the large lace stamps, and embossed them with clear embossing powder. My card was coloured with Memento Desert Sand, this is a lovely soft brown, a great contrast to the cream and black.

I have decoupaged the flower head, adding three more layers, it's a lovely image, and I think that this will become a well used stamp! Keep popping back to see what the other Design Team members have been up to over the next few days, thanks for stopping by, Judith xx

Tuesday, 24 April 2012

The Little Haberdashery Shop by Claire

Hi there, Claire here with a little card made with the new Haberdashery stamps. I thought the stamps would look fab stamped on shrink plastic and thought a shop window would be a good way to show them off.


I'm not too good at clever folding but I found a really easy way to create this little shop window. For more details pop over to my blog
Claire xx

Saturday, 21 April 2012

All dressed up (posted by Claire)

Hi there, Claire here with a card using the scrummy new Haberdashery and Lace Fragments stamps.


These new stamps are fab and I think they're going to be one of my favourites. I had fun dressing up one of the dress form stamps with a little chiffon dress. The background was created using a resist technique - I stamped lots of the smaller stamps from Haberdashery with versamark and then applied lots of distress ink (Spun Sugar and Victorian Velvet). The border is machine stitched. I've used the sentiment stamp on ribbon stamped with black stazon. 
The black lace was made by stamping one of the gorgeous lace borders on some tissue paper with black archival ink and pleating it as I applied it to a strip of double sided tape.

The little chiffon dress was really easy to make. I stamped and cut out the dressform and then took a couple of scraps of chiffon and stamped them with another lacy border (unfortunately it doesn't show up too well in the pic). To make the dress I just wrapped the stamped chiffon around the dressform using strong double sided tape to adhere it to the back of the image. To add a bit of bling I used a little crystal buckle on some narrow black ribbon. The dressform is layered up over a die cut stamped with another lace fragment.

The card is finished off with a couple of sparkly pins and some little black buttons
I think all of the DT have enjoyed working with these new stamps so make sure you keep popping back to see their beautiful projects.
Claire xx

Friday, 20 April 2012

Haberdashery frame (posted by Judith)

When I received the new Haberdashery stamp plate from Glenda, I knew that I wanted to decorate a box with compartments in which to place all of the elements. I didn't have one the right size, so I set about making one myself from grey board. I cut two pieces of 8" x 8", and trimmed squares from the top one before glueing them together. I painted the piece with acylic paint, and dry brushed it with a small amount of cream paint, to give it a distressed, aged feel. I then added some of Lesley's new lovely Chic Script paper as a background.

I stamped several of the images onto white card, and coloured them with Polychromos pencils, choosing colours from the background papers. I shaded the colours to give a rounded feel to the elements. I embossed the scissors and the thimble onto gold card, using gold embossing powder. I printed a couple of the butterflies from Lesley's downloads onto card and cut those out, adding flower stamens for antennae. I then made a little banner and stamped the sentiment for the top of the frame.

I added an acetate skirt to the mannequin, which I laid over the top of the original coloured version, and used Glossy Accents to stick them together. To finish, I chose one of the lace stamps from the Lace Framents stamp plate, which I stamped onto pink vellum with white embossing powder. I stuck this across the middle 'shelf' of the frame.

I had a lot of fun making this project, and the stamps really lend themselves to this kind of thing. Keep an eye out for what my Design Team mates have come up with over the coming days. Thanks for stopping by, Judith xx

Thursday, 19 April 2012

Absolutely FAB-U-LOUS new stamps!


I'm officially in love with our latest stamp sets, they are bang on trend and scrummylicious to play with.  Firstly we have the ab fab hab set - Haberdashery, an A5 set (approx 15 x 10.5 cm)


then there's the luscious A4 set Lace Fragments (21 x 29 cm)


The picture at the top shows some of my 'Etsy Tags'.  I don't have an Etsy store, but if I did, I would send my hand made wares out into the world with cute little hand made tags on everything.

Here they are in close up:


Just wait til you see the gorgeous creations that the Design Team have come up with - they'll be sharing their creations here and on their own blogs over the next week or two, so stay tuned.

Meanwhile, I'm feeling generous, so I'll be picking two lucky winners from comments left on this post to receive one of the new sets.  Please feel free to mention the giveaway on your own blogs or Facebook.  I will pick winners some time next weekend (that's after Friday 27th April).

Good luck!


Wednesday, 18 April 2012

Easter Egg Flower (Posted by Clare)

Hello all!  I know Easter has past us up once again, but I am still celebrating, and wanted to share this card with you!  The stamps from Chocolate Baroque's Baroque Eggs are fantastic!  So much detail, and so versatile!

On this card I stamped the eggs on white cardstock using Versamark ink, then heat embossed them in white detail powder.  I used a sponge dauber to shade them in, using peach and purple inkpads.  The rose in the center was made using scraps from punched images.  I put a blob of glue on a piece of scratch peach cardstock about the size of a dime (US) then positioned the petals after using my flower former stylus on them.  When dry, I just cut around it close to the outside row of petals.   The next purple layer is a long piece of cardstock, about 12" long and 2" wide.  I used my score-buddy to score lines across the 2" side at every 1/4", then alternately folded them opposite each other, and adhered the ends together, then pushed down in the center and adhered to the white base cut with a Spellbinders Scalloped Lacey Circle.  This was popped up on the peach layer, which was punched with a Martha Stewart's All Over the Page punch called Crochet Flower.  This was mounted on a piece of light purple cardstock cut to just 1/8" larger than the punched peach piece, and then on white cardstock.  I stamped the sentiment in purcple on white cardstock, hand-cut it out, sponged the edges peach, the adhered with dimensionals.  I added some pearls, and "Voila".  Finished size is 4 1/2" x 4 1/2" square. 


'Elegant Spring flowers' by Miranda

Hello there,

Just thought to pop in today to show you one of my 'Elegant Spring flowers' creations. I am in love with this little snowdrop.......I've coloured it with the Derwent pencils on Basic Grey paper. One of my favorite techniques.
Hope to inspire you to get your pencils out........

Thursday, 5 April 2012

Coloured Crocus by Glenda

I have a card to share with you today that features the beautiful border from the Elegant Crocus stamp set.  I stamped it onto white card and coloured it with pencils, then inked around the edges with toning Memento inks and layered it onto a plain white mat.


The sentiment is from Butterfly Dreams and was die cut after stamping (to get the positioning right).  Before removing the die, I drew around the inside with a fineliner pen, then once that was dry, I inked around the edges with Memento inks.

The lace paper is one of the designs in the Prima Meadow Lark paper pad and a simple green polka dot ribbon adds a little contrast.  The gingham butterfly is die cut from another of the Prima papers and finished with a little Stickles on the body and gems on the antennae.

I hope you all have a wonderful Easter and let's hope the sunshine comes back!


Monday, 2 April 2012

Three lucky blog winners - are you one of them?

Well I did try to post this announcement last Friday, but Blogger bloggered me about so much I gave up in disgust. Sorry Blogger, but every now and then, something weird happens and the text and images were dancing and jumping up and down on the screen - enough to make my eyes ache.

Things seem to be back to normal now, so here goes with the winners. I used a random number generator and in no particular order, our winners are:

Dots Dabbles who wins Easter Traditions
Dots Dabbles Mar 17, 2012 03:20 AM I have been eyeing that cross off for ages...I first thought that you must have used alcohol inks on this card. It is a stunning card, love everything about it! Dot x
Glennis who wins Elegant Spring Flowers
Glennis Mar 17, 2012 11:15 PM The new stamps are amazing and as regards to your question on the last set, I think you should keep it in - it looks very useful, and I just love the flourish
and Paula who wins Elegant Crocus
Paula (PEP)Mar 17, 2012 03:44 AM These are real beauties of floral/script stamps with gorgeous stylized variations included. I've been hankering after a crocus stamp.........how ever did you know?? My mum was an ordained minister so I'm thrilled to see the traditional Easter stamps. I've loved Art Nouveau for a long time & though I have that little Birthday Swirls set I can see how useful it is - one of the very few large Happy Birthday stamps with some elegance where the Greeting can actually form the focus of the design. Paula (PEP)
Well done ladies - please can you contact me with your details and I will get your prize sent out to you.


Easter Cross by Debbie

Glenda recently posted a video on YouTube of how to cut an apeture in a gatefold card. The video explains brilliantly how to cut the aperture.


Onto white card I stamped the cross with Versamark ink and heat embossed with silver powder. I coloured with blue and green Alcohol pens. Next I cut out the cross and mounted onto white and silver ovals. I also used pens to colour the snowdrops on the sides of the card.
This cross is delicately detailed and I think can be used for many occasions.

Debbie

Sunday, 1 April 2012

Flower Cross Card by Debbie

As my love of stamping has grown over the years I have looked at stamps in a different light hoping to get as much out of them as I can.
I wanted to create a border from the flower cross from the Easter Traditions stamps.


My card is an 8x8 and I started by dividing the the four sides in half and putting a pencil line. I then put a dot in the centre to help me line up the crosses. I apologise as I can't remember which ink I used for the background crosses, it's a pinky/peach colour. I trimmed the background and layered onto brown card. The cross in the centre was stamped with Versafine Vintage Sepia a few times and decoupaged. The squares of coloured card are from my stash of Alcohol inks papers.

Thanks for stopping by I know the girls really appreciate your comments.

Debbie