Pin It button on image hover

Wednesday, 1 October 2014

Guest post - Floral Violin by Mary Draper

Today I would like to introduce you to our Guest designer, Mary Draper. Mary has designed this beautiful, delicate card which I know you are going to enjoy


Materials:   
                                                                                              
Neenah card or other stamping card
Memento - Tuxedo Black
Lilac mirri card
Promarkers – Forest  Green, Pear, Aubergine, Amethyst, Orchid, Magenta, Cerise, Pink Carnation, Cocoa, Cinnamon, Tulip Yellow - or marker/pencils of your choice
Distress Inks – Dusty Concord, Picked Raspberry
Ink Duster, sponge or blending tool
White cardstock
Dry transfer lettering
  • About 4cm in from the edges of the Neenah card lightly draw a square measuring 8cm with a pencil. Stamp sround this on each side using Tuxedo Black and the floral spray image, judging where the end leaf and the beginning of the spray are. Rub out the pencil lines and cut out a square around the image. This will probably measure about 13.5 cm. Tip: You may want to try this out on some copier paper first so that you can practise the spacing.

  • Using Tuxedo Black stamp the violin in the centre of the design 
  • Use Promarkers, or markers/pencils of your choice, to colour the image. 
  • Take the ink duster, sponges or a blending tool, and the distress inks, and add colour to the background. 
  • Cut out a square of mirri card. This should have a side length 8mm longer than your image square.Cut the white card stock to form a rectangle 6 inch by 12 inch. Score down the centre and fold to form a 6 inch square card. 
  • Assemble the card as shown. (Square card, mirri card and finally image) 
  • Apply the dry transfer lettering in a wavy line to imitate floating musical notes.  
A big thank you from us for your wonderful design Mary. Your idea for stamping the flower circle is excellent, will definitely have to try that one myself. I know Mary would welcome your comments and if you want to see more of her gorgeous artwork then please visit Drapers Creations.

Tuesday, 30 September 2014

Autumn Tones (posted by Judith)

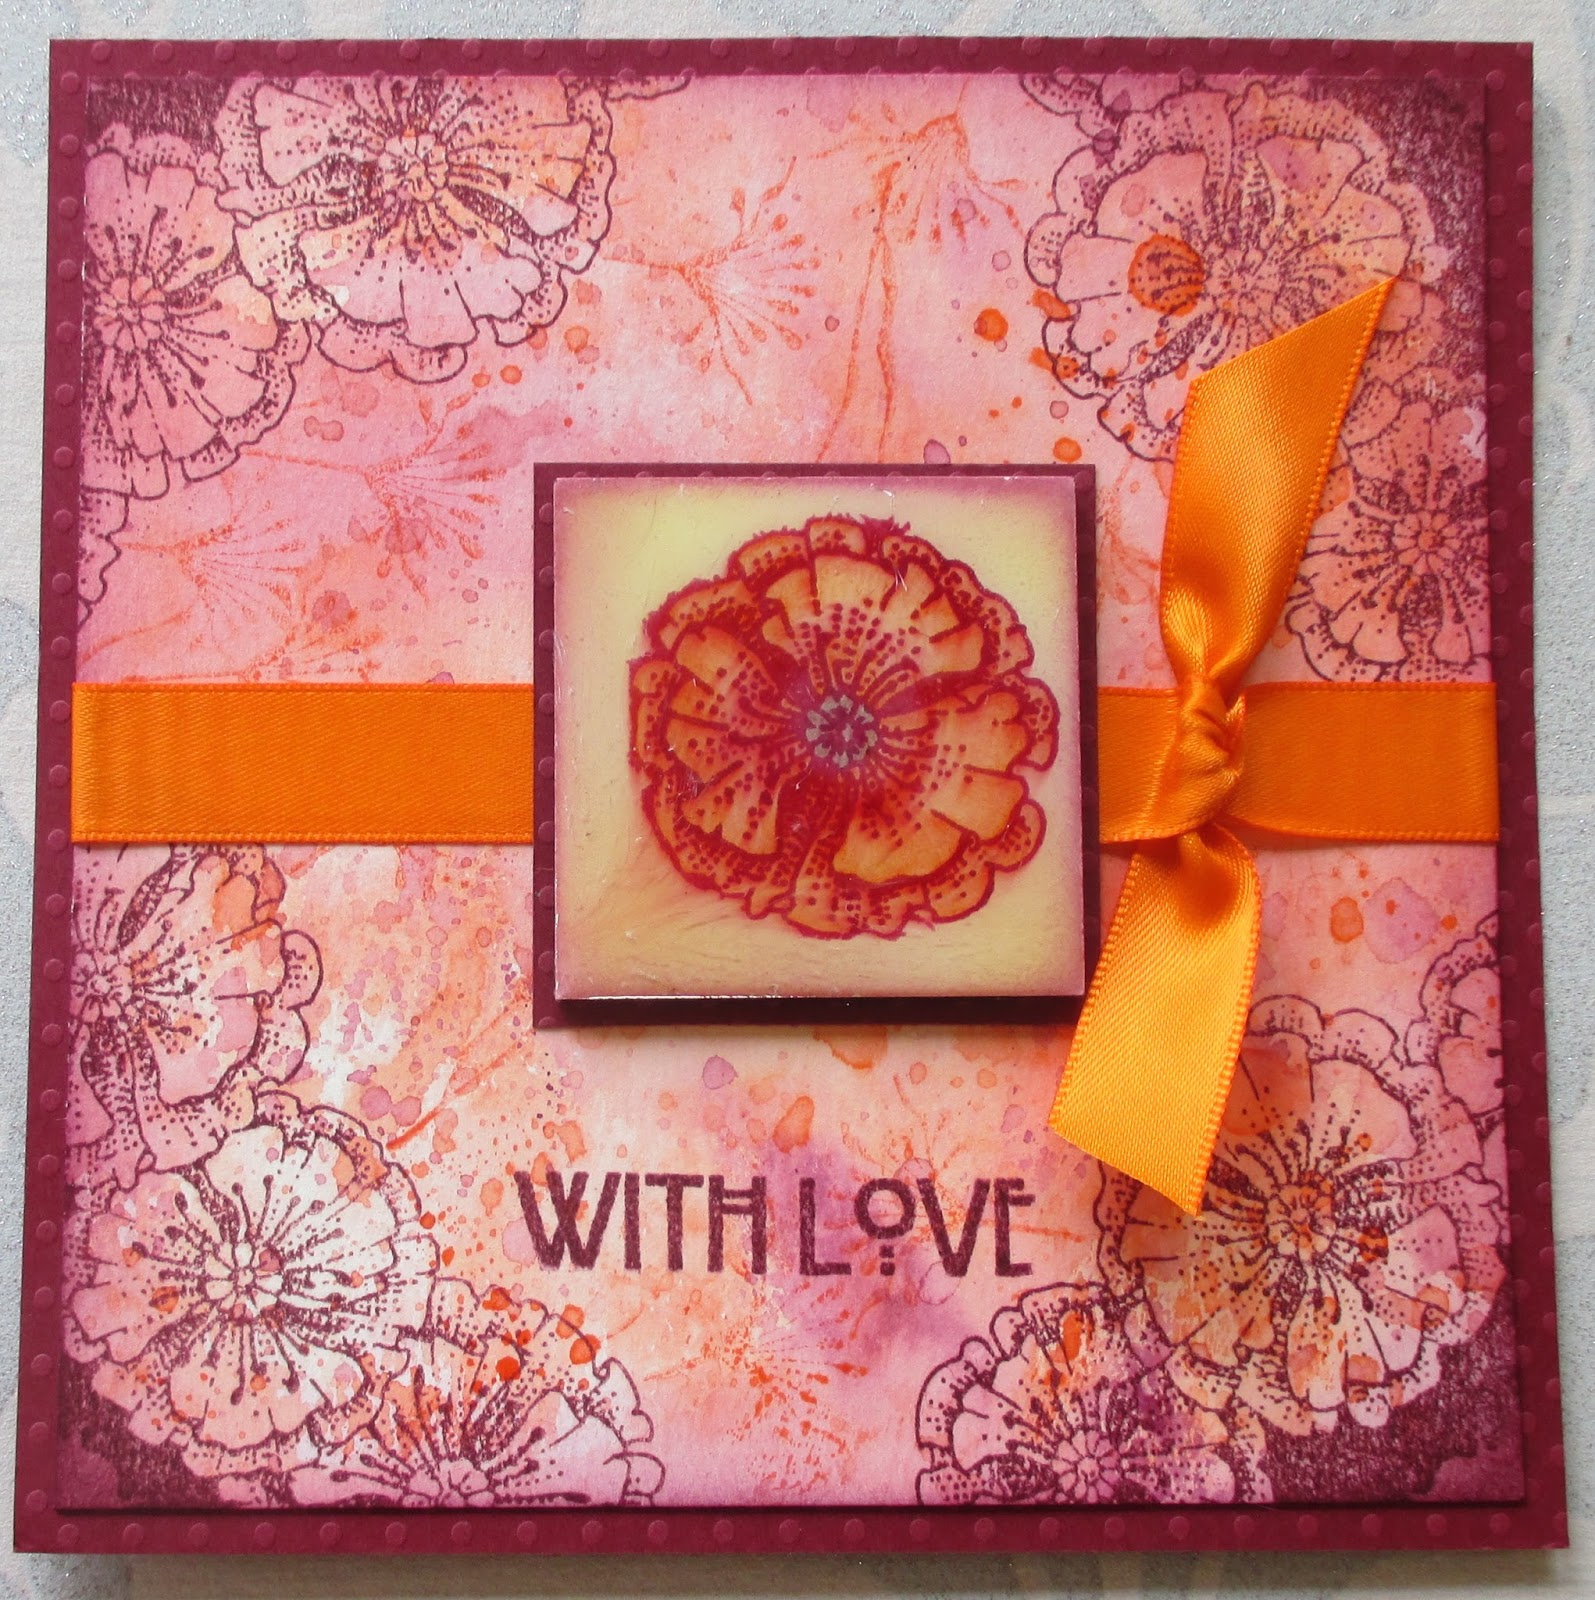
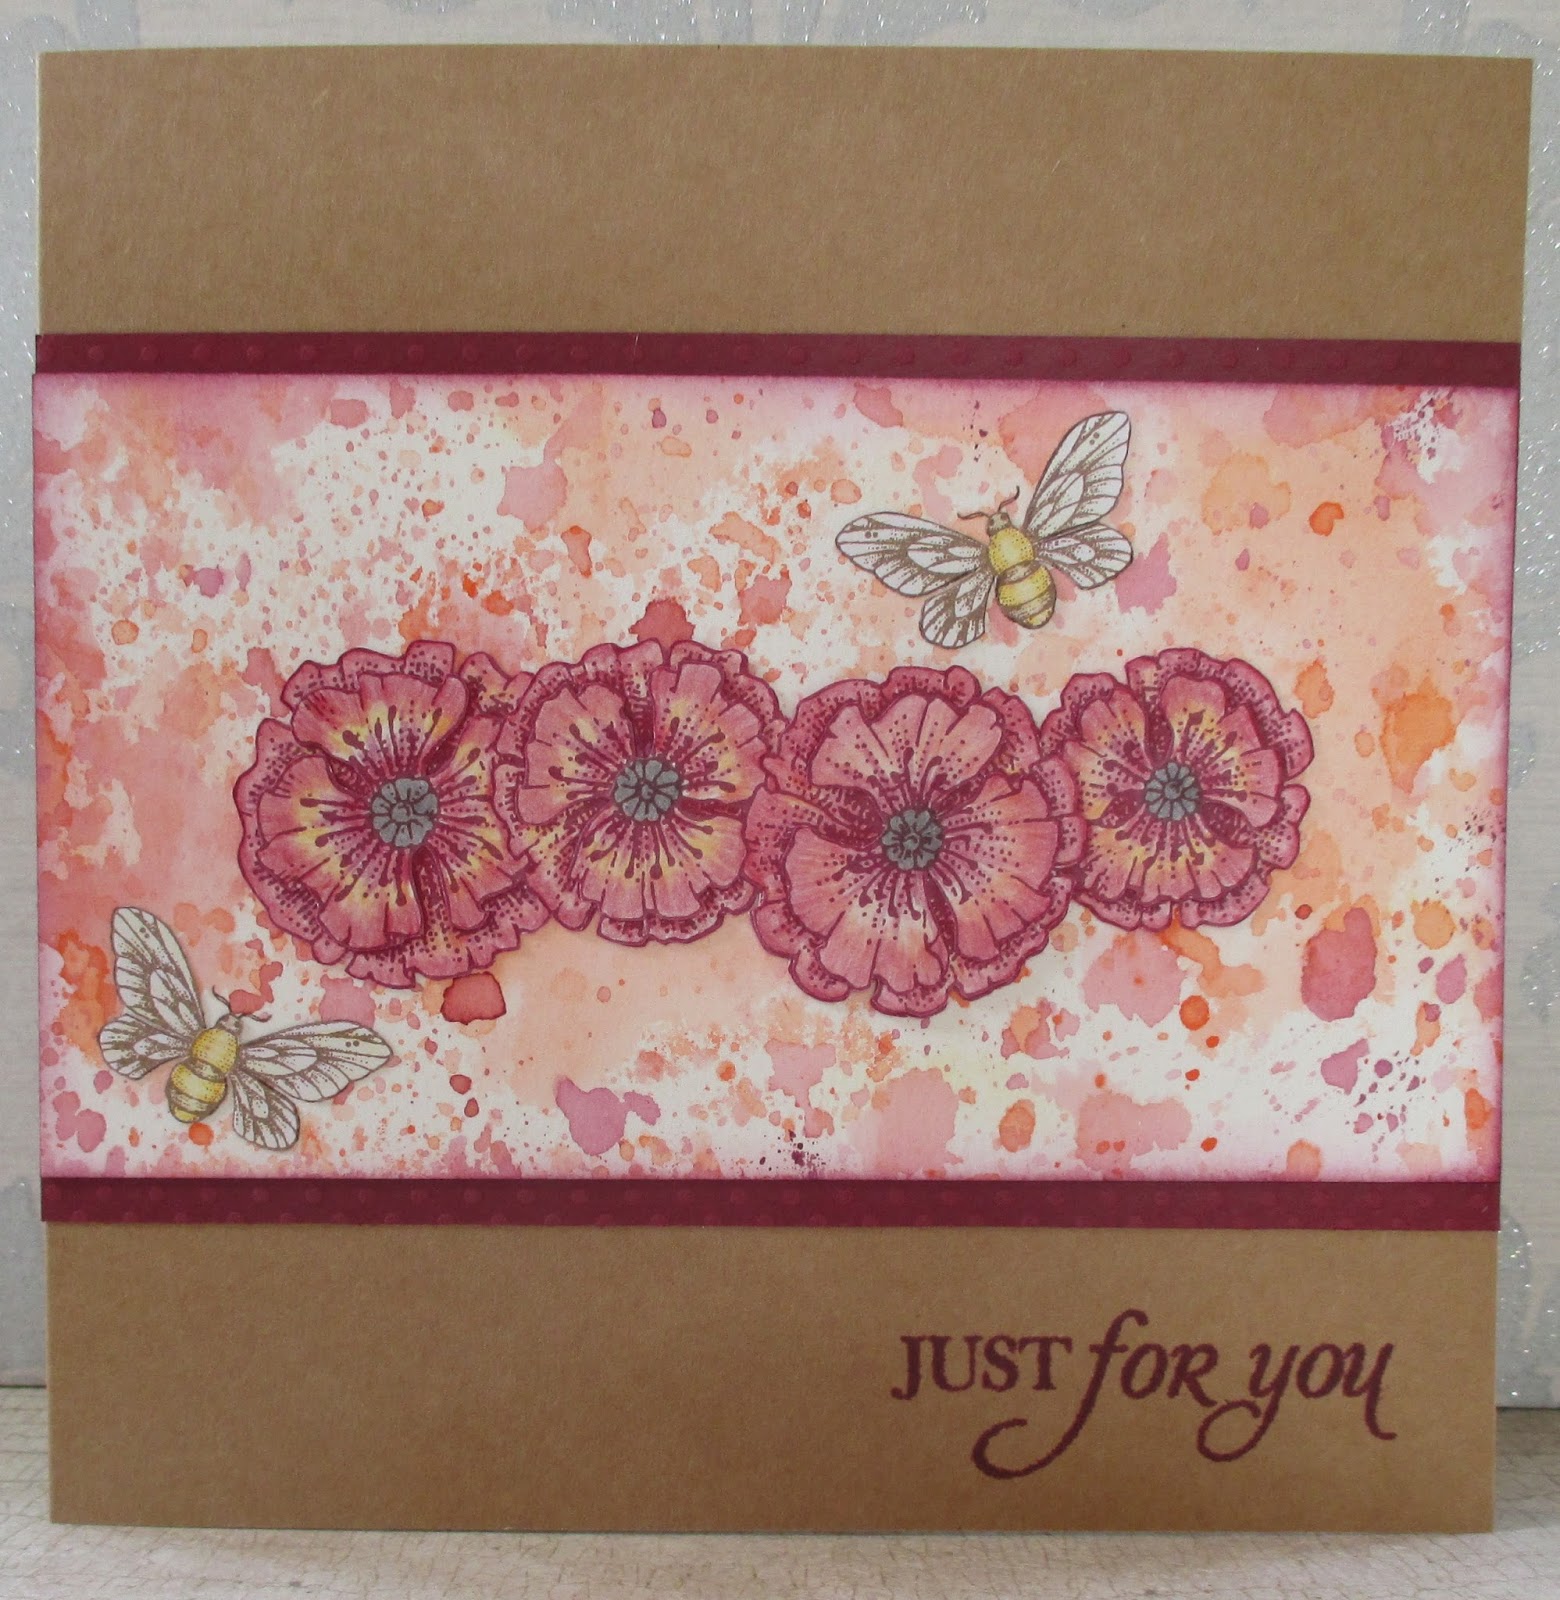
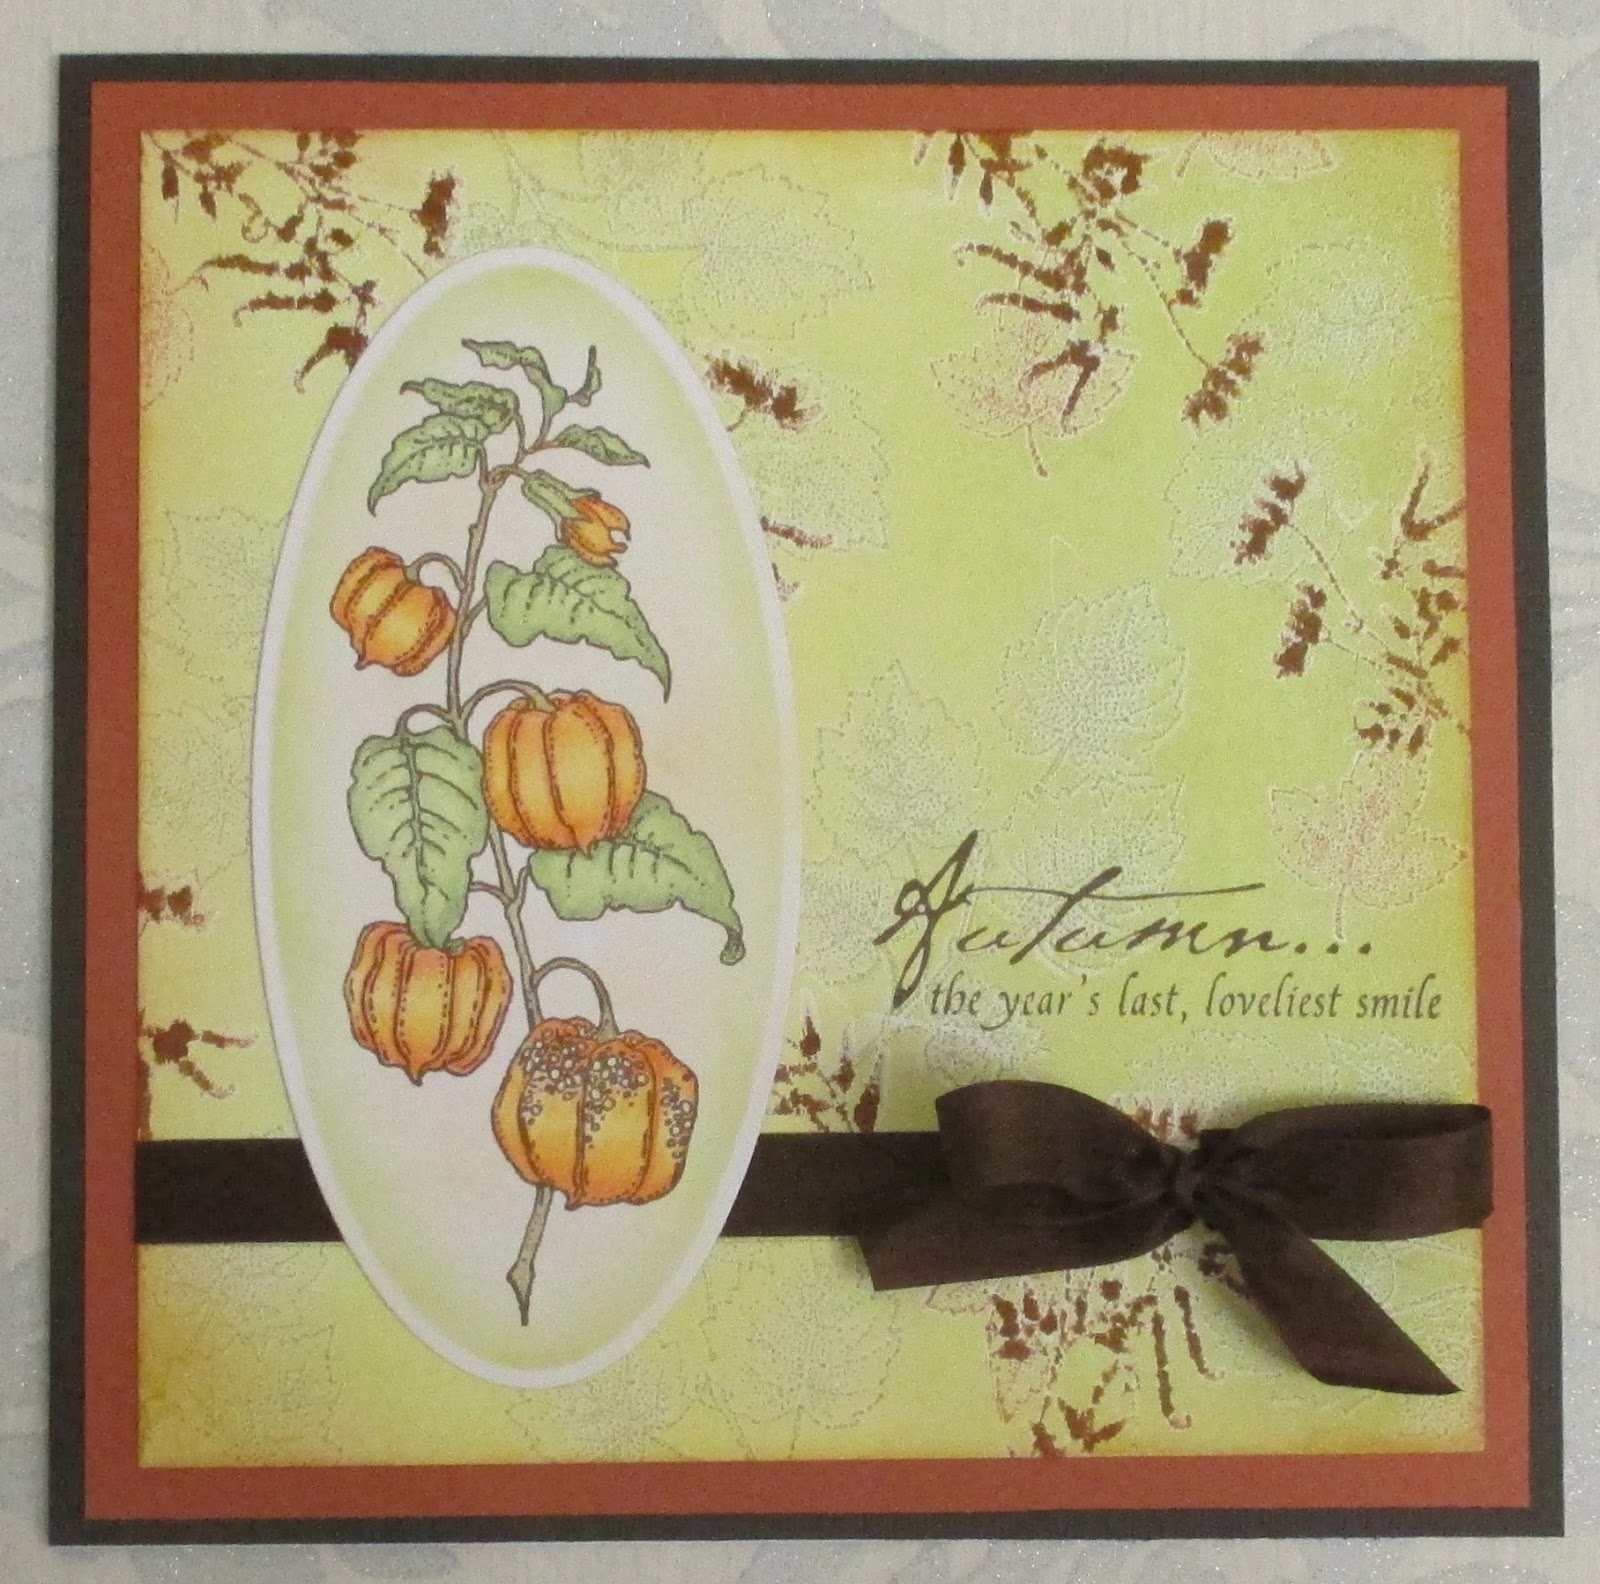
Hello Folks, I have some cards to share today, using some of the lovely new stamps that have been recently launched on the website. I love this time of year, as we are moving into Autumn, and enjoy working with the rich warm colours that are so evocative of the foliage that you see around on the trees and in the hedgerows.

For my first two cards, I made a wrinkle free Distress background, using orange and plum coloured Distress Inks. I have used a stamp taken from the Poppy Edges stamp set, and stamped around the corners of a piece of the background, using a darker plum ink. I masked the corners, and then stamped an image from the Poppy Meadow stamp set over the background using the orange ink that I used to make my background. However, I stamped the image onto scrap paper first, before I stamped onto the background, as I did not want the image to be too vibrant. I masked off part of the poppy edge stamp with masking tape, before I inked up one of the flowers, and then peeled off the masking tape. I then stamped the single flower onto a piece of stampbord. I coloured the image with pencils, and then covered the surface with three layers of ultra thick embossing powder, to create a tile effect. I added a sentiment from the Mackintosh Sentiments clear stamp set.


On my second card, I used a strip of the same wrinkle free distress background, matted onto burgundy card, and placed it onto a kraft card base. I stamped the poppy edge four times onto card, and coloured sections of the image with pencils, before cutting them out, and layering them onto the background. I added two of the little bees, which were also coloured with pencil. The sentiment was taken from the Amazing Birthday clear stamp set.


For my final card, I made a gelli plate background, using a selection of green inks, and stamped the single leaf and foliage stamp taken from the Autumn Poppy stamp set randomly over the plate. I took a print from the plate and trimmed it to size, before edging the background with a rusty coloured ink. I stamped the main image onto a large oval die cut, adding some colour to the background with green and orange inks. I coloured the image with pencils. The sentiment comes from the Nature's Peace stamp set, and is one of my favourites.


You are in for a real treat over the coming month with the samples created by my Team mates, so keep checking back to see their beautiful projects. Thanks for stopping by, Judith xx

Monday, 29 September 2014

Angels and Bells! (posted by Maria)

Hello everyone, once again you can see the beautiful Angel from the A child is Born stamp set passing by!


I made this card by creating a background using watercolour powders. I have coloured the angel with alcohol markers here, but of course you can colour it with pencils or Distress Inks. I cut the angel out and placed the image with 3D foam on the card. The snowflakes are stamped with Versamark and white embossing powder.


On this card I first made my background with Distress Inks in the colours I liked and I stamped the leaves   with Versamark. I used golden embossing powder to emboss with my heat-tool. Then I stamped my bells on some white paper, and coloured them in with my alcohol markers. I cut the image out with a die cut , and leaving the die cut in place, coloured all around with the Distress Ink. I removed the small card from the frame so that there was a beautiful white frame all around, and placed it with 3D foam on the card.

Have fun making your Christmas cards with all the fantastic Christmas stamps of Chocolate Baroque and enjoy!!

Greetings
Maria

Sunday, 28 September 2014

The call of the Sea (by Lesley)

Hi there, hope you have been inspired by all the fabulous creations that the Design Team girls have been posting here. For my post I thought I would be a small independent island amongst the sea of Christmas, so today's card uses the Seaside Dreams set.

  1. Make the background using the acrylic block technique with Chipped Sapphire, Mustard Seed and Shabby Shutters Distress inks on a piece of thick white card from the Essential A6 card pack. When completely dry take a spare piece of fairly stiff A6 card and tap one of the long edges in white acrylic paint then create a random pattern over the background. Repeat until you are happy with the effect. Don't worry if the lines of paint aren't complete, it adds to the effect if some of these lines are broken.
     
  2. Next stamp the shells onto a self adhesive label using Onyx Black Versafine. Allow to dry thoroughly and then 'paint' the shells using Sunshine Yellow and Butterscotch Adirondack dye ink. Tap each of the colours onto an acyrlic block and spritz lightly with water to create your paint palette. Build up the colour gradually with the Sunshine Yellow and add shading with the Butterscotch.
     
  3. When dry cut out, peel off the backing and stick into place on the background. Add some shading under the shells with Butterscotch. Finally stamp the sentiment with Onyx Black.
You've probably guessed that I use self adhesive labels alot, but they are a quick way of adding an image to your background without having to do any masking. This way you can concentrate on the background and the image and then marry them together to get the finished picture.

Please keep tuning in to get your daily 'fix' of stunning artwork from our wonderful Design Team.

Saturday, 27 September 2014

Stained Glass Angel (posted by Claire)

Good morning, Claire here with a sample made using the beautiful angel from 'A Child is Born' and an old favourite stamp from Gothic Fragments


I wanted to give the impression of the angel coming to life and flying out of the stained glass windows so I began by stamping the window fragments and embossing with Gold embossing powder. I used distress inks around the edges, starting with Faded Jeans and then adding Stormy sky and then Chipped Sapphire. I painted the glass in the windows with twinkling H20 paints and then stamped the snowflakes in the corners and the sentiment (from Christmas Magic)  and embossed with gold.


I stamped the angel with Memento Tuxedo Black ink and coloured her with Graph'It markers before cutting her out and layering her over the background with 3d foam pads.

Thanks so much for visiting today
Claire xx

Friday, 26 September 2014

A Child is Born and Snowy Penguins By Florence

Hi everyone


Today I would like to share three cards made using both the A Child Is Born and Snow Penguins stamp sets.


For my first card I used just the bells from A Child Is Born set.  I stamped the bells onto white card stock, colored the image and then fussy cut them out. I made up the card as seen using some backing  papers and adding some foam tape behind the bells to make them 3D.


These two cards have been made in the same way using just the snowflake stamp from Snowy Penguins.  I used a piece of backing paper I had made previously and just stamped the snowflakes randomly using Archival Ink.  I used one of the stamps from the Christmas Magic Sentiments Set and a die cut to make the tag and made the cards up as seen.


For the third card I just added "Christmas Is In The Air" using one of the word stamps from Snowy Penguins with the snowflakes on the backing paper.  Again, I used one of the sentiments from the Christmas Magic Sentiments Set to make the tag and made the card up as seen.

It has been such a delight using all of the new Chocolate Baroque Christmas Stamps this month.  Do check out all of the fabulous projects made by the DT.   

Thank you for looking.

Florence x


Thursday, 25 September 2014

Take a walk with Nature as we launch our latest stamps

It's definitely getting chillier in the mornings and the nights are drawing in, as my Nanna would say, so I guess it looks like Autumn is upon us. I love the colours that Autumn brings although I can do without the other stuff. I also like the fact that I can share our new stamp releases with you to help celebrate this glorious season.

First is our Stamp of the Month, which is a scrumptious A4 set called Autumn Poppy.

  This next set is one of two new additions to our A5 Edges series and is called Poppy Edges,

whilst the following three stamp sets are all A5 and are this year's Halloween releases. Halloween Edges is our second new Edges addition

then we have Book of Spells and Things that Go Bump

both of which are also available as our usual money saving multi-buy

All these gorgeous images are just crying out to be coloured with your favourite medium, and have sent the Design Team into a frenzy of Autumn and Halloween splendour.  Here are just a couple of samples to whet your appetite.

Here Maria has given the Poppy Edges a wonderful hedgerow feel, whilst Florence evokes all things spooky with her delicious Halloween card.

There are lots more inspirational designs to come over the next few weeks, so please keep tuning in to catch up with the latest creations from our talented girls. 

Finally, thank you for all the lovely comments that you continue to send to us, it does us all good to know that you are so appreciative of everyone's contributions to this blog. 

Wednesday, 24 September 2014

Guest Post - Santa by Venronica Pell


This is the last of Vernoica's mini series of guest posts and today she has designed a cheery Santa card using the Santa Baby stamp set.

I used a piece of card that had been sprinkled with grey and turquoise Brusho ink powders after being splodged with Perfect Pearls on crumpled cling film. By some minor miracle, it looked like mountains in snow, so perfect for Santa and his sleigh.

My usual technique of stamping with Versafine and clear embossing powder didn’t work very well over the pearly bits, so I ended up stamping the sleigh again onto white card, colouring with Promarkers and cutting out the main body and presents and glueing onto the original stamped image.

Santa was also done separately, cut out and glued in front of the sleigh after I had sponged some Stormy Sky Distress ink across the bottom of the card  to give him something to stand on.

Matted onto silver and blue (the blue was card coloured along the edge with a Promarker to give a better match to the background) then onto a 7” square base card.

Have to admit I stamped and embossed the greeting in silver before I added the image – I am very good at getting greetings crooked, but the clear greeting stamps make life a lot easier! I have this small one stuck onto the flat side of a small clear ruler, so it is straight in the first place, and I can use the ruler to make sure it is straight on the card as well.

That's a great tip about placing the greeting stamp onto a clear ruler Veronica. Thank you for the wonderful designs you have made for us over the past three weeks and for telling it like it is. We all have projects that don't go the way we planned but it's how you turn then around that's important and you have shared your skills beautifully. 

Don't forget to leave a comment to show your appreciation for all Veronica's hard work and remember to visit her blog, Vrons Cards.


Tuesday, 23 September 2014

Christmas Magic (by Debbie)

The weather is definitely changing and the leaves are rapidly turning from the
greens of Summer to the golden browns of Autumn.

I have a couple of cards to share using stamps from Holly Bells and Santa Baby.


I scored a square card, cut the squares with a craft knife to resemble windows and highlighted the scored lines with blue. 
I fixed acetate on to the back of the front that had Stickles dots .

  For the inside I stamped a selection of snowflakes for the background.
The mantle was stamped onto another piece of card and
coloured with Alcohol pens and the sentiment added to the corner.
Father Christmas was stamped onto a separate piece of card, coloured and
 I cut it out and fixed to the card.


This card also uses acetate in the aperture. I stamped the bells onto a scrap of acetate and when it was dry on the reverse used a quickie glue pen and each section added coloured glitters.
I attached with silicone glue as glitter is difficult to fix.
The holly was stamped, coloured and cut then added to the card. 


Thanks for visiting today

Debbie

Monday, 22 September 2014

Snow Friends By (Doreen)

Hello to you all, I am sharing a sample made from the new stamps that have just been released for September .My card uses a couple of the stamps from the Snowy Penguins stamp sheet.
I first stamped my images onto some white card and coloured in with Promarkers,inked around the edges with Faded Jeans Distress Ink,my background was made by stamping a snowflake repeatedly.The sentiment is from the Christmas Sentiments sheet.


Sunday, 21 September 2014

Sleigh Bells and Snow Balls (by Asha)

Good morning, fellow Chocoholics. I have more Christmas projects to show you - all made with the new stamps.

First up is the gift laden sleigh from the Santa Baby A5 sheet, set against the magical Northern Lights. I used various shades of Distress Inks to create the sky and added little silver dots for the stars. I coloured the presents with alcohol markers and sprinkled some shimmery fibres for the snow on the ground . The greeting is from the Christmas Magic clear stamp set. Details on the products used to create this card is available on my blog

My second project is a set of tags. I have to admit to not being a great fan of tags. But there's something about the images from these new stamp sets than inspired me to make these. The trio of bells is from the Holly Bells A5 sheet and the tree is from the Santa Baby sheet. I heat embossed the bells in gold onto some red cardstock, fussy cut and adhered to the tag base with foam tape.  The tree is just stamped directly onto the tag and dotted some red Liquid Pearls for the baubles. I blended Distress Inks to create the background on both tags.


And finally, here's an icy number I recently posted on my blog. For this easel card I used the Snowy Penguins clear stamp set. Super simple to make and has all the glitter and shimmer of a perfect Christmas. Details on how I made this card can be seen here.


Thank you for stopping by today. I hope you enjoyed looking at these projects as much as I enjoyed making them. There are so many ways to works these gorgeous new Christmas stamps. Please drop in regularly to see more inspirational work from the rest of the Design Team.

Beijinhos,
Asha