Pin It button on image hover

Tuesday, 17 May 2016

Abstract Patchwork Butterfly (by Debbie)

 
Good morning.
 
I had time this weekend playing with an old friend, my Gelli Plate. Like many people that have purchased them mine is really underused. I attended a workshop recently and it inspired me to keep it on my work desk. If you haven't used yours for a while, they are perfect for making paint or inky papers and backgrounds.
 

I have a 6x6 plate and tend to cut the card or paper to the size when using it for ease.
The colours of paint were lime green, bright pink, orange and yellow. I used objects that were on my desk to make the patterns in the paint, bottle tops, corrugated cardboard, stencils etc.
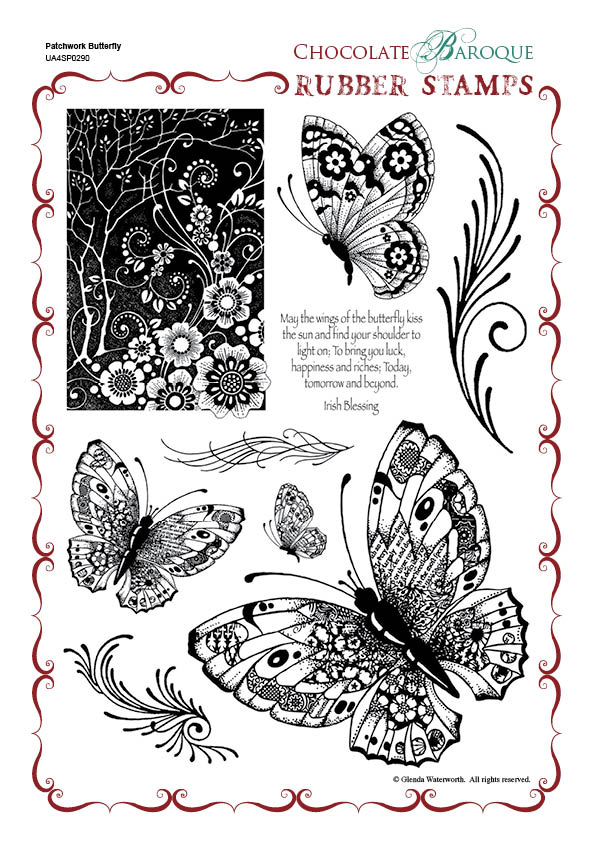
The butterfly was the first print and the colour was a lot stronger and when dry I stamped with Versamark ink and black embossing powder.
For the background, only a small amount of paint was added and more printing then another print was taken. I love the abstract feel to the background. I stamped the beautiful Irish verse from the Patchwork Butterfly A4 set in the top corner.

Patchwork Butterfly Rubber Stamp Sheet - A4
Thank you for visiting
Debbie

Monday, 16 May 2016

Happy Heart (by Julie)


Hello! Lovely to have your company. Today I have a card stamped with the rather wonderful Flowering Baroque Heart.This is one of the very latest clear stamp designs and is such a versatile stamp.


The main heart image has been stamped with blue Versafine and coloured with Inktense Pencils. I also stamped and coloured a second image onto spare card so that I could die cut the heart shapes using the same design. The background was created by sponging Worn Lipstick and Weathered Wood Distress inks around the stamped heart and then over stamping with the heart design inked up with grey Versafine. 
The Happy Heart sentiment is from Words of Wisdom and has also been stamped with blue Versafine.
I wrapped some sparkly silver twine around the card and glued the mini hearts into place with 3d glue gel and finished the card off with white, paint pen highlights.

Thank you for stopping by and please pop back soon for some more Design Team inspiration.

Julie xx

Sunday, 15 May 2016

Why and Why not ?

Hello
We often hear this question : why ?
And I often answer : why not ?
So for this new post I offer you this card.

Bonjour
Nous entendons souvent cette question : pourquoi ?
Et je réponds souvent : pourquoi pas ?
Aussi aujourd'hui pour cette nouvelle publication je vous offre cette carte.


I can say that these new stamps are already among my favourites.
You can find them here.

Je dois dire que ces nouveaux tampons sont déjà parmi mes préférés.
Vous pouvez les trouver ici.

I will comme back at the end of the month with new things.

Je serai de retour à la fin du mois avec de nouvelles choses.

Kind regards. A bientôt.

Saturday, 14 May 2016

An orchard of Brusho Trees (by Lesley)

Well hello everyone. Gosh it seems ages since I last made a post of my own on here, but it has been a bit hectic of late.  

Today I wanted to share with you the three cards that I demonstrated on the Brusho Art TV show.  I so love these little pots of powder which are full of explosive cover and I had a ball taking them onto the Craft Channel.  And when combined with our beautiful Design a Tree stamps, they become magical. Anyay enough waffling here we go.


This first card features the Woodland set. The Brusho panel combines Violet, Turquoise and Leaf Green tapped onto the masked off section and then spritzed with water.  The tree was stamped twice in Smokey Grey Versfine to give the shadowy effect and then the main image in Onyx Black. The border around the card blank as made by stamping several of the small blossom/foliage stamps randomly around the edge with distress inks in Peacock Feather, Shaded Lilac and Peeled paint. The sentiment is from Words of Wisdom.


To create this background white card was spritzed with water and then sprinkled with Orange, Yellow and Scarlet Brushos and spritzed again to allow them to blend. Another piece of white card was then used to blot over the top. When dry the Spinney tree was stamped twice using water (spritz water onto a craft mat and then use this like an ink pad) and then again with Sepia Archival ink. The sentiment from Words of Inspiration was stamped in the same colour and both the edges of the background and the Kraft card blank were swiped with Decoart Gold Wax.

This last card involved stamping the wall from Landscape Edges onto a piece of white card. This was then masked using our Masking Tissue and the Orchard tree was stamped in Onxy Black. Leaving the mask in place the grass and sky were painted with Leaf Green, Yellow, Violet and Ost. Blue Brushos, diluted with water on a craft sheet. When dry the mask was removed and the walled painted with Light Brown, Dark Borwn and Gamboge Brushos. Some water was sprinkled on the sky and dabbed dry.

To finish the scene the birds were stamped with Onyx Black and.shading was added beneath the wall with a charcoal pencil. Finally the border around the edge of the card was created using the wall, stamped freehand with no acrylic block.

I so enjoyed making these and hope you have enjoyed reading this post. Please join us again tomorrow to see what delights await you from another member of our wonderful Design Team.


Friday, 13 May 2016

Quick and Simple Cards

Hello everyone, and welcome to the first of our bi-monthly fifteen minute card blog posts for May. We hope that you are enjoying our newest feature on the Design Team Blog, and that you are finding some inspiration from our cards that take no longer than fifteen minutes to make.

We have some fabulous designs to share with you this month, created by the Design Team and we have been joined by the Guest Design Team again with their projects to show you that a stunning card can be simple in design, and does not have to take hours to prepare. Whether you are looking for speedy batch cards, or are a beginner to stamping, we hope that you will find something amongst our selection that will have you reaching for your own craft supplies.

Anne has created a set of three cards, stamping the image onto patterned paper, and embossing with clear embossing powder. She has partly coloured the images with glitter pens. Adding some pretty ribbon and gems finishes the cards perfectly.


Brenda has created two really pretty cards for us this time around. The first card was created by masking a corner section of the card, and stamping the Song Thrush stamp using Versamark then embossing with white detail embossing powder. She used a selection of Distress Inks to cover the embossed image and buffed the area with a tissue to bring out the embossing. The sentiment is from the June Fairy stamp set.

Her second card was created by stamping the sentiment onto the right hand side of the card, and then using masking tape to create a panel on the left-hand side of the card, (sticky notes would work just as well). Randomly stamp the leaves from the Autumn Poppy stamp set, using Distress Inks to ink the stamps. Add a little Distress Ink around the edges of the panel while the mask is in place, but you could alternatively use a ruler and draw a line around the panel, or a squiggly freehand one. Finally, mat onto co-ordinating cardstock.
Brenda did say that the size of the sentiment that you choose would dictate the size that your card would need to be.

Dominike has created a vibrant card, stamping onto a book page and adding acrylic paint.

Rachel has created two lovely cards, her first using one of our fairy stamps, coloured with pencils, is placed onto a Distress Ink background.

The second card using our Elegant Iris stamp set, was coloured using water based markers.

Vronnie's Rennie Mackintosh style card, very CAS in its layout, is beautifully coloured.


Next, we have two cards from Gerrina, she has stamped the images with Versafine Onyx Black Ink, and coloured them with pencils. She then drew the lines with a fine marker, using a ruler, moving it slightly each time. Her coloured card matting adds another dimension to the cards.


Zoe has used the same sentiment as Gerrina in her card, but how see how different her card is with the vibrant splashes of colour behind the sentiment, and the use of some toning sequins in the white space.

Shilpa has created a simple yet very effective quick card using a lovely tulip image. She spritzed some peach colour ink and water onto a craft mat, and picked it up with a small acetate sheet before smooshing it onto a piece of watercolour paper. She heat set it with a heat gun. She repeated the same procedure with red ink. Once the surface was dry, she stamped the Tulips and Best Wishes images using Ranger Archival Jet Black Ink. Finally, she adhered the panel onto white card using foam adhesive.

We have already had a fabulous selection of cards to share with you, but for this post, we have a bonus Kraft selection.

Lesley has made two delightful cards featuring some of our tiny stamps and greyboard tiles. For her first card, she used scrap paper as a mask and inked in some hills. She added trees from the Teeny Weeny Meadow set to create a scene. She edged the tile with a gold pen. She stamped a squiggly border using Versamark and added white embossing powder. Adding a sentiment from the Amazing Birthday stamp set.

For her second card, she stamped the car, using second generation stamping. (This means stamping the image first onto scrap paper to get rid of some of the ink, and then stamping onto the tile before re-inking, so that you get a fainter image). She then stamped the man on the bike using the same ink, Coffee Archival Ink. She stamped the ironwork arch using Potting Soil Archival Ink to frame the images. All the stamps came from the Curiosities stamp set. She edged the tile with the same ink, and adhered it to the card, then drew a line around the tile onto the base card, using a fine-tipped dark brown permanent marker. She then drew a squiggly line around the card. Finally, she stamped 'Just for You' centred on all four edges, using Potting Soil Archival Ink.
I have made a little set of notelets using a variety of floral images and sentiments, using kraft card. I took two sheets of A4 card, and measured 9.8 cms across the card, and cut three equal strips of card. I then scored and folded the card strips in half, and rounded all of the corners. I stamped the images and sentiments using Versafine Onyx Black Ink. These little notelets will be so handy for all sorts of occasions.

I have also created a card using a Poppy image from the Flora and Fauna stamp set. I die cut three squares, and stamped a segment of the image onto each square, and coloured it using pencils. I mounted the squares onto a strip of black card, before adding the strip to another piece of kraft card. I added a sentiment from the Card Sentiments clear stamp set.


Finally, Magda has created two cards, the first uses a pretty stamp from the Dusky Damask stamp set, simply stamped in dark brown ink. She has picked out a single area of the image and coloured it using gelli pens and glitter.

Her second card is fabulous, and a technique that I am certainly going to try! She has used Brushos on her background, stamping the butterfly image first with Festive Berries Distress Ink, then Picket Fence Distress Ink, and finally, edging the image with a black pen. She has used gesso on her stencil. The Brushos look great on Kraft, don't they?

Well, we hope that you have enjoyed reading about all of the techniques and projects throughout our blog post this time around. Join us later in the month, for another post filled with quick makes and lots of tips and techniques.




Thursday, 12 May 2016

Four Seasons Heart Coasters (by Magda)

I love the new clear stamp of Chocolate Baroque, it gives a lot of possibilies of use and
why not as a table home decor for special occasions? 


Step by Step :

1.     Take four cardstock coasters bigger than the heart
2.     Colour the coasters with Distress Inkpad Old Paper
3.     Stamp each Heart onto white cardstock with the Distress Inkpad colour you like for the four seasons
4.     Move the colour of the flowers and the leaves with the waterbrush
5.     Stamp a sentiment with the same colour of the flower onto the coaster
6.     Colour all round the edge with the same colour as the stamped heart
7.     Cut out the shape of the stamped image and glue it onto the coaster
8.     Put some drops of Stickles Crystal in the middle of the flowers and let it dry completely
9.     Ink the whole surface of the coasters with Versamark
10. Emboss with Clear Embossing Powder

Thank you for stopping by

Magda

Wednesday, 11 May 2016

Mixed Media Chic (by Shilpa)

It is a new month and time to welcome back Shilpa who joins us for another of her guest Design Team spots.  This week she treats us to a shabby chic style design. Enjoy.


Hello Everyone, Shilpa here, it is great to be back with my Guest Designer post here. I've created this mixed media card with Chocolate Baroque Just Butterflies stamp set, it has beautiful 8 butterfly image stamps.


I created the background on Prima Epiphany design paper. Created first layer of texture with stencil and texture paste. Let it dry completely. Next to bring on colours, I spritzed Colour shine inks in green and purple onto it (any type of mica sprays will also work well), then dried the surface with heat tool.
As I am crazy about texture, I created another layer with flower stencil and texture paste.


I spritzed the purple ink on watercolor paper, when it dried, I stamped butterflies and fussy cut it to adhere on my card.


Attached diecut "love" on the card.


More close up views


Hope you liked my card and get inspired.

Thanks so much for stopping by. See you next week.

Shilpa 

I hope you will agree this is a beautiful project. Thank you for the close up photos Shilpa, they really bring your design to life, we look forward to seeing what you have in store for us next week.

Please stop by again soon to see more inspirational and creative ideas from our ever talented team.