Hello everyone, it is still a while before we get to the busy Christmas season, but this month, we are sharing some of our projects created using stamps designed by the lovely Sue Page, featured on last month's Christmas shows on Hochanda. Batch card designs are always useful at Christmas time, because we need to make lots of cards for friends and family. I have used several of the stamp sets to russle up a few quick cards to share with you today.
For my first card, I stamped and embossed the dotty circle from the Shaded Baubles stamp set onto a piece of card using white embossing powder. I also added some snowflakes from The Christmas Garden stamp set, also embossed in white. I covered the circle with a piece of Masking Tissue, and coloured the background with Distress Ink. I removed the mask, and blended the ink slightly into the circle to show the fine dots of the embossing more clearly. By masking the area first, you have more control with the coverage, and can colour the background a lot quicker. I added the sentiment with a darker ink which complemented the background colour. This card was very quick and could be made in a range of colours and different sentiments.
Using the same circle and snowflake, I created a very Scandinavian style card next, by stamping and embossing the snowflakes onto a piece of grey card. I added some red card behind and used a piece of red ribbon as an embellishment. The circle and sentiment were stamped using silver embossing powder on this occasion.
I stuck with the grey card for my third card, adding dots of Stickles over the card and allowed them to dry. I added a large glittery snowflake, some stripey ribbon, and stamped the sentiment using grey ink onto a die cut. I edged the die cut with the same grey ink.
For my final card, I took the mistletoes sprig and created a wreath by stamping around a pencil drawn circle. I added Stickles on the berries, and then stamped a sentiment using red ink.I rubbed out the pencil lines once everything was dry.
I hope that my simple cards will have given you some inspiration for some quick cards to try out for Christmas. Try looking at the smaller stamps on the stamp sets and see how quickly you can make backgrounds, add a sentiment within the dotty bauble, and you will have a lovely card to send. Try unusual colours, bold and bright, or go for a vintage theme, whatever you prefer.
Thanks for stopping by,
Judith xx
Saturday, 17 August 2019
Friday, 16 August 2019
Christmas in August part one - by Zoe
Good morning Lovelies! I can’t believe it’s August already! This year is flying by. That being said, it’s time to start Christmas card making!


Firstly I’d like to send my condolences to Sue’s family, such a sad loss. Her artwork is amazing !
Here are some of my samples from last months Hochanda show featuring these gorgeous Xmas themed stamps designed by the very talented Sue.
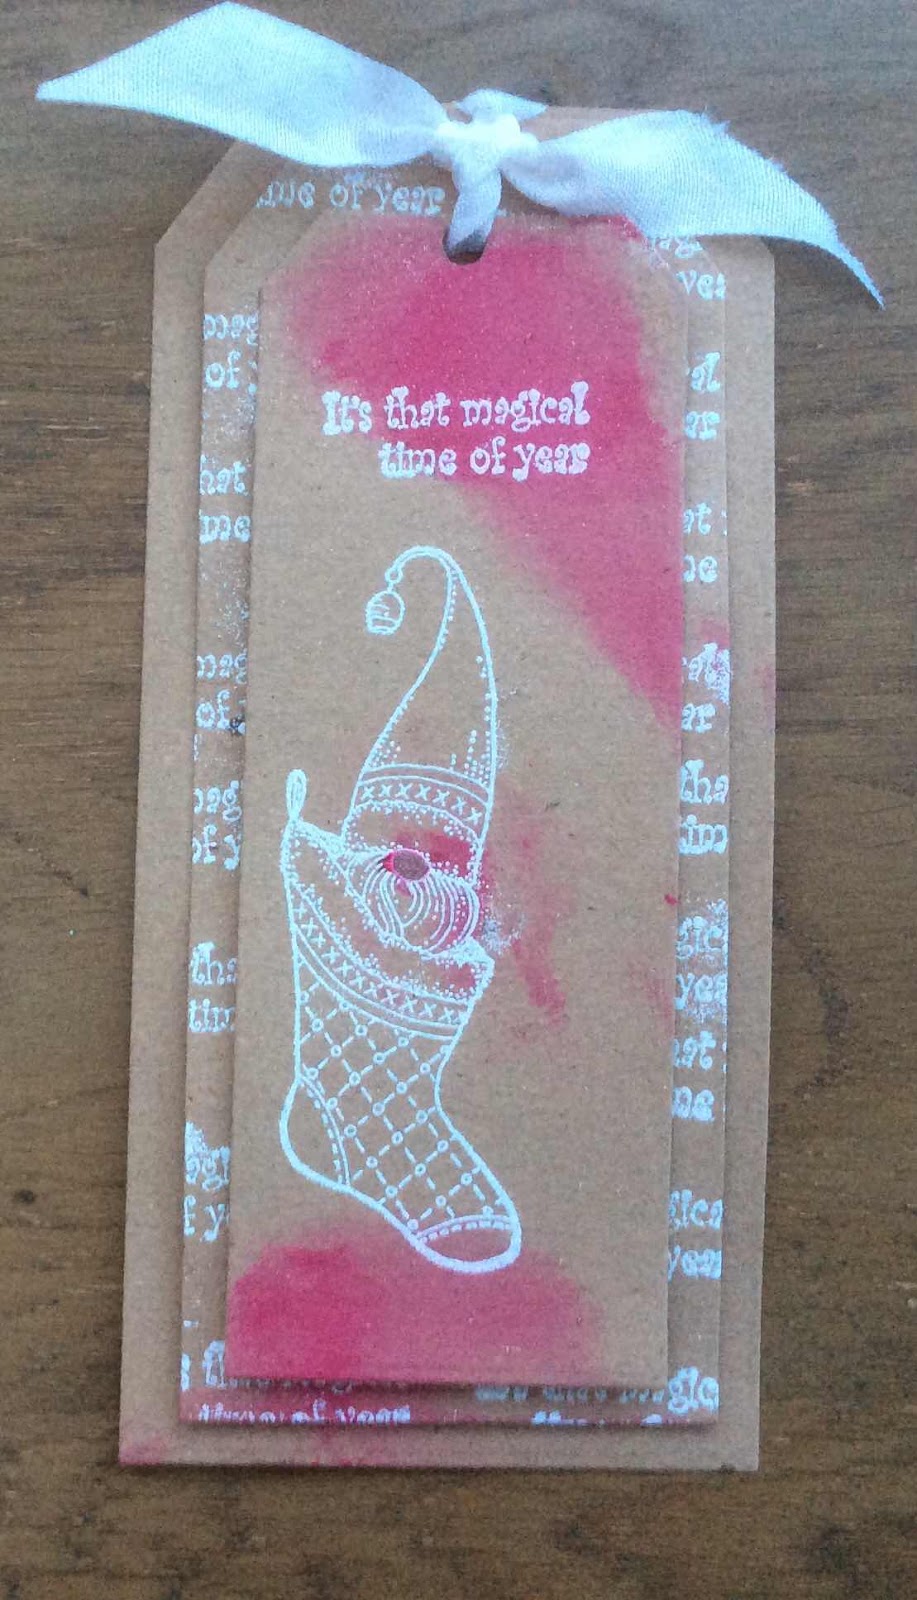
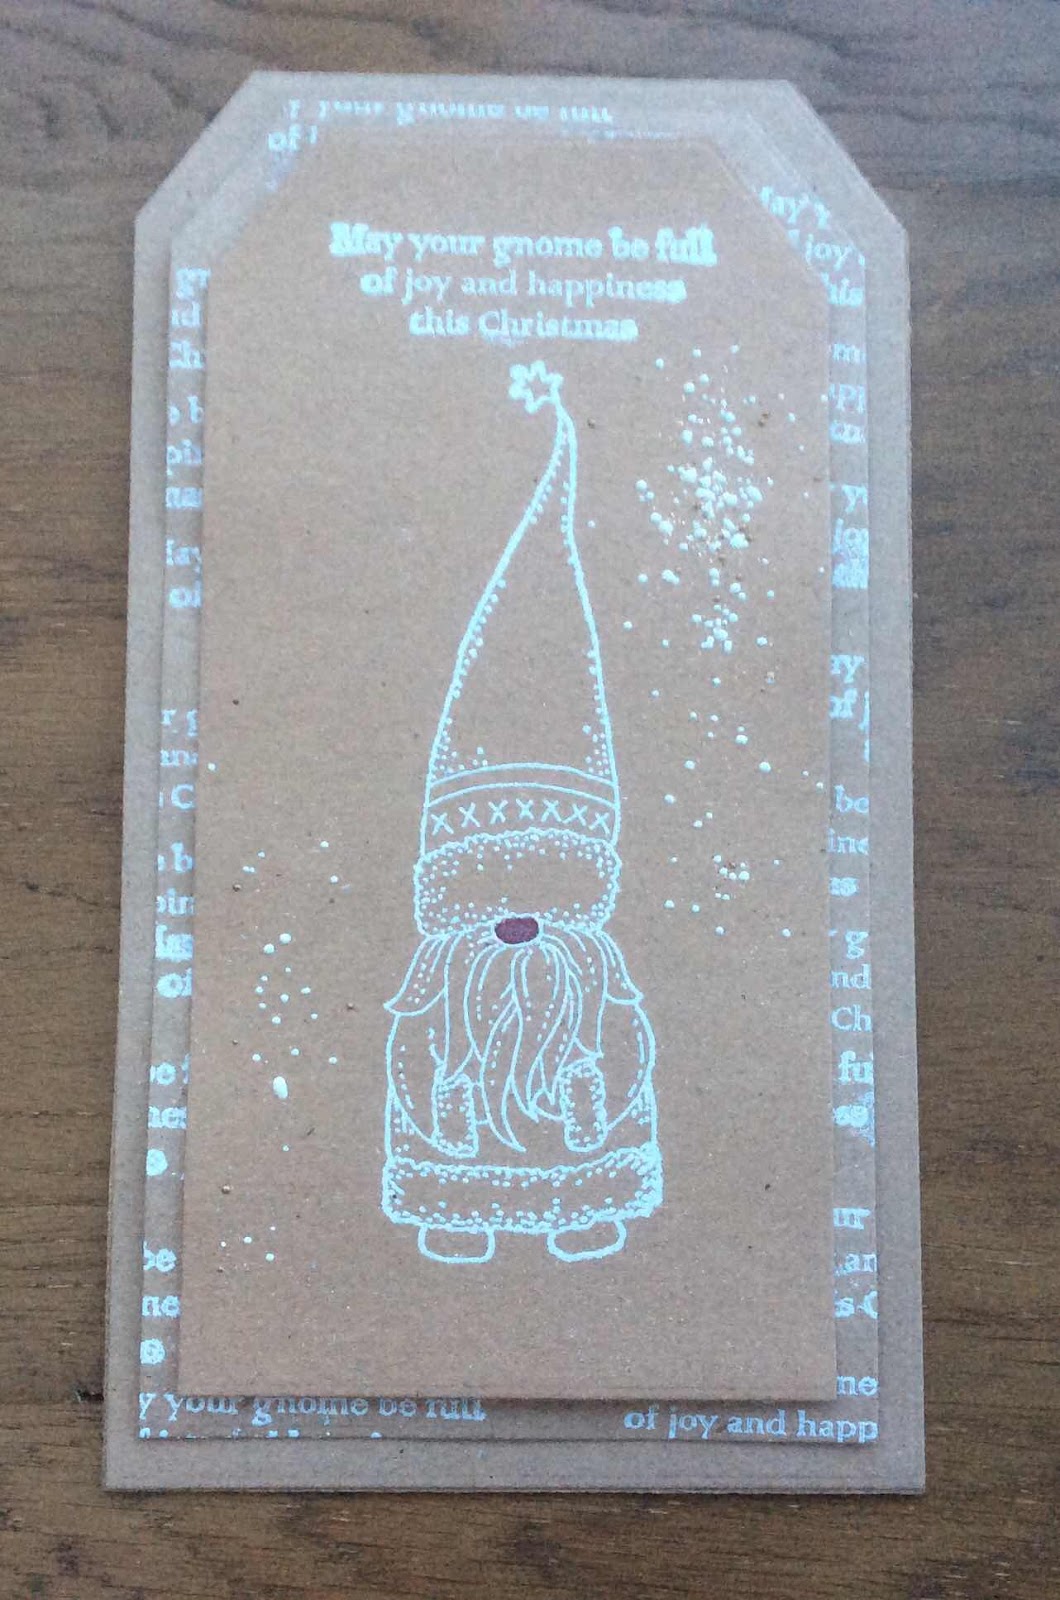
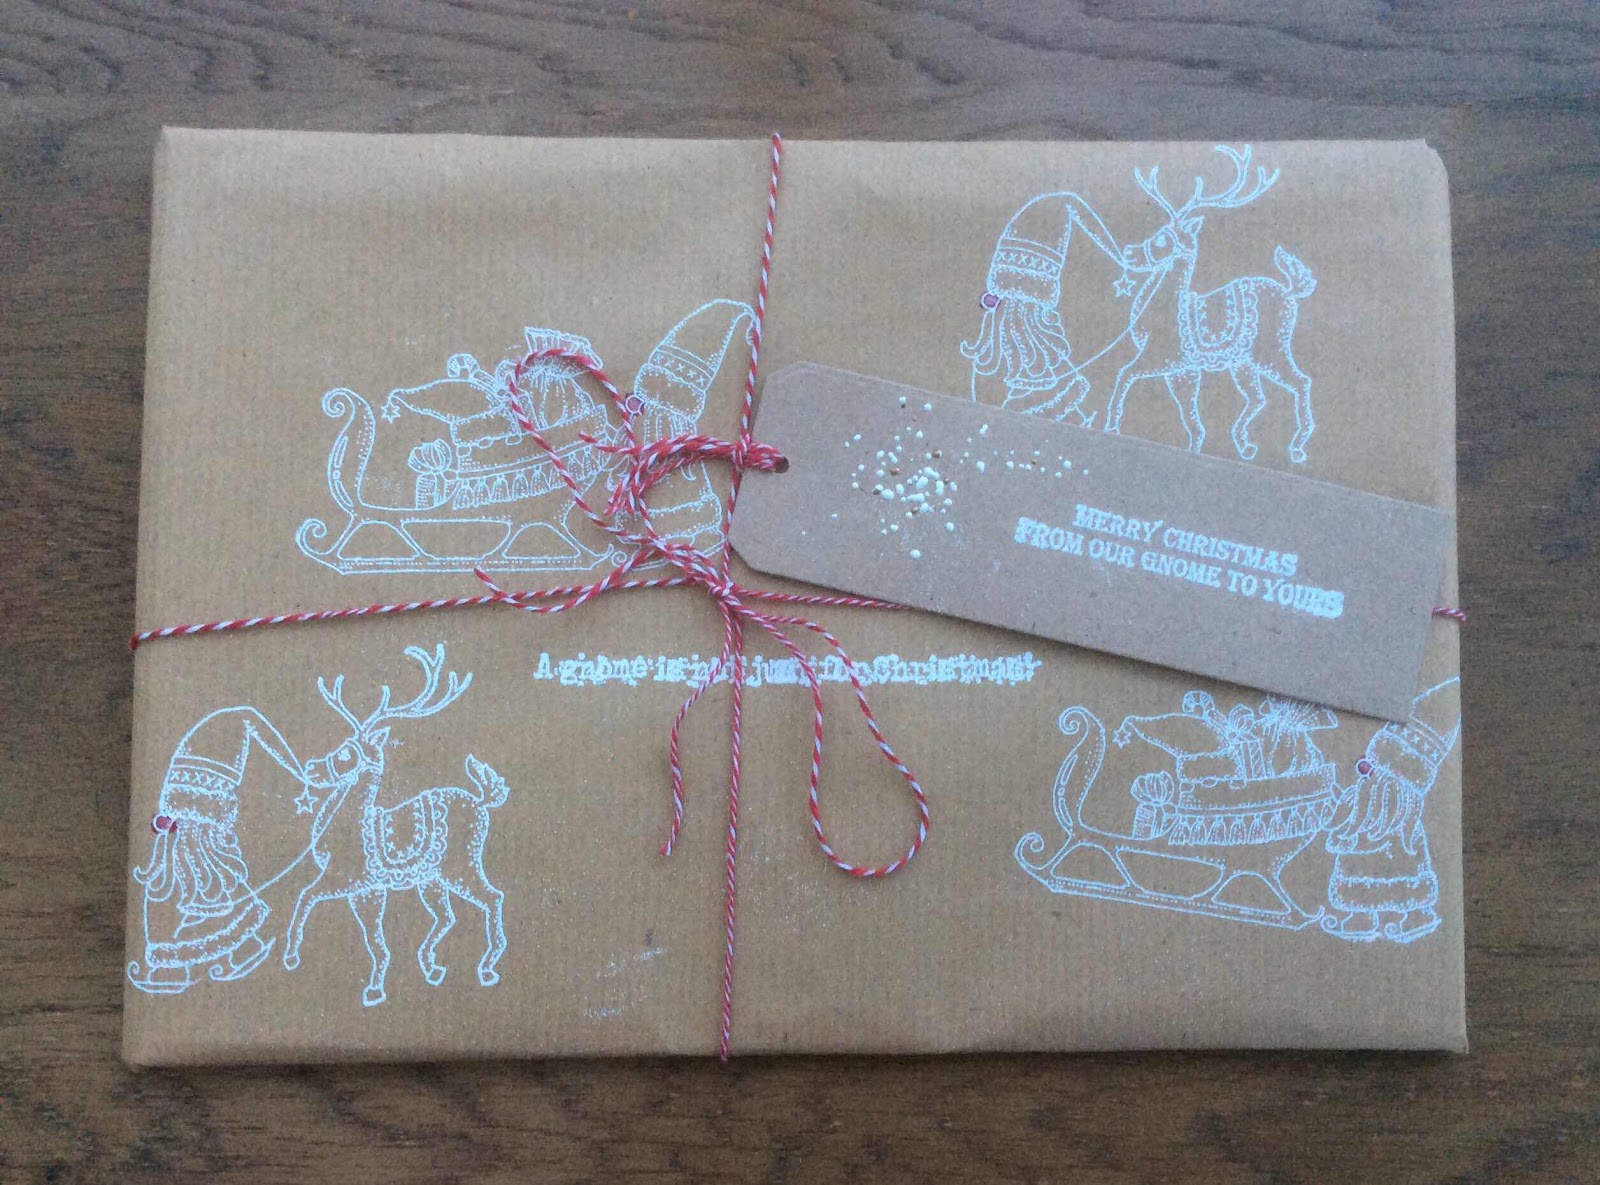
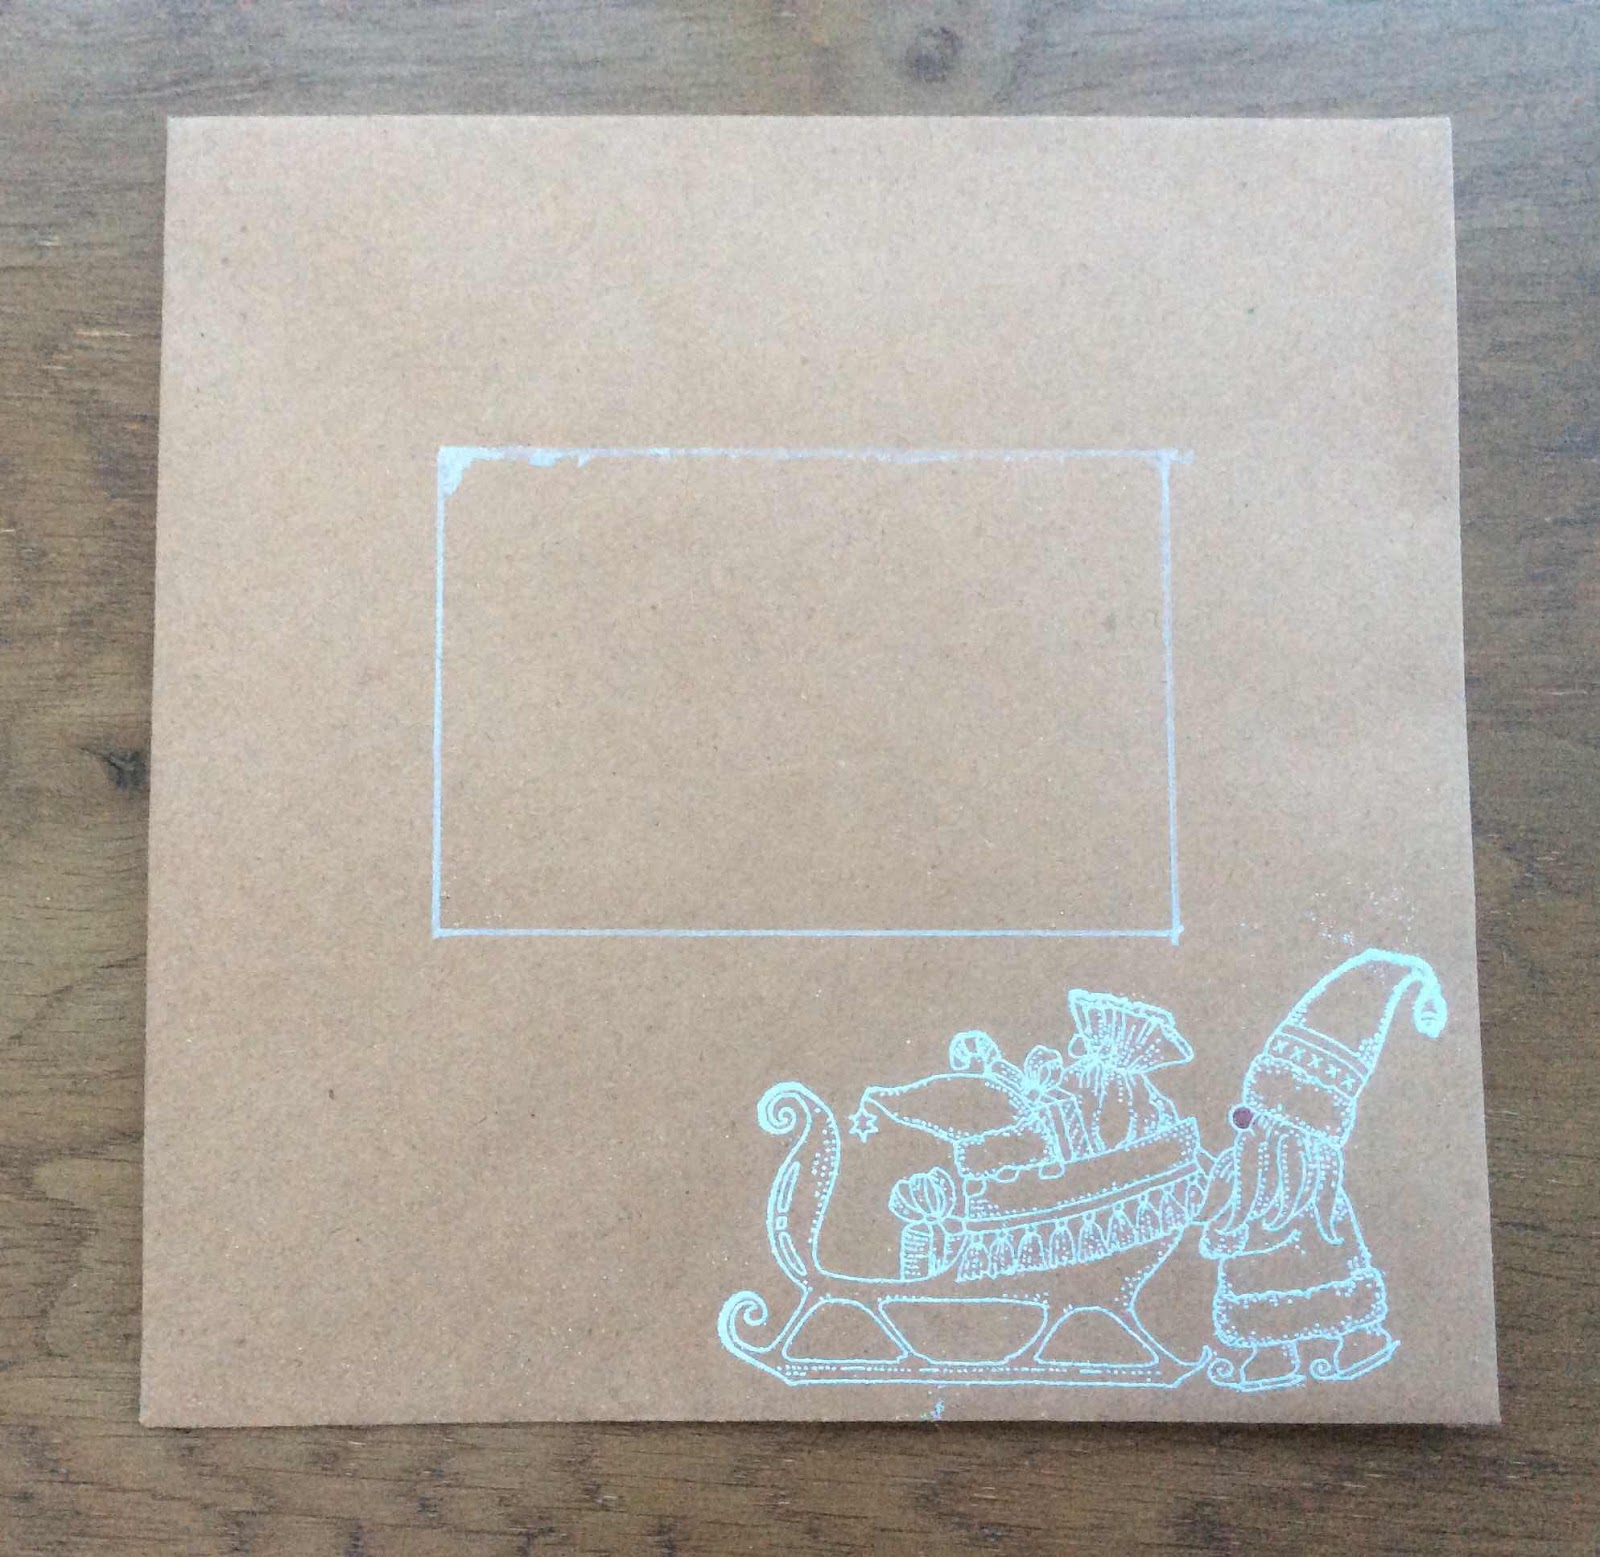
I created a set Scandinavian style greeting items firstly a layered tag, second a layered tag card, third is wrapping paper and fourth an envelope, all using white Embossing powder on craft,
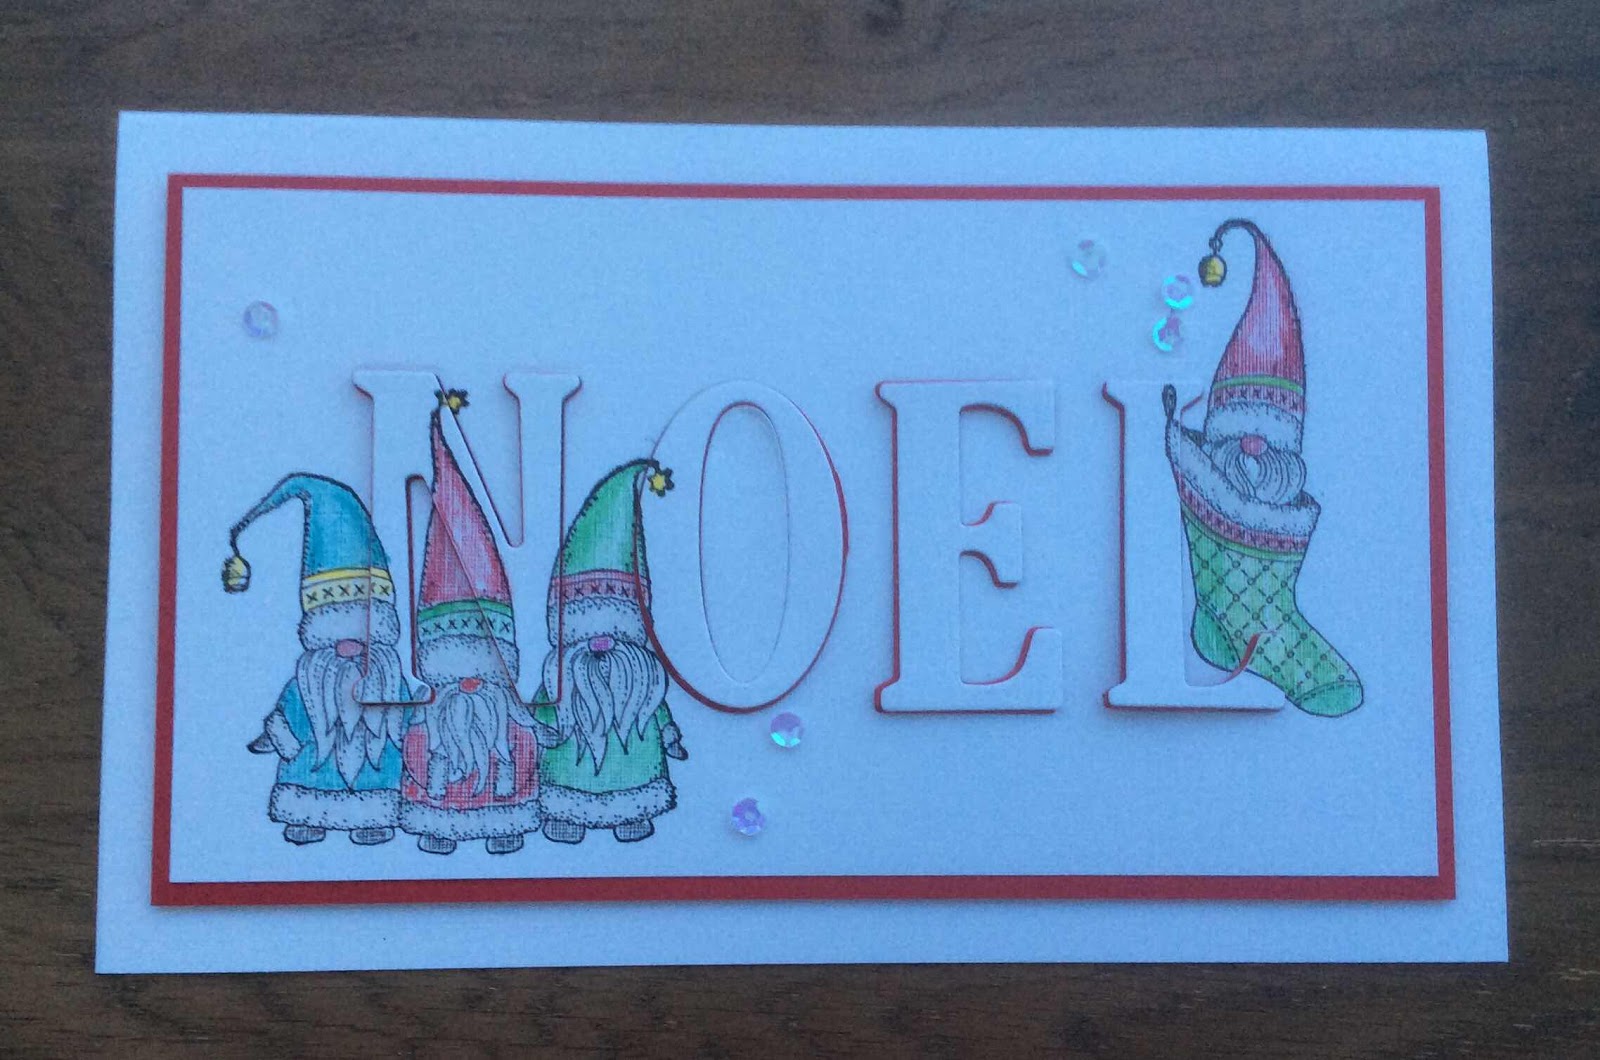
My last creation is an Eclipse Card on Linen textured cardstock and coloured with pencils.
Thank you so much for taking the time to visit and comment, see you later this month.
Have a wonderful day xx Zoe
Tuesday, 13 August 2019
Candle glow by Brenda
Good morning Peeps, Brenda here with some Christmas shares from Lesley's July Hochanda shows.
For my first card I used the candle image from the new Christmas Circles stamp set, stamped onto linen cardstock and coloured in with Koh-i-Noor paints and some watered down Distress Ink washed around the edges and a little glitter added to the glow of the flames. A die cut frame placed over the image using foam pads to raise it before matting and layering onto red and white cardstock.
As I had some inchies on my desk from another project I thought I would use them for this card. I started by using two of the worker stamps from Christmas Garden and stamping with Versafine Clair. I inked the inchies with the same inks and then stamped the image from the new Tomte stamp set using Nocturne Versafine Clair and when dry added three layers of UTEE heat embossing each layer to build up a glazes finish. The sentiment is from Christmas Circles.
And this is the beautiful Christmas Garden, a new stamp with so much detail. The background is Brushos and the image stamped with Versafine Black and heat embossed with detail clear EP and the colour bleached out of some elements and a little white gel pen added to bring out detail.
Thanks as always for your visit and I hope I have inspired you to pop over the the website and take a closer look at the new stamps.
Monday, 12 August 2019
Is it Christmas yet?...... (by Sandra)
Hello everyone, I'm sharing some of the cards I have made with the new Christmas stamps.
The first one is from The Christmas Garden stamp set. What a gorgeous stamp this is, you can use all of it or just parts.
For this card I stamped in Archival ink and coloured with pencils.
My next card I stamped and embossed in gold and filled in selected areas with red glitter glue.
The next card is using the small Mistletoe sprig and sentiment from the the same set. I used a stamping platform and two shades of Distress Inks, Forest Moss and Bundled Sage, to make a pretty frame for the sentiment. Finished with some 3D liquid pearls.
My next pieces are from the fabulous A Tomte Christmas set. Who could resist these quirky gnomes?
This one is on a piece of grey board. I made a background with gesso and dark blue acrylic paint. I added branches from Howling Moon stamps and embossed in white. Using Kraft card, I stamped and cut out the large gnome, coloured him with water colour pens and added the sentiment.
My next cards are little 4x4 cards. These are so cute! I stamped with Archival and coloured with water colour pens and used the Shaded Baubles stamp to frame them.
This is the last card I am sharing with you today. I cut 3 different sized circle apertures into a piece of card and popped the Tomte gnomes behind. These were coloured with alcohol markers.
Sandra
Saturday, 10 August 2019
Have Yourself A Merry Little Gnome (by Julie)
Hello, today I have a selection of fun, Winter/Christmas themed cards for you all. Chocolate Baroque recently released some brand new Christmas stamps which include Tomte Christmas, which has lots of fun Scandinavian style gnomes.
My first project is a DL card where I have teamed the large gnome from Tomte Christmas with the Mushroom House. I started by stamping the gnome in the bottom left corner of the card and coloured with polychromus pencils. I also stamped the image onto some copy paper and cut it out to make a mask.
Place the mask over the gnome and then stamp the Mushroom House so that it just overlaps the masked gnome. Remove the mask and draw in some free hand lines to join up the path and to create texture in the snow. Colour with polychromus pencils and add white paint pen to the tops of the mushrooms for a snow effect along with touches of Chrystal Stickles to finish off the snow effect.
My second card sees the the little Tomte Gnome pulling a reindeer placed inside a bauble. I inked up the blank bauble from Shaded Baubles with a blue dye ink and stamped onto some white stamping card. I then inked up the little gnome and deer image with the same ink and stamped it within the bauble. I coloured the image with polychromus pencils and then cut to size to fit the centre of my card blank. I finished off the panel with a sentiment from Tomte Christmas and a stamped snowflake from Christmas Garden.
For my third card I inked up the blank bauble from Shaded Baubles with a light blue dye ink and stamped it directly onto my card blank. I also made a mask from some copy paper. Next I placed the mask over the blank bauble and stamped the snowflake bauble to the right so that it overlaps the first one. Remove the mask and stamp the little trio of Tomte gnomes using the same ink as before. Colour with Polychromus pencils and then add the little snowflake from Christmas Garden for the background before finishing off with a sentiment from Tomte Chrismas and dabs of Crystal Stickles.
My last card uses the same light blue, dye ink as before, which I used to ink up the snowflake bauble from Shaded Baubles and stamped onto spare stamping card. I also made a mask from copy paper. Once you have stamped the sentiment into the bauble, cover with the mask then spritz with a royal blue, spray ink. Cut to size and then stamp the snowflake from Christmas Garden using the dye ink as before, around the edge.
On a separate piece of card, stamp the snowflake and spritz with the spray ink as before. When dry, cut to size and attach both panels to the front of your card blank with 3d foam pads.
Thanks for stopping by and please call back soon for more Design Team inspiration.
Julie xx
Friday, 9 August 2019
Tomte tomte tomte tom (By Rachel)
Hello there! Rachel here today with some more gorgeous Tomte makes - these wee guys really are sooooo much fun - I love them to pieces!!! Here's some of my makes with them from the July shows:
When I first got the A Tomte Christmas stamps - they screamed 'scene' to me - so this was my first make - I stamped the wee tomte then coloured them with water colour pencils before masking them and the moon. Then I used torn paper and inks and brushes to create the landscape.
Next I stamped the triple Tomte trouble stamp...they are so very cheeky! J just coloured them with water colour pencils then masked them plus the circle underneath them and finally used distress inks to create the background and then finally used water to spritz and flick and get the splatter effect.
In this third card I used a gelli background that I created using some of the other stamps from the show (a christmas garden set) and inks and added a circle of card stamped with the snowflake bauble stamp (from shaded bauble set). Finally I added the small Tomte in the foreground.
.....and finally for today the largest Tomte, stamped onto a mat and coloured using water colour pencils. I added a pen line around this and added the mat to a card I had stamped with the small leafy stamp from the show (from a Christmas Garden).
I do hope I have given you some inspiration of ways to use your Tomte stamps.... big hugs!
Rachel xx
Thursday, 8 August 2019
"Christmas is Coming!!"- By Debbie
Hi everyone here are some of my samples for my first Hochanda show since I joined the Design Team and boy, was I nervous and excited!
First we have the gorgeous The Christmas Garden, I just love all the detail in this stamp. For the first design I've printed with a brown inkpad and coloured using metallic pencils. I distressed the edges of the image before mounting onto Kraft card and then purple card. The ivory card blank is an 8" x 8". I've used the corner foliage stamp which comes with the set to add detail to the corners of the card blank using purple ink. To add the finishing touch I've added some pearls.
For the second design using The Christmas Garden I have stamped using a black inkpad and coloured with pencils. When finished I covered the entire surface with embossing ink and covered with a clear rainbow powder which gives a lovely sparkling effect. The card blank again is an 8" x 8" and I've finished off with a frothy tulle bow and some sparkly gems.
For my next 2 designs I've used Christmas Circles but 2 very different looks. For the first one I have stamped the image onto a die cut circle using a black inkpad and coloured with pencils. I stamped the lower part of the stamp again so that I could decoupage the poinsettia. I mounted the image onto an embossed die cut circle and used a doily and some dark green velvet paper for the background. Oops! Spot the deliberate mistake? No sentiment!!
For my second take on the same stamp I've white embossed onto a die cut circle of Kraft card which is one of my favourite techniques. I've just added some soft shading using a white water colour pencil as I find that water colour pencils give a stronger colour when using Kraft card. I've used the small poinsettia stamp from The Christmas Garden for the card blank itself which is a 6" x 6". The sentiment has been embossed onto a tag and held in place with ribbon.
Still with the Christmas Circles we have the robin this time and firstly I've chosen not to go for a circular shape this time. This image has been stamped with black ink and embossed with clear powder before water colouring with Koh-I-Nor water colours. I've also stamped the holly from the stamp onto the edges of the sentiment tag. The card blank is a ivory A5 which has been stamped with Large Crackle Background and brown ink. I've sponged around the edges of the image, the tag and the card blank with Distress ink Tea Die. To finish I've added some die cut holly and foliage and red ribbon.
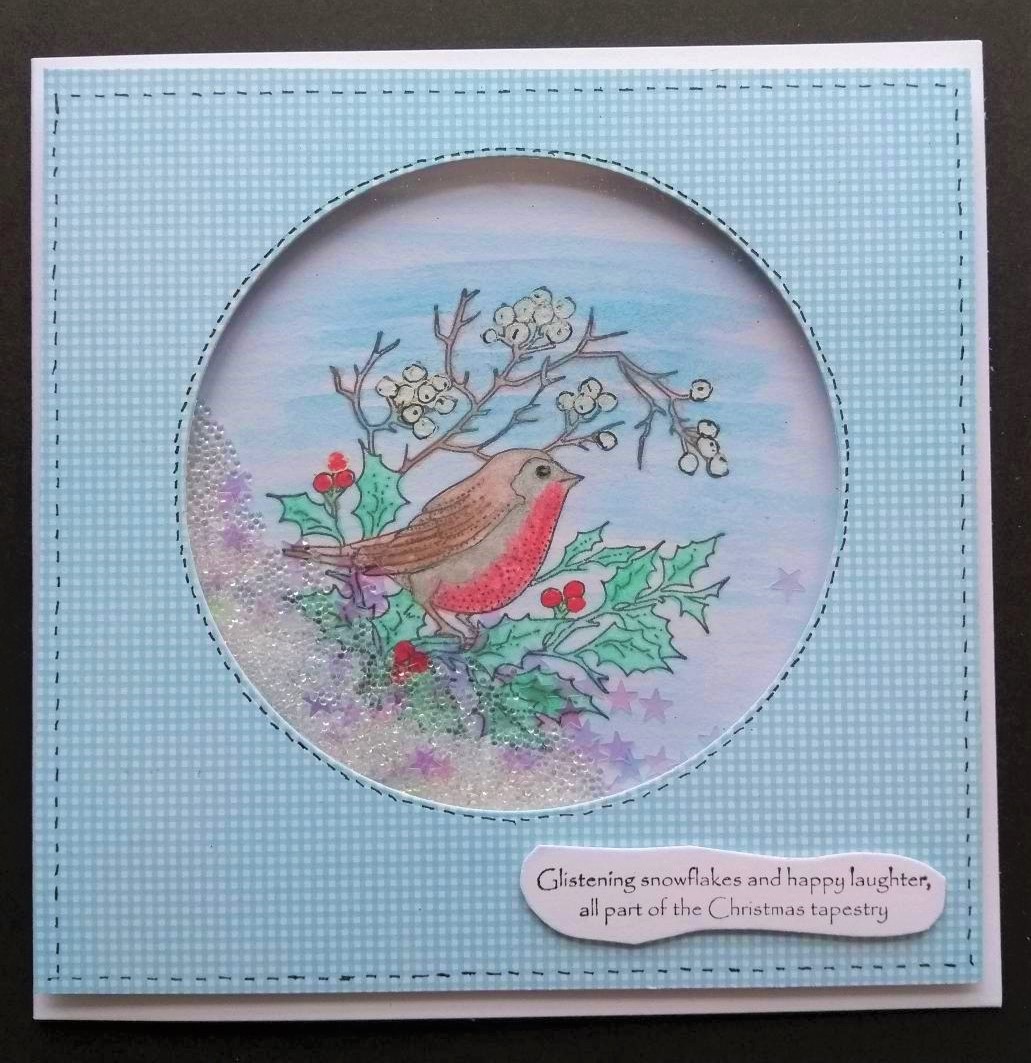
For my second look at the robin I decided to give it a snowy theme with a shaker card. Coloured softly with pencils onto white card it forms the background to the shaker card. I then die cut a circle from some blue gingham card and attached a piece of acetate to the back. Next seal all around the edges of the circle on the reverse with 3D foam tape. Place a small pile of shaker materials in the centre of the robin image (I used a mix of small beads & snowflakes) and then carefully place the outer layer over the background. To finish I've added some faux stitching .
That's all for this time, see you later in the month for all my gnome samples.
Bye for now, Debbie
Tuesday, 6 August 2019
Gnome for Christmas (by Magda)
Hello,
These new gnomes are so cute, that I thought to use A Tomte Christmas plate of Chocolate Baroque for a Menu Card, for Toppers and for an Invitation card
I have listed here for you below the items for the three projects
1. White Cardstock
2. Distress Ink Pad for the background
3. Archival Jet Black for stamping, the images and sentiment
4. Water color pencils Faber Castell Art Grip Aquarelle Pencils
5. Modeling paste for the snow
These new gnomes are so cute, that I thought to use A Tomte Christmas plate of Chocolate Baroque for a Menu Card, for Toppers and for an Invitation card
I have listed here for you below the items for the three projects
1. White Cardstock
2. Distress Ink Pad for the background
3. Archival Jet Black for stamping, the images and sentiment
4. Water color pencils Faber Castell Art Grip Aquarelle Pencils
5. Modeling paste for the snow
For the invitation card I stamped with water on the background also the baubles of The Christmas Garden stamp
I am sure you will love using the gnomes too, thank you for passing by.
Magda
Monday, 5 August 2019
Christmas garden quartet (by Veronica)
It didn't feel a bit like Christmas making these in blazing sunshine...but this BIG stamp made it so easy!I did three versions in the end, it was so easy to keep playing.
First one was simply stamped in black versafine ink and clear embossed. I coloured the robin, lanterns, tree and poinsettias using koh-i-noor watercolour paints. The sentiment from Christmas circles was stamped at the top before addin a mat of black card. The white base card was randomly stamped in grey ink using the baubles bit and holding the stamp in my hand.
As a brusho addict, i just had to try with brushos and this was the result. Background was a mix of yellow and turquoise powders well spritzed with water. Once it was dry, the image stamped in black versafine and clear embossed. I used bleach and a paintbrush to lighten the lanterns, candles stars and baubles. The robin, holly, poisettias and the candles were painted with watercolours again - the background was fairly light behind the poinsettias and the robin, and the watercolours easily covered it up. The card was edged with black marker pen, and added to narrow gold and black mats before adding to a white base card.
This one was simply stamped on black card with versamark and embossed in white before painting the candles and poisettias with watercolour paints. Gold and red mats before adding to a white base card.Number four took a lot longer, but most of that involved fussy cutting the poinsettias out.
I used the small mistletoe sprig and used my stamping platform to create a wreath, stamping in two different green inks. The poinsettias were stamped in black versafine onto white card and clear embossed before colouring with marker pens - I think I stamped them six times altogether, but it could have been more. The sentiment comes from the Christmas circles seta little bit different, and while there are probably not too many people with Christmas birthdays, they do deserve a birthday card!
Sunday, 4 August 2019
Baubles Galore by Penny
Hello peeps, I'm here again with my first post of the month. What better subject for the middle of summer than....Christmas! I have three cards to share with you today, all were samples for the Christmas shows in June and all of them focus on Christmas Baubles.
The first card features stamps from the Shaded Baubles and Christmas Circles sets; Koh-I-Noor paints, Distress Ink, gold EP and white EP. I stamped both baubles onto Drawing Cartridge and embossed one with white EP and the other with gold. I then painted them and cut them out.
I stamped and embossed the Robin and foliage in gold and painted it as before, then fussy cut the image and attached it to the plain bauble with 3D foam. I stamped some Pine branches from the Robin the Spruce set using DI onto a white base card. I attached the snowy bauble flat on the card and attached the other bauble in 3D. I added some ribbon and a couple of bows to give the impression of baubles hanging on a tree, and stamped a sentiment.
The second card features stamps from the same sets as the first; grey Versafine ink, alcohol pens, Distress Ink, Luxury Smooth White Paper, a couple of dies and some coloured paper from my stash. I stamped the empty bauble image in grey ink onto a piece of smooth white colouring paper and coloured it in with pens then added some glitter. I stamped Pine branches around the edges of the panel and added silver pen around the edges before matting it onto coloured card.
I used a die to cut some Pine branches from coloured card and another one to cut a lantern. I attached all the die cuts to the card and added glossy accents to the lantern to look like glass. I used silver peel-offs to add a chain to the bauble, stamped and embossed a sentiment onto coloured card then matted it and attached it to the card.
I used the same stamps as in the first two cards; a piece of smooth, Kraft paper, alcohol pens, Versamark ink and white EP, brown DI and a circle die from my stash. I stamped and embossed all the images in white then coloured them with pens before die cutting them. I attached both circles to a cream base card then stamped a sentiment.
Thank you for dropping by today, I hope that you have enjoyed this post. I shall be back later in the month with some more Christmas craftiness!
Take care all,
xx Penny xx
Friday, 2 August 2019
July's Blog Comment Winner
Hello everyone,
We truly appreciate the time you take to let us know your thoughts about our designs, so each and every comment is very important to us.
Each comment in July was assigned a number and we used Random Org to draw a winner.
Congratulations to Gwen70, you have won this months £15.00 voucher to spend on Chocolate Baroque stamps. To claim your prize, please email here to confirm your email address and Lesley will send your gift certificate.
Lesley will be giving another £15 gift voucher to another lucky winner drawn from August's comments. The more comments you leave the better your chances of being the winner.
Thank you so much for all the kind comments you leave.
Good luck from the Design Team
Thursday, 1 August 2019
Gnomes and Baubles (by Judith)
Hello everyone, we have been having some really hot weather recently, so it's the perfect time to share some of our recent Christmas projects with you that we featured on last month's TV shows on Hochanda. It feels so strange to be preparing Christmas projects at the hottest time of the year but we always need to be one step ahead as crafters, don't we?
I have a few projects to show you today, and thought that I would start with some of the cards that I made featuring the delightful A Tomte Christmas stamp set. I stamped the large gnome and masked him before adding a background using a torn paper mask and Distress Ink in blue and grey tones. I added first and second generation stamped trees from the Trees a Crowd stamp set.
I removed the mask and coloured the image with Koh-I-Noor pencils and added some soft pencil shading around the base of the trees to ground them.
For my second card, I used the trio of gnomes, and started by colouring a die cut oval using Distress Ink. I stamped the image onto a spare piece of card using brown ink and I coloured the image with Distress Ink and a water brush, adding pencil shading over the top. I fussy cut the image and attached it to the oval.
I created a little tag and stamped the sentiment, adding some baker's twine. To assemble the card, I used a piece of music paper as a background, added brown card as a matting layer and some pretty red ribbon to finish.
I liked the vintage colours on this card, and made a matching tag using one of the circular acrylic baubles that we had on the show. I used Archival Ink to stamp the image, acrylic paint to colour the image, and again used music paper for the background.
My final project for today also features the acrylic tags. I coloured them with alcohol inks, and stamped on top of them using white acrylic paint. I used images from the Shaded Baubles stamp set and The Christmas Garden. As long as you clean your stamps straight away, you can use paint to stamp with, no problem.
I chose a mixture of bright colours for the tags. These would look great on the tree at Christmas, or as beautiful sun catchers hung in a window.
I added matching twine and a bit of Stickles for a bit more bling.
I will be back later in the month with a few more projects to share with you. Thanks for stopping by,
Judith xx
I have a few projects to show you today, and thought that I would start with some of the cards that I made featuring the delightful A Tomte Christmas stamp set. I stamped the large gnome and masked him before adding a background using a torn paper mask and Distress Ink in blue and grey tones. I added first and second generation stamped trees from the Trees a Crowd stamp set.
I removed the mask and coloured the image with Koh-I-Noor pencils and added some soft pencil shading around the base of the trees to ground them.
For my second card, I used the trio of gnomes, and started by colouring a die cut oval using Distress Ink. I stamped the image onto a spare piece of card using brown ink and I coloured the image with Distress Ink and a water brush, adding pencil shading over the top. I fussy cut the image and attached it to the oval.
I created a little tag and stamped the sentiment, adding some baker's twine. To assemble the card, I used a piece of music paper as a background, added brown card as a matting layer and some pretty red ribbon to finish.
I liked the vintage colours on this card, and made a matching tag using one of the circular acrylic baubles that we had on the show. I used Archival Ink to stamp the image, acrylic paint to colour the image, and again used music paper for the background.
My final project for today also features the acrylic tags. I coloured them with alcohol inks, and stamped on top of them using white acrylic paint. I used images from the Shaded Baubles stamp set and The Christmas Garden. As long as you clean your stamps straight away, you can use paint to stamp with, no problem.
I chose a mixture of bright colours for the tags. These would look great on the tree at Christmas, or as beautiful sun catchers hung in a window.
I added matching twine and a bit of Stickles for a bit more bling.
I will be back later in the month with a few more projects to share with you. Thanks for stopping by,
Judith xx
Subscribe to:
Posts (Atom)