Pin It button on image hover

Wednesday, 10 September 2014

Guest Post - The Mantlepiece by Veronica Pell

This week I would like to issue a warm welcome to Veronica who will be 'guesting'  for the next three weeks. For her first week she has chosen to create a wonderful vintage style card with the Santa Baby stamp set. So, it's over to you Veronica.

I thrilled to be asked to do a blog post by Glenda, as I have always loved her stamps since discovering them on C&C many years ago, back in the days when they only came on wooden blocks.

When I received my stamps to play with – Santa Baby and Holly Bells – the one image I really couldn’t see how to use was the mantelpiece – to me, it was unfinished, I wanted the rest of the fireplace! Funnily enough, it is the one I have used the most..............

My moment of inspiration came when I was using a friend’s holly wreath stencil and suddenly thought that the mantelpiece stamp would fit in the centre. I quickly stencilled it in Vintage Photo distress ink onto some spare card and took it home to play.

To me, this was a very Victorian image, which was why everything is vintage photo. I stamped the image in the centre and coloured it by dragging the colour out with a waterbrush. I sponged Scattered Straw distress ink very lightly round the image, then Vintage Photo working from the edges in towards the holly, finally adding a touch of Black Soot in the corners. Finally I matted it onto dull gold and dark brown card before adding to a white 7"x 7" card base.

This actually resembles a vintage photograph Veronica, very clever and thank you for designing is for us. I know you will want to add your comments to show your appreciation and if you want to see more inspiring creations then why not visit Vernoica's blog -Vrons Cards

 

Tuesday, 9 September 2014

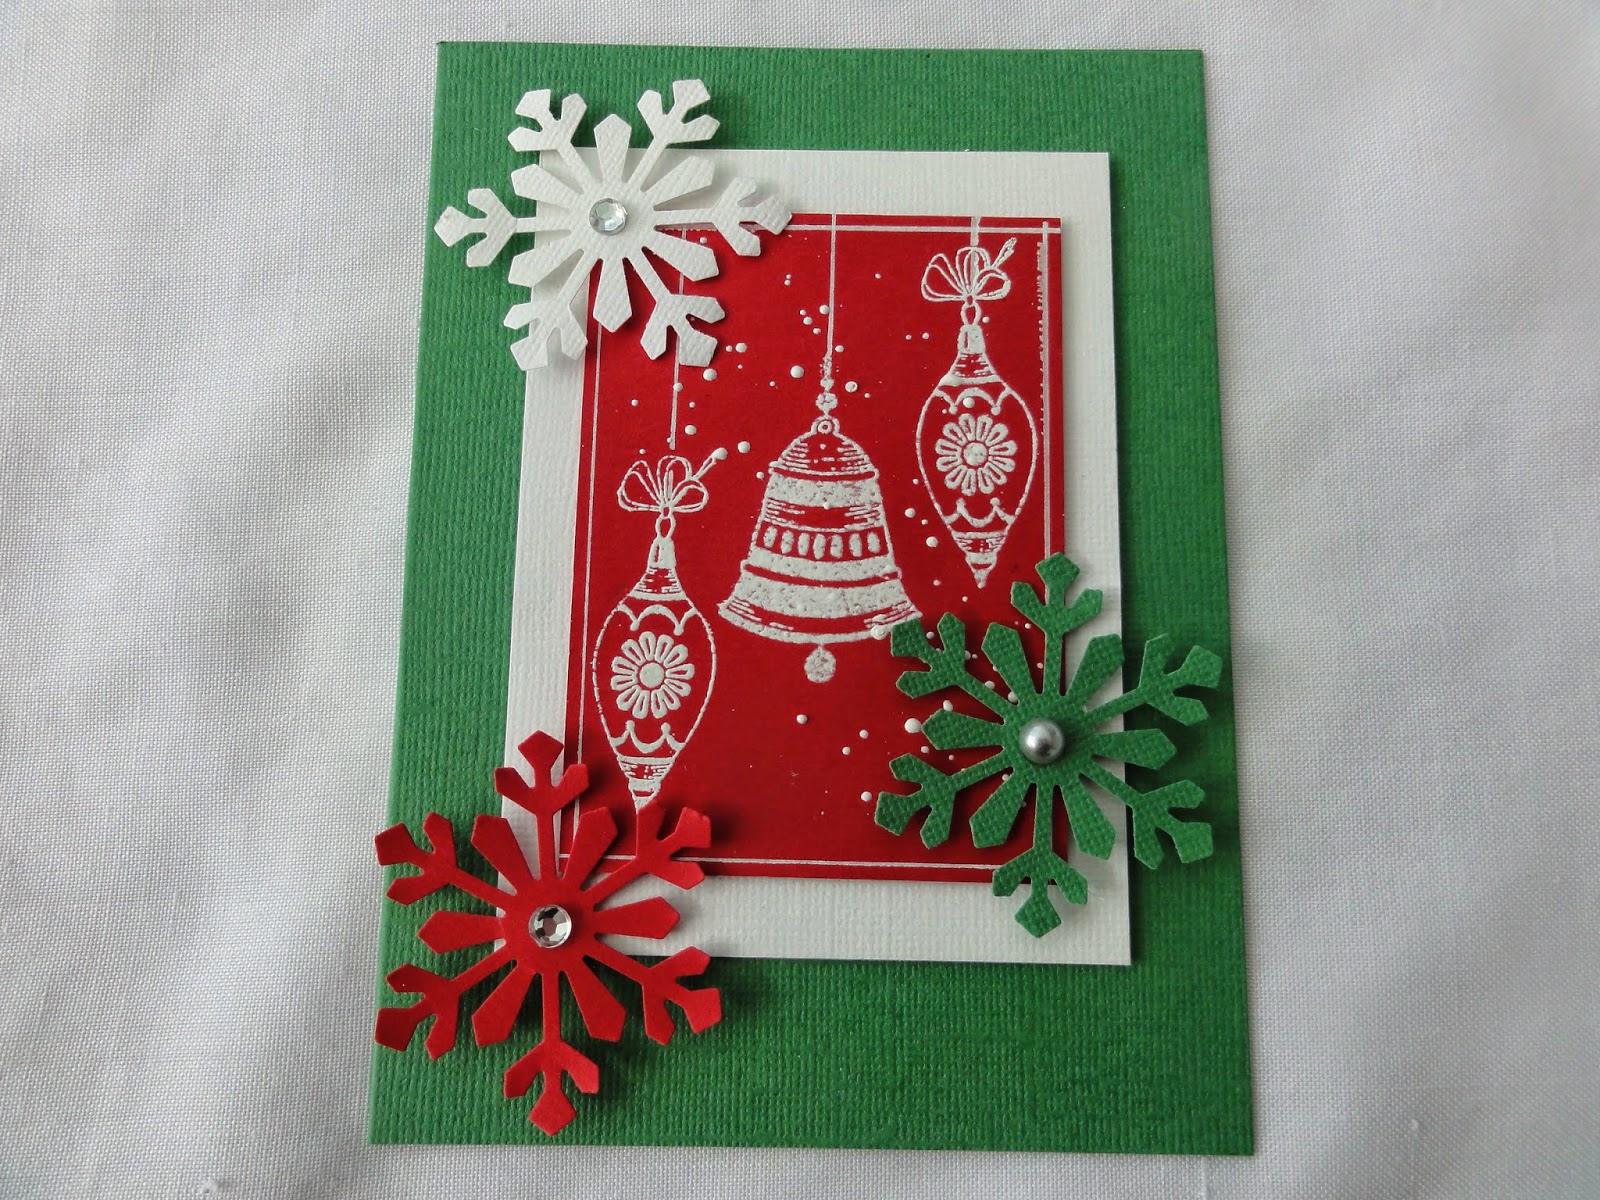
CAS with Christmas stamps (by Maria)

Hello stamping lovers, this is not my usual style, but when I don't have too much time and a lot of other stuff to do, now and then I have to make a CAS (clean and simple) card. They are ideal for Christmas. I need something like 100 Christmas cards so high time to make it CAS! So here are my simple cards:


Some of the new Christmas stamps from Chocolate Baroque are just the way I like to use them "simple" in design. What do you think about them? I took red cardstock and Versamark, stamped the images, then gave them a bit of silver (first one) and white (second one) embossing powder, and embossed it with my heat-tool.  I put it on white and green cardstock paper.  From the same cardstock, I made some ice cristals with a paper punch, placed them on my card and added some gems in the centres. For the snow on the second card I used a white jelly pen. Very quick makes for very busy people. Have fun!

Greetings
Maria

Monday, 8 September 2014

A Seaside Postcard (by Lesley)

I love beach huts, so I was truly excited with the new Seaside Dreams set.  Here is my interpretation of a seaside postcard, using a brayer and one of my favourite supplies, self adhesive labels.

The background was brayered onto a piece of A6 silk cardstock, using Adirondack Pool and Scattered Straw Distress inkpads and then shading was added to give the effect of clouds and sand dunes. The beach huts were stamped onto a self adhesive label and coloured with watercolour pencils then cut out, along with the flag pole and flag, Next the huts were stamped directly onto the background with Adirondack Jet Black ink and the cut out pieces stuck into place. The sentiment was added as shown..

I am a great advocate of using self adhesive labels, especially if you find masking difficult  It is what I call cheat's masking, why not give it a try. I hope this may have inspired you to create your own postcard and if you would like to read the full tutorial on how it was made you will find this on my blog.

Please keep coming back on a daily basis to see loads of other uber inspirational ideas from the fabulous design team girls.


Sunday, 7 September 2014

Christmas Shepherds (posted by Claire)

Good morning, Claire here with a sample made using stamps from A Child is Born and Holly Bells.  We're spoiled for choice with so many beautiful stamps this month!

I've used a dictionary page as my background and stamped the Shepherds with Memento Tuxedo Black ink. The holly was stamped and embossed with Gold embossing powder. I coloured the shepherds with Graph'It markers and added some white to the sheep with a gel pen. Its quite time consuming colouring on the text but I love the effect.

I've edged the page with a gold krylon pen, layered the page up one a brown card blank and tied a twine bow along the edge. I was lucky enough to find a dictionary page with 'Christmas' on so I took a red pen and circled the word as a fun sentiment

Thanks for visiting today
Claire xx


Saturday, 6 September 2014

Santa Baby and Snowy Penguins - By Florence

Hi everyone

I hope you are enjoying the weekend.

Today I would like to share two cards I made using the new Santa Baby and Snowy Penguins stamp sets.  I hope you like them.

 These are amazing sets off stamps.  The beauty of all of the new stamp sets is the choice.  There are so many stamps on one sheet.  The images are fabulous used on their own or, as with all of Chocolate Baroque stamps, they are perfect for mixing and matching.


I mixed the little sleigh image from the Santa Baby Set with one of Chocolate Baroque's Carousel Horses. 

I stamped the Sleigh and the Horse and colored the images.  I added a some Distress Ink around the edge of the stamped card and stamped some snowflakes.  I then made up the card as seen and added some bling to connect the two images.


These penguins are adorable.  Seriously, once you start stamping with them you will not be able to stop.  They are so addictive.

I stamped the penguins multiple times with the aid of masking tissue.  I added some Distress Ink around the edge of the card and stamped the snowflakes.  I used a felt pen and added some red dots between the flakes.  I then made up the card as seen adding a little ribbon.

Full details of how I made these cards can be found on my Card Making Blog Here

Take care and happy stamping

Florence x


Friday, 5 September 2014

Baubles and Branches (by Debbie)

 
I love the baubles from the Holly Bells and Santa Baby set as they are a great size for smaller cards for batch making for Christmas. 
 
I had stamped the baubles many times and cut them out ready to fix to the cards.
For the first one I stamped the leaf stamp from Thistle Butterfly with green ink
making a circle for the wreath. The baubles are attached with pads so they are raised.


For the second card I added a sentiment to the middle.
 
 
The holly branches are ideal for hanging the baubles, I distressed the edges with Vintage photos.

 
A similar card with a variation of the baubles.


Many thanks for visiting
Debbie

Thursday, 4 September 2014

A Craft Christmas By (Doreen)

Hello to you all, I am sharing a sample made from the new stamps that have just been released for September over at Chocolate Baroque. My card uses a couple of the stamps from the Holly Bells stamp sheet...I started by stamping my tree, snowflake and sentiment onto craft card with Versamark and white embosed them. They were then matted onto white card  The sentiment is from the Christmas Magic Set

Wednesday, 3 September 2014

Guest Post - Welcome to Fairyland by Lorraine Harrison-Rogers

This week's guest post, designed by Lorraine, is a wonderfully bright and cheerful card featuring Magical Landscapes.  Lorraine has provided a very detailed step by step to sit back and enjoy.

This was such a delightful project to make!  As soon as the stamps arrived I couldn’t wait to use them and kind of knew where I was going with it. So how did I make it?              
  1. I chose which of the beautiful castles I wanted to use - I chose this one for the crenellated top and the onion shaped roofs of the towers - I felt this one was really exotic for the colours I wanted to use.
  2. Cut a piece of white card stock - 6 1/2’ x 6 1/2’ and drew a pencil line approximately 2/3rds towards the bottom of the square. This is to help place the castle on a water line - if you look closely at the stamp the land and rocks go out into the water. I wanted the castle/land to sit on the line I had drawn, or very close to it at least.
  3. Then ink up the stamp with versa mark and stamp the image quickly heat embossing with black embossing powder. On mine I sprinkled a little silver embossing powder around those onion towers too for extra WOW!
  4. Next stamp on to masking paper or post it note and cut out placing it over your stamped image where you want to protect the image from your background colouring.
  5. Now I used brushes, but I might just have easily chosen a brayer, which would give me a similar finish. I find using brushes in a slow, soft circular motion means that I can get an even finish to my colour blending - it takes practice but it is worth the effort and time. For this I brush over the ink pad, I only use water based ink pads for this technique - never the oil based or permanent colour ones. I start in a corner and using soft, gentle circles, I brush across my paper until I have built up my colour in the area that I want it. I then change brushes and move on to my next colour, starting at the edge of my last colour and blending into it and then over the area I am going next. I continue like this until I have built up my colours. I will go back over areas if I think the colour isn't quite right. The key is not to be afraid of colour!!!
  6. When I am starting a project like this I usually test several colours together on scrap card until I am happy with my colour combination.  For this project I chose the strong, bold colours of sunrise for my sky. Starting with an apricot colour, I moved onto a melon colour, soft raisin colour and finished with a strong light plum/purple type colour. I wanted to create light on the horizon without losing the night time colour too much.
  7. Using the same method with my brushes I used a deep midnight blue and the same plum/purple for the water, but I avoided around the rocks and land putting those in separately with a colouring pen.
  8. Colour your castle, trees, land rocks etc, for this I used Copic markers and a white highlighting pen. I went around my land and rocks darkening the area that would be away from the light. I also drew in a small skyline of mountains with a black pen; in a real sunrise those mountains would not have any light before the sun rose above them so would appear very dark.
  9. For the edges I cut strips approx 1 1/4” wide and used the tree line stamp, alternating it upside down and heat embossing with both black and silver embossing powder. To colour them I used the same techniques with the brushes and built up just two colours - the melon and the soft raisin.
  10. Finally I stamped the ‘Welcome to Fairyland’ text, again heat embossing this, building up my colour with the brushes and finishing with a couple of rhinestones.
Thank you so much for this gorgeous card Lorranie and for the time and effort taken in writing up the mini tutorial and the insight into your colouring techniques.  I am sure you'll all find this very informative and will want to leave a comment to let Lorraine know how fab this post has been. And if you want to catch up with more of her beautiful work then visit her blog at travellingcolours.wordpress.com


Tuesday, 2 September 2014

While Shepherds Watched (by Asha)

Good morning, fellow Chocoholics.  Have you seen the new September release stamps? Lesley calls it "an abundance of glorious stamps" and boy, is she right! This set is full of beautiful ... seriously stunning swoon-worthy images.

For my sample today, I picked the image of two shepherds (having a natter) from the "A Child Is Born" A4 sheet. To create the background, I first masked a little circle for the moon and lightly blended several shades of purple and blue Distress Inks. Then I added some subtle sparkle with Stickles. Nothing fancy here. The image is so gorgeous as is that it really doesn't need bells and whistles.

Now for the best part - colouring the image... and what a joy that was! I used alcohol markers to dress these shepherds, restraining myself to simple neutral colours.


A full description of the inks and colours used in this project will be available on my blog tomorrow. Over the course of this month the Design Team and I will be posting more samples from the September release stamps on our blogs. Swing by for a magical Christmas!

Thank you for stopping by today. Please drop in regularly to see more inspirational work from the rest of the Design Team.

Beijinhos,
Asha

Monday, 1 September 2014

August Blog Comment Winner

Hello everyone, we would like to thank you all for your visits here at the Design Team blog.  We appreciate the time you take to let us know your thoughts about our designs.  

Each comment in August was assigned a number and we used Random Org to draw a winner.  Congratulations to Gerrina you have won a £15.00 voucher to spend on Chocolate Baroque stamps! Please send a quick email here to confirm your email address and Lesley will send you your gift certificate.

Lesley will be giving a £15 gift voucher to another lucky winner drawn from September's comments. The more comments you leave the better your chances to win!   

Thank you for your kind words and comments,
Good luck from the Design Team!

Christmas Night (posted by Judith)

Hello Folks, I'd like to show you a card using the newly released Santa Baby stamp set. I wanted to use the sleigh flying through the air pulled by a reindeer, and so I looked through my older christmas stamp sets and found the perfect match on the Damask Reindeer stamp set. I stamped both of the images onto a piece of smooth watercolour paper, and then covered them with a mask. I also added a circle mask at this point. I coloured the background with a variety of blue Distress Inks, graduating to a deep purple at the bottom of the page. Around the circle, I added some yellow, to create a glowing effect. I spritzed the background with water to create a starry feel to the background, and added a little bit of pearl spray for some extra shimmer.

I removed the masks, and coloured the images with water based markers and a water brush. I stamped a tree from the Stained Glass Christmas stamp set along the bottom of the background, using green ink and clear embossing powder. I added some grey shading to the moon, and stamped a sentiment taken from the Christmas Magic clear stamp set using black ink.


I have also created a card using the A Child is Born stamp set. I stamped the corner snowflake stamp around the edges of some watercolour paper using white embossing powder, and filled in the gaps with one of the smaller snowflakes to create a frame. I created a watercolour background using lots of blue tones. I stamped the angel onto a separate piece of card, and coloured the image with pencils. Finally, I added the word 'Joy' to the background.


Full details of how I made this card can be found over on My Blog

 My Team mates have some beautiful inspiration for you over the coming month, so please keep checking back. Thanks for stopping by, Judith xx