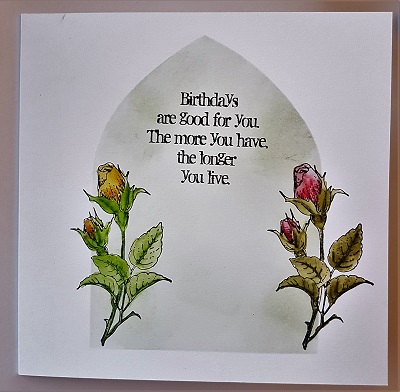
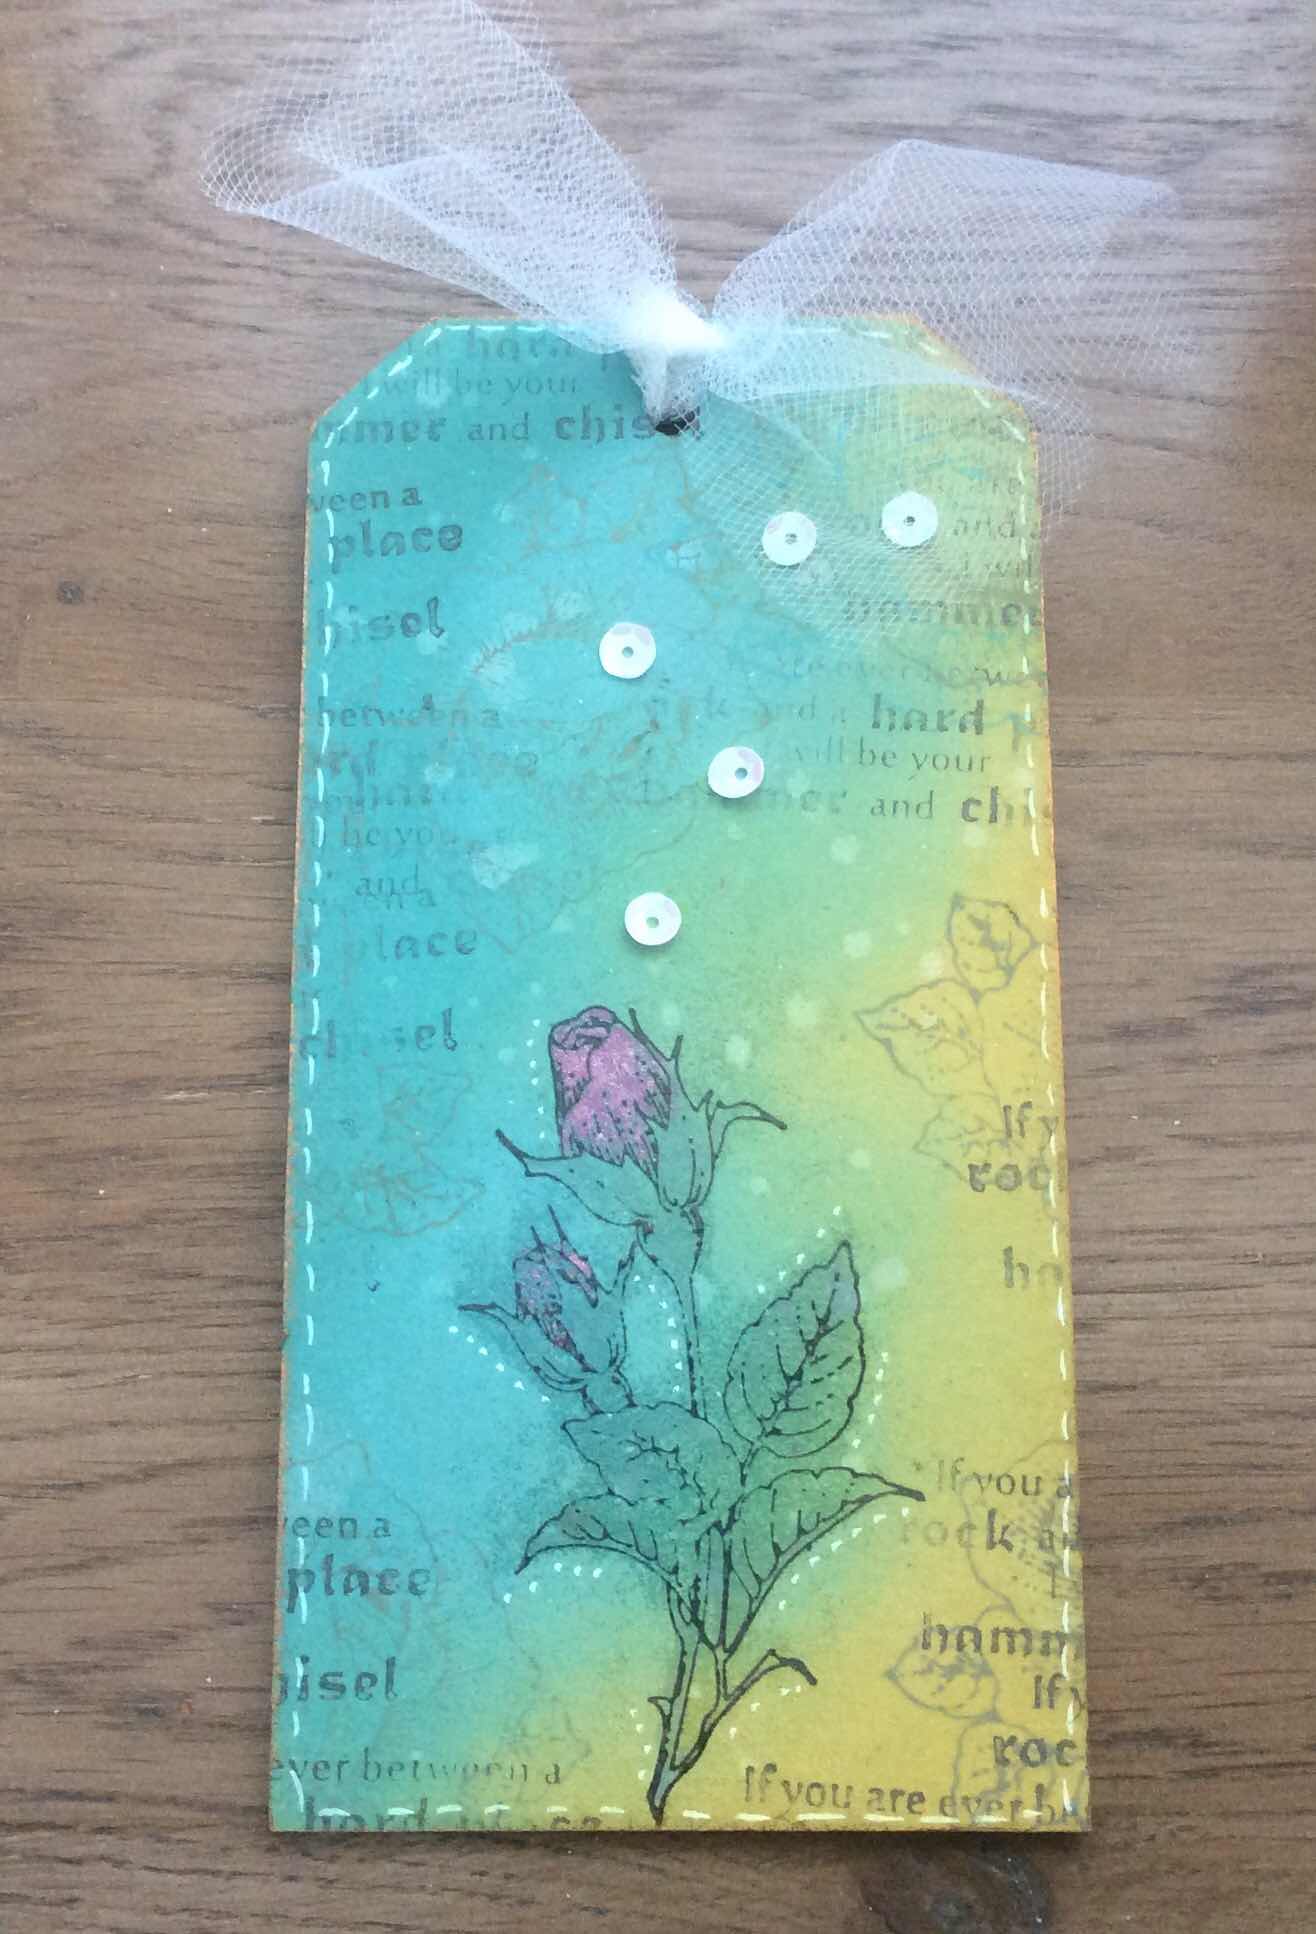
Hello everyone, it is time for our monthly blog post featuring cards and projects created in fifteen minutes or less. The Design Team have designed some fabulous creations to inspire you, and are sharing lots of tips and ideas to save time when creating their designs. If you want to make a card in a hurry, or are looking for smething to make for a craft fair, or as a batch card, maybe as a Wedding card or a Christmas card, (it's never too early in the year!), then we have lots of ideas to share with you.
So, grab a cuppa, and enjoy this month's selection.....
Brenda has designed a box of cards using Distress Inks, Versafine Clair Inks, Pan Pastels, and stencils. The card designs themselves are very simple, and would make great 'any occasion' cards. What a lovely gift this set would make for someone, but you could just choose any one of these designs to make as a quick card.
I have made a quick tag, which could be added to a gift, used as a bookmark, or added to a card. I have used a scrap piece of background from my stash to make the tag, which was coloured with Distress Inks and water, then sprinkled with salt and left to dry. I stamped the butterfly border over the top and coloured it with Inktense pencils and a waterbrush. I added a sentiment, which had been stamped onto a piece of scrap card, with the edges distressed and inked. I distressed and inked the edges of the tag, and added a complementary ribbon.
Rachel has made a trio of pretty cards this month. She has blended Distress Inks through a stencil to create a background for her first card, stamping the rose image and then adding colour over the top.
For her second card, she has added a hand drawn border for extra detail.
Finally, a Distress Ink background with the fabulous leafy image stamped over the top:
Carole has created a vibrant card using the Dawn Chorus, Wise Owl and Fly Away With Me stamp sets. The background was stamped with Abandoned Coral and Fossilized Amber Distress Inks using various elements from the three sets. the image from Dawn Chorus is stamped with Versafine Onyx Black ink.
Pat has followed a blue theme for her cards this month, her first card was created by stamping the rosebud image from the Rose Perfumery stamp set onto a piece of paper from My Floral Soul designer papers using a grey permanent ink and colouring it with pencils. She blended some blue Distress Ink around the edges, and spritzed with water to lift some of the ink. She added the sentiment, again using permanent ink, and layered it onto blue card, then onto a white die cut layer before adding it to the card.
For her second card, she heat embossed the image from Floral Perfumery onto glossy card using silver embossing powder. She then coloured the background using alcohol inks with an applicator and blending fluid to aid coverage. She cut a strip of vellum and heat embossed a sentiment with more of the silver embossing powder. She wrapped the vellum around the background before attaching it to the card.
We have some pretty envelope art from Zoe this month, featuring some of the butterfly stamps from last month's TV shows. These would be a lovely surprise popping through someone's letterbox, but would make an equally great card design.
You could stamp a sentiment in the centre of the second one if you were using this idea for a card.....
Finally we have some great projects from Magda, who always inspires us with her time saving ideas. She has created a Brusho wash background for her first card.
She has used Distress Ink pads through a stencil to create the second card.
We hope that you have enjoyed our projects this month, and we will be back next month with more projects to share with you. In the meantime, do keep visiting the blog for a daily dose of inspiration from our regular Design Team posts. Thanks for stopping by,
Saturday, 16 February 2019
Friday, 15 February 2019
Floating Butterflies by Brenda
Good morning Peeps, Brenda here, with some more shares from the samples I made from Lesley's shows using the beautiful new Perfumery stamps she showcased on Hochanda recently which were hugely popular with you all.
So for my top card I started with die cutting an arch aperture in the base card and running some fine jewellery thread down the aperture and fixing it behind the overlay. Onto this I fixed some 'flating Butterflies which I stamped and cut out from the Butterfly Perfumery stamp set. Behind the aperture on the base card I stamped the main image from Floral Perfumery and coloured in with pens and inked around with DI's. Stamped a sentiment to the top left and one of the larger Butterflies decoupaged to the top right of the card.
For this One I repeat stamped the beautiful Butterfly border from Floral Perfumery down the leading edge of a custom cut DL card and cut out around the edges, coloured in and added liquid pearls to the Butterflies thorax's. I stamped an inspirational quote from Artistic Affirmations, another Butterfly, a piece of coordinating DP and ribbons.
I kept this one fairly simple stamping the focal image from Floral Perfumery, colouring in with pens in pastel colours, stamping around the edges with Large Crackle Background and adding a sentiment from the same stamp sheet as the main image.
The background for this one is made using Ecoline inks which seem to be making a comeback, I've had mine for many years since they were popular the first time round so it was nice to give them an airing stamping the image from Floral Perfumery, bleaching out some of the colour and then adding back in with Distress Markers and some glitter to the bottle top.
My thanks as always for your visit to our DT blog today.
Thursday, 14 February 2019
Perfumery For Your Valentine (by Julie)
Happy Valentine's Day! I have two romantic themed cards to show you, my first being stamped with the rather wonderful Butterfly Perfumery.
I stamped the main image in the centre of my card and also onto some spare stamping card as I needed a second image so that the butterfly on the perfume bottle could be decoupaged. I then stamped the rows of butterflies either side of the bottle design and then the little scroll detail was added at the top and bottom of the card. All of the stamped designs were coloured with pencils and the background has been sponged with Distress inks. The card was then cut to size, mounted onto black card-stock and finished off with dabs of liquid pearl dots.
My second card is stamped with Floral Perfumery. The background has been simply coloured with Distress inks and over stamped in black and light grey inks with the little leaf stamp.
I stamped the bottle image onto separate card-stock before taking a large metal heart die and placing it over my stamped image. Next I drew a pencil line where the cut line would be and then cut out the parts of the design that overhung the heart cut line with a pair of scissors, before replacing the heart die and running it through a die cut machine. Just make sure that the bits that overhang the heart edge are placed over the die, out of the way of the cutting line or they will be cut off!
The heart was coloured with a mixture of watercolour and Distress ink and the perfume bottle image was coloured with coloured pencils.
Once the design was dry I stamped the sentiment onto the heart with Onyx Black Versafine and then attached to the front of the card with 3D glue gel.
Thanks for taking a look and please be sure to call back for daily Design Team inspiration.
Julie x
Wednesday, 13 February 2019
Butterfly perfumery - 3 ways (by Rachel)
Hello there! Rachel here with you today - I have three cards made for the January shows to share with you today - all of them used the Butterfly perfumery stamp set.
In my first sample I used flitterglu and metal leaf with the images and stamped onto black card - I also used metallic pens to finish off the bottle. There is also a butterfly that I stamped and cut out and decoupaged on.
The next sample shows a simple distress background that I overstampled with a fluorish, The main panel was stamped and coloured using distress inks.
In my first sample I used flitterglu and metal leaf with the images and stamped onto black card - I also used metallic pens to finish off the bottle. There is also a butterfly that I stamped and cut out and decoupaged on.
In the final sample I decided to use the butterflies as a cut edge feature. I really liked how this worked and if I did this again I think I would add another layer!
I do hope these have given you a few ideas.
Big hugs
Rachel x
Tuesday, 12 February 2019
Aquarium and Layers (by Magda)
My second post for this month is a virtual Aquarium journaling page and a mixed media Tag
Step by step. : Aquarius
1. Colour randomly in blue, green your journaling page with Distress Ink
2. On this background stamp with Archival Jet Black in first, second and third generation the butterfly
and the sentiment of Butterfly Perfumery rubber stamp plate
Step by step. : Aquarius
1. Colour randomly in blue, green your journaling page with Distress Ink
2. Spritz with water, dry well and cover all with white gesso
3. Stamp Mermaid Queen stamps with Archival Jet Black in first and second generation and colour
all with Brusho watercolour
4. Cover the journaling page with an Acetate sheet to give a glass effect
Tag
1. The background of the tag has several layers of colours as brown, blue, pink, red and fine gesso,
heavy sand gesso and mesh.
2. On this background stamp with Archival Jet Black in first, second and third generation the butterfly
and the sentiment of Butterfly Perfumery rubber stamp plate
Thanks for passing by
Magda
Monday, 11 February 2019
Poppy Congratulations (by Carole)
Today sees the first post this month from our regular Guest team Design member Carole Cann. Carole has created a lovely card to inspire you incorporating soft colours, and a wooden heart.
Carole writes:
Good morning everyone.
I am delighted to be back again as a Guest Design Team member, during February.
I have used the beautiful poppy stamp from Poppy Meadow and the centre of Song Thrush. It is relatively quick to make too.
The poppy has been stamped with Versafine Onyx Black ink and clear embossed, to fit onto a DL card base.
I have used a 7cm heart shape as the central element.
As my shape was wood and I wanted the blue to be crisp and clear, I painted it with slightly watered down, white acrylic paint.
When dry, the centre of the Song Thrush stamp was inked with Blue Versafine ink, and the heart was placed over the section I wanted to stamp.
All the colouring has been done with watercolour pencils.
For the top and bottom edges, I drew a line using the same blue as the rest of the card. I then pulled a damp baby wipe along the edge to smudge and soften it slightly.
The joy of poppy stamps is that you can colour them almost any colour that you like. This shape reminded me of blue Icelandic poppies.
I hope that you have enjoyed my post and I will see you next week with my second project.
Thanks, and happy crafting,
Carole.
Carole writes:
Good morning everyone.
I am delighted to be back again as a Guest Design Team member, during February.
I have used the beautiful poppy stamp from Poppy Meadow and the centre of Song Thrush. It is relatively quick to make too.
The poppy has been stamped with Versafine Onyx Black ink and clear embossed, to fit onto a DL card base.
I have used a 7cm heart shape as the central element.
As my shape was wood and I wanted the blue to be crisp and clear, I painted it with slightly watered down, white acrylic paint.
When dry, the centre of the Song Thrush stamp was inked with Blue Versafine ink, and the heart was placed over the section I wanted to stamp.
All the colouring has been done with watercolour pencils.
For the top and bottom edges, I drew a line using the same blue as the rest of the card. I then pulled a damp baby wipe along the edge to smudge and soften it slightly.
The joy of poppy stamps is that you can colour them almost any colour that you like. This shape reminded me of blue Icelandic poppies.
I hope that you have enjoyed my post and I will see you next week with my second project.
Thanks, and happy crafting,
Carole.
Sunday, 10 February 2019
floral perfumery (by Veronica)
Today I have a couple of canvas boards to share instead of cards.
The first one has a greeny background using distress oxides and a leafy mask. I stamped the butterfly border from butterfly perfumery twice onto white tissue paper using an elderly multicolour ink pad, painted round the dges with clean water and tore carefully round them.
I used modge podge to fix the tissue paper strips onto the board, trying not to smudge the dye inks, not always successfully.....but the smudges gave an appearance of depth.....
The main image from floral perfumery was stamped onto white card using black versafine and coloured with watercolour pencils, fussy cut out and glued on.
The second board has a different colour background, mostly using distress oxides again, although it had so many layers I can't remember how I did it! I also used crackle medium, although I think the temperature was too low for it to work well, as it took hours to dry and crackle and didn't really self level as it should have. I also mamanged to chip a bit off when putting it in the scanner, so not one of my better ideas!The main image from floral perfumery was stamped onto white card and coloured with watercolour pencils. The flowers on this stamp are also on the sheet as a separate image, which is very useful - I stamped them, onto tissue paper and coloured them with alcohol markers before tearing them out and adding to the board with modge podge behind the main image.
Saturday, 9 February 2019
Fragrant Flowers (by Judith)
Hello everyone, I have a couple of cards to share with you showcasing the beautiful stamps featured on last month's TV shows on Hochanda.
For my first card, I wanted to show how to 'colour' the perfume bottle using the background paper. Lots of perfume bottles are made of lovely coloured glass, and this was the look that I was going for. I made two pieces of background paper using drawing cartridge, sprinkling Brushos on one of them, spritzing it with water, and pressing the other piece of drawing catridge on top. I set the pieces of drawing cartridge to one side to dry.
I die cut an oval, and stamped the main image from the Butterfly Perfumery stamp set , stamping it again onto a piece of spare card. I coloured these images with Koh-I-Noor pencils, choosing colours to match the Brusho background, and cut out the butterfly and flower from the spare image. I also stamped the perfume bottle area onto the second piece of the Bruso background and cut that out. I decoupaged all of the elements onto the die cut oval.
On the first background, I stamped around the edge with the silhouette swirl to create a bold border. I attached the oval to a slightly larger black oval, before adding to the Brusho background. A black mat finished the card.
To create my second card, I made a winkle free distress background on drawing cartridge, using Distress Inks and water. I chose a yellow and green colour palette. I stamped the little leafy sprigs over the top and coloured them using green ink.
I die cut a rectangle of card, and stamped the main image from the Floral Perfumery stamp set, and stamped the image again onto spare card. I coloured the images with Distress Inks and a water brush. I cut the flowers from the spare image, and decoupaged them onto the main image. I added a sentiment, and a hand drawn border with a fineliner pen to finish.
I will be back later in the month with more projects to share, thanks for stopping by, Judith xx
For my first card, I wanted to show how to 'colour' the perfume bottle using the background paper. Lots of perfume bottles are made of lovely coloured glass, and this was the look that I was going for. I made two pieces of background paper using drawing cartridge, sprinkling Brushos on one of them, spritzing it with water, and pressing the other piece of drawing catridge on top. I set the pieces of drawing cartridge to one side to dry.
I die cut an oval, and stamped the main image from the Butterfly Perfumery stamp set , stamping it again onto a piece of spare card. I coloured these images with Koh-I-Noor pencils, choosing colours to match the Brusho background, and cut out the butterfly and flower from the spare image. I also stamped the perfume bottle area onto the second piece of the Bruso background and cut that out. I decoupaged all of the elements onto the die cut oval.
On the first background, I stamped around the edge with the silhouette swirl to create a bold border. I attached the oval to a slightly larger black oval, before adding to the Brusho background. A black mat finished the card.
To create my second card, I made a winkle free distress background on drawing cartridge, using Distress Inks and water. I chose a yellow and green colour palette. I stamped the little leafy sprigs over the top and coloured them using green ink.
I die cut a rectangle of card, and stamped the main image from the Floral Perfumery stamp set, and stamped the image again onto spare card. I coloured the images with Distress Inks and a water brush. I cut the flowers from the spare image, and decoupaged them onto the main image. I added a sentiment, and a hand drawn border with a fineliner pen to finish.
I will be back later in the month with more projects to share, thanks for stopping by, Judith xx
Friday, 8 February 2019
Serenity and Tranquility by Miranda
Hello there,
Today I have made something using two gorgeous sheets; Serenity and Tranquility.
In time when these sheets were launched I was so happy.....finally some beautiful female Buddha stamps! Still find them so beautiful.......
I've made an inky background using Distress inks and stamped (using same colors) fragments of the background stamp; Studded Lattice.
And then some plain black stamping for the focal image......and some cherry blossom branches....
I did colour her using color pencils.
I made a separate border stamping the beautiful Indian designs from the Indian Elephant sheet which matches perfect with the Buddha designs. I am sure you all understand that I have a lot of favorites at CB!
I have blended with Distress inks and colored on the pattern using gorgeous sparkle pens....you can see the effect on the close-ups......isn't it gorgeous?
I also gave some sparkles to the Buddha........using a transparant sparkle pen.
and the stunning effect of the Signo Ball glitter pens.........
Well, for now this is my last blogpost but I hope to see you again here on the DT blog......
Thanks for all your kind comments and stay creative,
let's make the world more beautiful with our ART!
Thursday, 7 February 2019
Floral Fragrances by Zoe
Good Morning Lovelies and welcome to my first post for this month featuring these absolutely gorgeous Floral stamps.

I hope you managed to catch the Hochanda shows with these lovely stamps on.
So here’s a selection of some of my samples from the show, I hope you like them?
I used a Greyboard tag, I just went straight on with Distress Oxides using a blending tool and a few drips of water to create some texture, I then used one of sentiments and the single rose stamp using grey Oxide inkpad on the background, the rose I stamped using Versafine Black inkpad and heat embossed using a clear EP, I coloured in using sparkle brush pens, a few dots and faux stitching using a white marker, I always edge my Greyboard or MDF using Gilding wax to just finish off nicely.
Very simple this card, I stamped onto my card and coloured in using pencils and stamped the image again onto the backing papers that were on the previous show and fussy cut and decoupaged, I also used the paper to mat and layer.

A set of “not quite” AT Coins, I say “not quite” because I’ve actually used Greyboard circles from the website that come with hearts too.

Thank you so much for visiting today, I love to read what you think of my creations.
Have a wonderful day xx Zoe xx
Wednesday, 6 February 2019
Lavender cushion by Brenda
Good morning to you all, Brenda here and I am excited to be sharing my Lavender Cushion which I made using one of the beautiful new fabric panels for the show on Hochanda when Lesley launched them last month, there are six different designs available, you will find the one I used here and the others here.
The fabric has a lovely soft finish but is very sturdy and will take inks, acrylics and various colouring mediums, I used watered down acrylic paint and coffee on mine, the latter because I wanted to give a slightly vintage feel. Firstly I added a watery wash to the areas around the Rose, left it to dry for a few minutes and then coloured in the flower and flourish with the same colours but of a slightly thicker consistency. I added a few highlights to the leaves with a cream acrylic pain, again watering it down a little.
When I was happy with the colouring I stitched it to a piece of cream cotton (inside out) leaving one end open so I could reverse it, filled with Lavender which I had bought in France in the Summer, sewed up the end and then stitched the string pearls all around the front edge to decorate.
These fabric panels offer something really different to expand your crafting and I do hope you will give them a go as they are such fun to work with and make super gifts.
Tuesday, 5 February 2019
Memory ( By Marga)
Hello hope you have a great day today, it's my birthday today so family time and a new card from me to show you.
What do you think to the new stamps, aren't they great?
I made the background with Distress Ink and I used the same colours to colour the image. I used Tumbled Glass, Wild Honey and Peeled Paint Distress ink.
I stamped the image after I made the background with Versafine Onyx Black.
By the leaves I used a waterbrush with water to pick up the colour.
The stamp I used is : Floral Perfumery
Hugs
Marga
Labels:
Floral Perfumery
Monday, 4 February 2019
January's Blog Comment Winner
Hello everyone,
We truly appreciate the time you take to let us know your thoughts about our designs, so each and every comment is very important to us.
Each comment in January was assigned a number and we used Random Org to draw a winner.
Congratulations to Tracy Welham, you have won this months £15.00 voucher to spend on Chocolate Baroque stamps. To claim your prize, please email here to confirm your email address and Lesley will send your gift certificate.
Lesley will be giving another £15 gift voucher to another lucky winner drawn from February's comments. The more comments you leave the better your chances of being the winner.
Did you manage to catch Lesley and Judith on Hochanda TV earlier today? Both Lesley and Judith will be back on our screens tomorrow morning at 8:00 am so reserve your seat or set your recorders. If you don't manage to catch their fabulous demonstrations then you can watch back on Catch Up over on the Hochanda website.
Thank you so much for all the kind comments you leave.
Good luck from the Design Team
Cup of Tea Anyone? (by Judith)
Hello everyone, I hope that you are keeping warm, and looking forward to longer, lighter days to come. As you read this post, I will be at Hochanda with Lesley for two days of TV shows, I hope that you will be able to catch the shows, as we have some lovely demos and great products to share with you. The Design Team have made some beautiful samples again this month.
For my post today, I am sharing some projects that I demonstrated on last month's Anniversary show on Hochanda, using the fabric panels. If you caught the shows, you will have seen these samples during the afternoon show. My first project was unfinished at the time, and I have now made it into a useful book cover, and I thought I would share a few photographs with you. Katya is from the set of 3 Ladies fabric panels.
I coloured the fabric panel with tea first of all, dipping the whole thing into a bowl of the warm liquid, and gently squeezing out the liquid, and letting the panel dry. You can decide how dark you want the panel to be, by dipping the panel more than once, or leaving it to soak a bit more.
Once the panel was dry, I coloured the image with Inktense pencils, and blended them with a waterbrush, to give a watercolour effect. The whole effect looks very vintage, which is exactly what I wanted. I like the blotched effect that the tea has given, as if the fabric is old, and has been in storage for a long time.
I created a book cover by adding some felt wadding, and two pieces of contrast fabric to make a 'sandwich', using a journal as my template. I turned the ends in to make the inside flaps, and hand stitched those in place.
I will be able to reuse the cover once I have finished with the journal. The wadding makes the cover feel very luxurious.
My second project is a canvas bag, from the Timeless set of fabric panels, that I showed as a finished example on the show. I had already coloured the Steampunk image with Inktense pencils as before. The panel had been dipped in tea, but I had created a lighter finish, which teamed up with the canvas bag perfectly. I used a blend of pencil colours to create a stone and metallic finish, so easy when you are colouring. I used green, orange and brown for the metal, to give a rust-like appearance.
On the bag itself, I used a couple of stencils, Tando Mini Cogs, and Chocolate Baroque Mask- Kaleidoscope of Butterflies to create a background. I used Inktense pencils, colouring through the stencils, and then used a waterbrush to spread the colour.
I decided to outline the butterflies with a permanent marker for a bit more definition.
I simply hand stitched the panel to the bag, but could just as easily have machine stitched it to the bag. I hope that you have enjoyed my projects, and reading about how I put them together. I will be back later in the month with more projects to share with you, thanks for stopping by.
Judith xx
For my post today, I am sharing some projects that I demonstrated on last month's Anniversary show on Hochanda, using the fabric panels. If you caught the shows, you will have seen these samples during the afternoon show. My first project was unfinished at the time, and I have now made it into a useful book cover, and I thought I would share a few photographs with you. Katya is from the set of 3 Ladies fabric panels.
I coloured the fabric panel with tea first of all, dipping the whole thing into a bowl of the warm liquid, and gently squeezing out the liquid, and letting the panel dry. You can decide how dark you want the panel to be, by dipping the panel more than once, or leaving it to soak a bit more.
Once the panel was dry, I coloured the image with Inktense pencils, and blended them with a waterbrush, to give a watercolour effect. The whole effect looks very vintage, which is exactly what I wanted. I like the blotched effect that the tea has given, as if the fabric is old, and has been in storage for a long time.
I created a book cover by adding some felt wadding, and two pieces of contrast fabric to make a 'sandwich', using a journal as my template. I turned the ends in to make the inside flaps, and hand stitched those in place.
I will be able to reuse the cover once I have finished with the journal. The wadding makes the cover feel very luxurious.
My second project is a canvas bag, from the Timeless set of fabric panels, that I showed as a finished example on the show. I had already coloured the Steampunk image with Inktense pencils as before. The panel had been dipped in tea, but I had created a lighter finish, which teamed up with the canvas bag perfectly. I used a blend of pencil colours to create a stone and metallic finish, so easy when you are colouring. I used green, orange and brown for the metal, to give a rust-like appearance.
On the bag itself, I used a couple of stencils, Tando Mini Cogs, and Chocolate Baroque Mask- Kaleidoscope of Butterflies to create a background. I used Inktense pencils, colouring through the stencils, and then used a waterbrush to spread the colour.
I decided to outline the butterflies with a permanent marker for a bit more definition.
I simply hand stitched the panel to the bag, but could just as easily have machine stitched it to the bag. I hope that you have enjoyed my projects, and reading about how I put them together. I will be back later in the month with more projects to share with you, thanks for stopping by.
Judith xx
Sunday, 3 February 2019
Timeless Fabric Panel (by Rachel)
Hello there! Rachel here today with a bag I decorated using one on the fabric panels from the January shows. Sadly my samples were still in the post so weren't seen on the show itself....
The fabric panel was a dream to work with - I loved the design and used paints that work on paper and fabric to do my painting. I chose lovely bright colours for the main part of the panel but edged it with grey to tone it down slightly. Next I worked on the main bag fabric and added some of the main colour through a stencil that matched (in my mind at least) the leaves on the fabric panel. Once dry I sewed on the fabric panel and ironed the whole thing to make the paint washable.
I hope you like this as an idea of how to use one of your fabric panels if you ordered them!
Have a great day!
Hugs
Rachel x
Saturday, 2 February 2019
Perfume (by Magda)
Hello
Can you smell the fragrance that comes out of the new Perfume bottles from Chocolate Baroque?
Here are 3 cards I made with these new stamps, that most of you have had the opportunity to see on Hochanda in January.
Eau de Imagination
1. On a white cardstock blend with a blending tool Distress Ink Pad Brushed Corduroy
2. Stamp with Archival Jet Black the open tailed peacock from Tangled Peacock stamp set as a
background
3. Stamp on a white cardstock the perfume bottle from Floral Perfumery stamp set and colour it with water
colour pencil Faber-Castell Art Grip
4. Cut the outline of the image and glue it on the centre of the peacock and Eau de Imagination as
sentiment.
Can you smell the fragrance that comes out of the new Perfume bottles from Chocolate Baroque?
Here are 3 cards I made with these new stamps, that most of you have had the opportunity to see on Hochanda in January.
Eau de Imagination
1. On a white cardstock blend with a blending tool Distress Ink Pad Brushed Corduroy
2. Stamp with Archival Jet Black the open tailed peacock from Tangled Peacock stamp set as a
background
3. Stamp on a white cardstock the perfume bottle from Floral Perfumery stamp set and colour it with water
colour pencil Faber-Castell Art Grip
4. Cut the outline of the image and glue it on the centre of the peacock and Eau de Imagination as
sentiment.
Butterfly
2. Colour the image with brown pencil and highlight it with white pencil
3. Stamp and colour in the same way a Butterfly of the same plate Butterfly Perfumery and cut it out
4. Blend with a blending tool Distress Ink Pad Brushed Corduroy on your card
5. Glue with Inkssentials Glue n Seal the craft mat and the butterfly as shown
Folded card
1. On the outside and the inside of the white cardstock card stencil with a pale rose the background
2. Stamp with Archival Jet Black the stamps and the sentiment of Rose Perfumery rubber stamp sheet
3. Colour all the images with Brusho
4. Close your card and wrap it it a nice ribbon.
See you in few days again, Hugs
Magda
Friday, 1 February 2019
memory......(by Veronica)
A lovely bright morning as I type this - blue skies, sunshine, snow, but minus temperatures outside - just the day for crafting!
Today I have a card to show using the lovely new floral perfumery stamp set , and a technique that I haven't used for a long time, one introduced to me by Doreen Sympson who learned it from Lynnda Worsnop.....
I dusted the stamp with brusho powders, then covered it with pva glue and left it to dry.....I used far too much brusho the first time, so scrapped that
I had used the stamp normally several times before deciding to have another go, and just covered the stamp with the pva this time, intending to colour it later. To my surprise this was the result - there was obviously enough brusho left in the crevices to colour the stamp. I do realise I am admitting here that I hadn't cleaned the stamp at all since my first effort, so apologies to all who religiously clean their stamps after every use!
It does take about 24 hours to dry the pva, but it is easy to peel off the stamp then. I trimmed round the image with scissors then glued it onto a square card blank. Sentiment stamped with versamark and gold embossed.
My teamies will be showing you some stunning samples samples over the next few weeks from the new stamps shown on Hochanda last month, so do keep checking for some inspiration!
Subscribe to:
Posts (Atom)