Wednesday, 9 December 2015
Guest Post - A vista under the sea by Rachel Fisher
Tuesday, 8 December 2015
The gift of a Candle (by Veronica)
Veronica
Monday, 7 December 2015
Studded Lattice (posted by Claire)
Sunday, 6 December 2015
Individual background stamps by Zoe
Hello there! Or should I say "Happy Christmas" lol ok ok I guess it is a tad early yet :) I love Christmas but it is a hectic time, I hope you're all keeping on top of your prep?
Anyway! Today it's my turn to share with you my projects made with the fantastic new Background stamps, featured on The Craft Channel yesterday and again today, I hope you manage to watch our fab Lesley?
I love these stamps they are so versatile, they're not actually available from Chocolate Baroque until the 7th December as they are exclusively The Craft Channel until then.
My first project is an MDF Xmas tree shape which I black Gesso'd first, then covered with Versamark Inkpad and used Lapis Black UTEE and heated until melted, I repeated the process but the second time I inked up this gorgeous ornate background stamp "Baroque Orchid" with Versamark and while the UTEE was molten I stamped into it, waited a moment or two for it to slightly cool before lifting the stamp off, once it was cool I added some gold gilding wax and buffed with a soft dry cloth.
Another MDF piece I Gesso'd first then painted with a Buff colour chalk paint, once dry I stamped the "Open Weave" stamp using an Archival Inkpad, I used the gorgeous Patchwork Butterfly as my feature which I stamped onto card and coloured using pencils, the sentiment is from "Positive Beauty" clear stamp set, the border is from the "Floral Edges" rubber stamp set.
I hope you like my designs as much as I enjoyed making them and they've inspired, thank you for taking the time to visit and comment, please pop back each day to see what my wonderful teamies have created with these gorgeous stamps, have a great day xx Zoe xx
Saturday, 5 December 2015
New Lattice Stamps (by Debbie)
Friday, 4 December 2015
At The Haberdashery (by Julie)
Thursday, 3 December 2015
2 or 3 little things
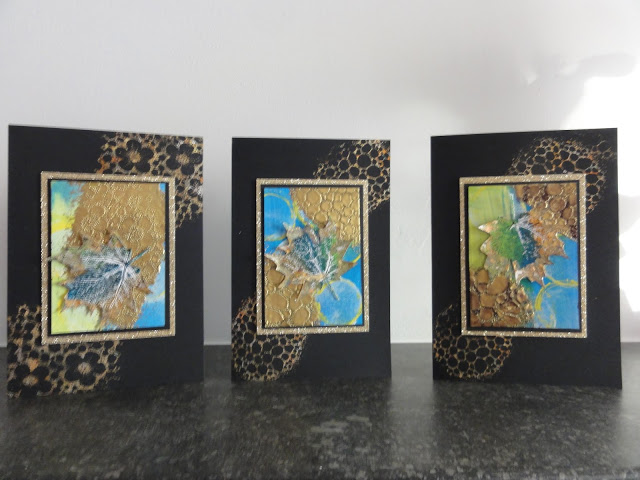
It is unsual for French people to send cards for Christmas. The tradition is for the new year. So these cards are examples of what I realized for 2016. "Meilleurs vœux" is "All my best wishes".
Ce n'est pas habituel pour les français d'envoyer des cartes pour Noël. Traditionnellement c'est réservé à la Nouvelle Année. Voici quelques exemples de celles que j'ai faites pour 2016.
Wednesday, 2 December 2015
The Chocolate Baroque Reader's Gallery- it's your turn to shine!
So it's over to you for a look at the projects that we found during November:
These first few projects were found on the Chocolate Baroque Facebook Group, and there have been some fabulous creations this month:
A stunning entry from the Chocolate Baroque Challenge Blog:
Spotted around Blogland:
Finally, a couple of photos from the Chocolate Baroque Postcard swap. This takes place every month on the Chocolate Baroque Ning Group, and the participants create some lovely artwork, which is swapped amongst them.
Here are Mickie Sutcliffe's swaps:
and Jean Straw's swaps:
We hope that you have enjoyed this month's selection, and have been inspired by the beatiful artwork. If you do not have a blog, or have access to the Facebook Group, we would be delighted if you could send good quality photographs of your artwork to Lesley to sales@chocolatebaroque.com and we can then upload them to the gallery for you. Please do not be shy, as it would be lovely to share more of your fabulous artwork with everyone.
Tuesday, 1 December 2015
Dutch Scene Card using Country Views and Sunburst Scenes (by Anne)
- Country Views and Sunburst Scenes stamp sets
- White card blank 20.5cm square, white stamping card, blue and white pearlescent card
- Copy paper to create masks
- Distress Inkpad (Chipped Sapphire)
- Fine marker pen and alcohol ink marker (dark blue)
- Adhesive
How to make it:
- Cut a decorative mat approx. 18cm diameter and back with blue card. Cut small corner elements in blue card. Cut circular topper approx. 13.5cm diameter from stamping card (to fit onto decorative mat).
- Stamp the scene using Distress Ink. Use masks to cover the foreground images while stamping the ones behind in the background. Complete the scene using the fine blue pen.
- Colour the image by putting Distress Ink onto a tile or palette and picking up ink with a wet brush.
- Outline the edges of the topper with blue alcohol ink.
- Glue decorative mat, corners and topper onto the card blank.
Blog Comment Winner November
Good luck from the Design Team!
Sunday, 29 November 2015
Double Flower Power (by Asha)
- Start by stamping one flowerhead in the top right hand corner in the front of the card base and another in the top left hand corner inside the card.
- Trim the around the flowerheads so that they stick out of the top and side edges.
- Colour the flowerheads. I used Faber-Castell Polychromos.
- Start at the edges and continue to blend the Distress Inks inward. Stopping short of the flowerheads creates a halo effect.
- Stamp a greeting from Birthday Words A5 sheet and fill the rest of the card with leaves from Autumn Poppy A5 sheet.
- For a final flourish, little droplets of Liquid Pearl and a few strokes of Clear Wink of Stella pen on the petals.
This is the inside of the card. As with the card front, I inked the inside edges with Distress Inks too.
So there you have it - a floral one layer card, perfect for mailing. I hope you'll give it a try. Details on tools and products used above are available on my blog. Don't forget to stop by for more fabulous makes by my team mates.
Thank you for stopping by today and have a crafty weekend!
Beijinhos,
Asha
Saturday, 28 November 2015
Christmas Flower (posted by Judith)
I created my background by covering a gelli plate with turquoise ink, using a brayer. I used a piece of white card to take a print from the gelli plate. This is a really quick way of colouring a piece of card if you want a single colour. Once the card was dry, I stamped and embossed a harlequin design from the Harlequin Fragments stamp set onto the background, using gold embossing powder. I added some droplets of red ink over the rest of the background, and a little bit of gold shimmer, using a gold pen.
I stamped and embossed the flower onto red vellum twice, using gold embossing powder, and cut it out. I added a leafy die cut, and dark green matting to complete my card.
Thanks for stopping by, Judith xx
Friday, 27 November 2015
Brusho Swirl Flowerhead (by Veronica)
Hi everyone, today I have two more cards using the Swirl Centre Flowerhead cling mounted stamp and brusho powders.