Pin It button on image hover

Thursday, 11 December 2014

Brusho under the Sea! (posted by Maria)

Hello everybody ,

I hope you are doing well, and I hope you can enjoy your card making during these busy days!
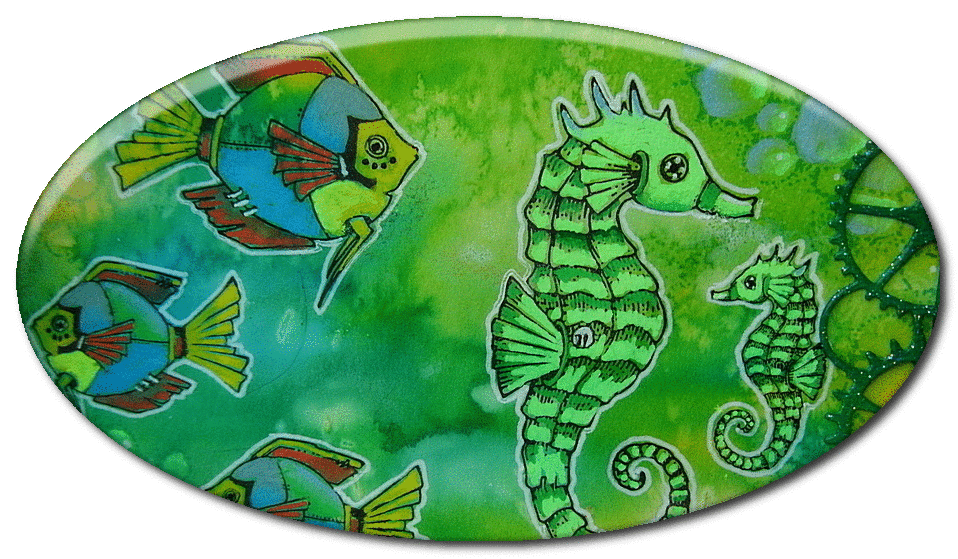
I have made some more underwater world samples with the gorgeous Steampunk Funk Fish and Steampunk Sea World stamp sets for you , and I really hope you like them. Today have I used some Brusho, such a fun, and very easy product, these cards are really made in 10 minutes, so if you don't have a lot of time, use Brusho!


I coloured the creatures with some Brusho too, and  for the golden accents I used a Wink of Stella glitter marker in gold. The golden circles I made with some golden acrylic paint and the cover of an embossing powder box! The small golden border I made with some Versamark and golden embossing powder.
I really had a lot of fun with these stamp sets and Brusho, I hope you do too!

Hugs,
Maria

Wednesday, 10 December 2014

The Beautiful Briny Sea (posted by Lesley)

For my first post using the gorgeous new Steampunk marine themed stamps I wanted to create the illusion of sea foam and bubbles and a great way of doing this is to use Acrylic Wax. This product is manufactured by the company that created Brusho. It is a white fluid that dries clear and is water and heat resistent and was actually developed to use with fabrics, but I have been putting it through it's paces with paper and cardstock.

This is a slightly longer post than normal as I want to explain how you can achieve this technique.

  • Squeeze out a small amount of Acrylic Wax onto a piece of scrunched up kitchen roll and randomly dab across a blank cardstock tag. To try and achieve the sea foam effect I dabbed across the tag in four places, applying more or less wax as I went. TIP: Make sure you don't cover the entire tag or you will not be able to apply any colour. Set aside to dry thoroughly. Depending on how thickly you have applied the wax this can take up to an hour. You know when it is ready because you should be able to rub your finger over the surface without it feeling tacky.
  • Next apply the colour using either brushes, sponges or Cut 'n' Dry Foam. I used Distress inks in Mustard Seed, for the sand, Peacock Feather in the middle and finished at the top with Broken China. Allow the ink to dry and then buff the whole tag with kitchen roll. 
  • Because the wax acts as a resist it sealed in the plain colour of the tag underneath and only taken on the distress inks where there was no wax. For a more subtle, distressed, worn looking background apply a much thinner layer of wax, using a stroking rather than dabbing action.
  • The seahorses are from Steampunk Funky Fish and they were stamped onto self adhesive labels using a Memento inkpad, coloured with alcohol markers and then finished off with coloured pencils. 
  • To add interest to the bottom of the sea I stamped the coral edge stamp from Seaside Dreams using Archival ink in Orange Blossom. To get the faded appearance of the image I did second generation stamping i.e. stamped it first onto copier paper and then onto the tag.
  • Finally the seahorses were cut out, stuck into place and a jumbo brad was attached at the top of the tag to finish.
I hope you get the feeling of bobbing along on the bottom of the beautiful briny sea (a line from the song in the film Bedknobs and Broomsticks) and that you may be inspired to play with the Acrylic Wax.

Thanks for stopping by and watch out for more delicious creations from the girls.


Tuesday, 9 December 2014

Steampunk Jellyfish with Texture (by Shirley)

Hello everyone, I hope you are enjoying the festive season, it's hard to believe that we are into early December already.

I hope you are enjoying the designs by my teammates featuring the amazing & quirky Steampunk stamp sets, Steampunk Seaworld and Steampunk Funky Fish.  I especially love the Jellyfish!  I used stamps from both sets for my design below.


I had a lot of fun creating the background for this mixed media piece, I did not have a plan.   I started with Distress paints and then added a sand texture gel and a thin layer of crackle paste here & there.   I used a little mica powder over the sand texture and spritzed with water.  When dry I added Viva Crystal Gel (hologram) over the sandy areas.

I stamped the images with Cobalt Archival ink and coloured with Prisma pencils.  I used a metallic gold Gellyroll pen to highlight the cogs.


Thanks for your visit and have a great day,
Shirleyx

Monday, 8 December 2014

Steampunk Jellyfish posted by Claire

Good morning, Claire here with a bookmark made using the fabulous jellyfish stamp from Steampunk Funky Fish. When I first saw this stamp, the tentacles reminded me of a tassel so I put my thinking cap on and came up with the idea of a book mark.


The background was from my pile of inky papers, made with distress inks in Broken China, Chipped Sapphire, Mowed Lawn and sprized with mica spray. I covered the wet inky background with cling film and left to dry, unfortunately you can't see the mica in the photos.

I stamped the Jellyfish with Memento Tuxedo Blank ink and added some stencilling with sequin waste and Chipped Sapphire distress ink. 


To add a bit more interest I had a rummage in my craft room and found some Fantasy Film so I dusted of my iron and created the 'umbrellas' of both Jellyfish and attached them with some glue.

To finish off I inked around the edge with more Chipped Sapphire and of course I had to add a tassel.

I hope you're having fun with these new stamps, they are a lovely change from Christmas crafting
Claire xx

Sunday, 7 December 2014

Steampunk Sea World and Steampunk Funky Fish Tags By Florence

Hi everyone

I hope you are all enjoying the weekend.

I can't tell you how excited I am about the new Steampunk Stamps!  They are amazing!

Like many of you, I am a huge fan of the Chocolate Baroque's Steampunk Stamp Range so when I saw the new stamps I couldn't wait to get my hands on them and have a play.  You are going to love the new stamp sets.

Apart from how great the images are, one of the things that struck me straight away when I looked at the stamp sets is that there are TEN stamps on each A5 sheets.  How wonderful is that!

These are some tags I made using the new Steampunk Funky Fish and Steampunk Sea World Stamp Sets.

I hope you like them.


Tag 1


Tag 2


Tag 3


Tag 4

I made all of the tags in the same way by stamping the images (using Black Archival Ink onto white card stock) and masking them to build up the scenes.

I left the masks on my stamped images and colored the background with Distress Inks and stencils.

I then removed the masks from my stamped images and colored them with water color crayons.
I then gave my tags two to three coats of Mod Podge.

 Tip: Stamping and Masking.  Start by stamping the image that you wish to appear at the forefront of your scene first and then mask it. Then stamp the next image that you wish to appear directly behind the first image and then mask that one and continue stamping and masking until you have built up your scene.

Thank you for looking.

Happy Stamping
Florence x


Saturday, 6 December 2014

An Under the Sea Canvas (by Debbie)

I recently received a canvas as a gift from a friend and when the Steampunk Funk Fish and Sea world stamps arrived set to work immediately.
The canvas is 10cm by 30cm in size. I've recently fallen in love with working on canvas so it was great fun to play.


I started with stamping onto scraps of card that were coloured with Brusho inks and Distress spray colours. For the background I used gesso, stencils with paste, ink sprays, paints, cogs and watch faces found at a flee market. The fishes and ship wreck were attached and a leaf sprig for dimension.
 
Many thanks for visiting
Debbie 

Friday, 5 December 2014

A Trio of Tags

Hello to you all, I am  back sharing samples made from the new stamps that have just been released for December

I have made a trio of tags using various mediums

This has been made using some distress inks as the background and simply stamped the images using black Archival ink


This has blue and white acrylic paint brushed on for the background, again I stamped the image with black Archival ink and coloured in with water colur pencils I used a white gelly pen for the sails to make them stand out more.

Distress inks and a stencil for the bacground ,I stamped the images with black Archival ink and again coloured with pencils. I used the white gelly pen again for highlights.
Each one of these took less than ten minutes to make.

Thursday, 4 December 2014

Quick and Easy Christmas Cards (by Asha)

Good morning, friends! You've seen the December release stamps and must agree that they are delightful. I'm sure you are having great fun with them.

However, with the deadline to post Christmas cards fast approaching, I've got a few quick and easy festive cards to show you for those last minute makes. So join me as we flip through Chocolate Baroque's holiday archives and ink up stamps from Christmases past.

*********************

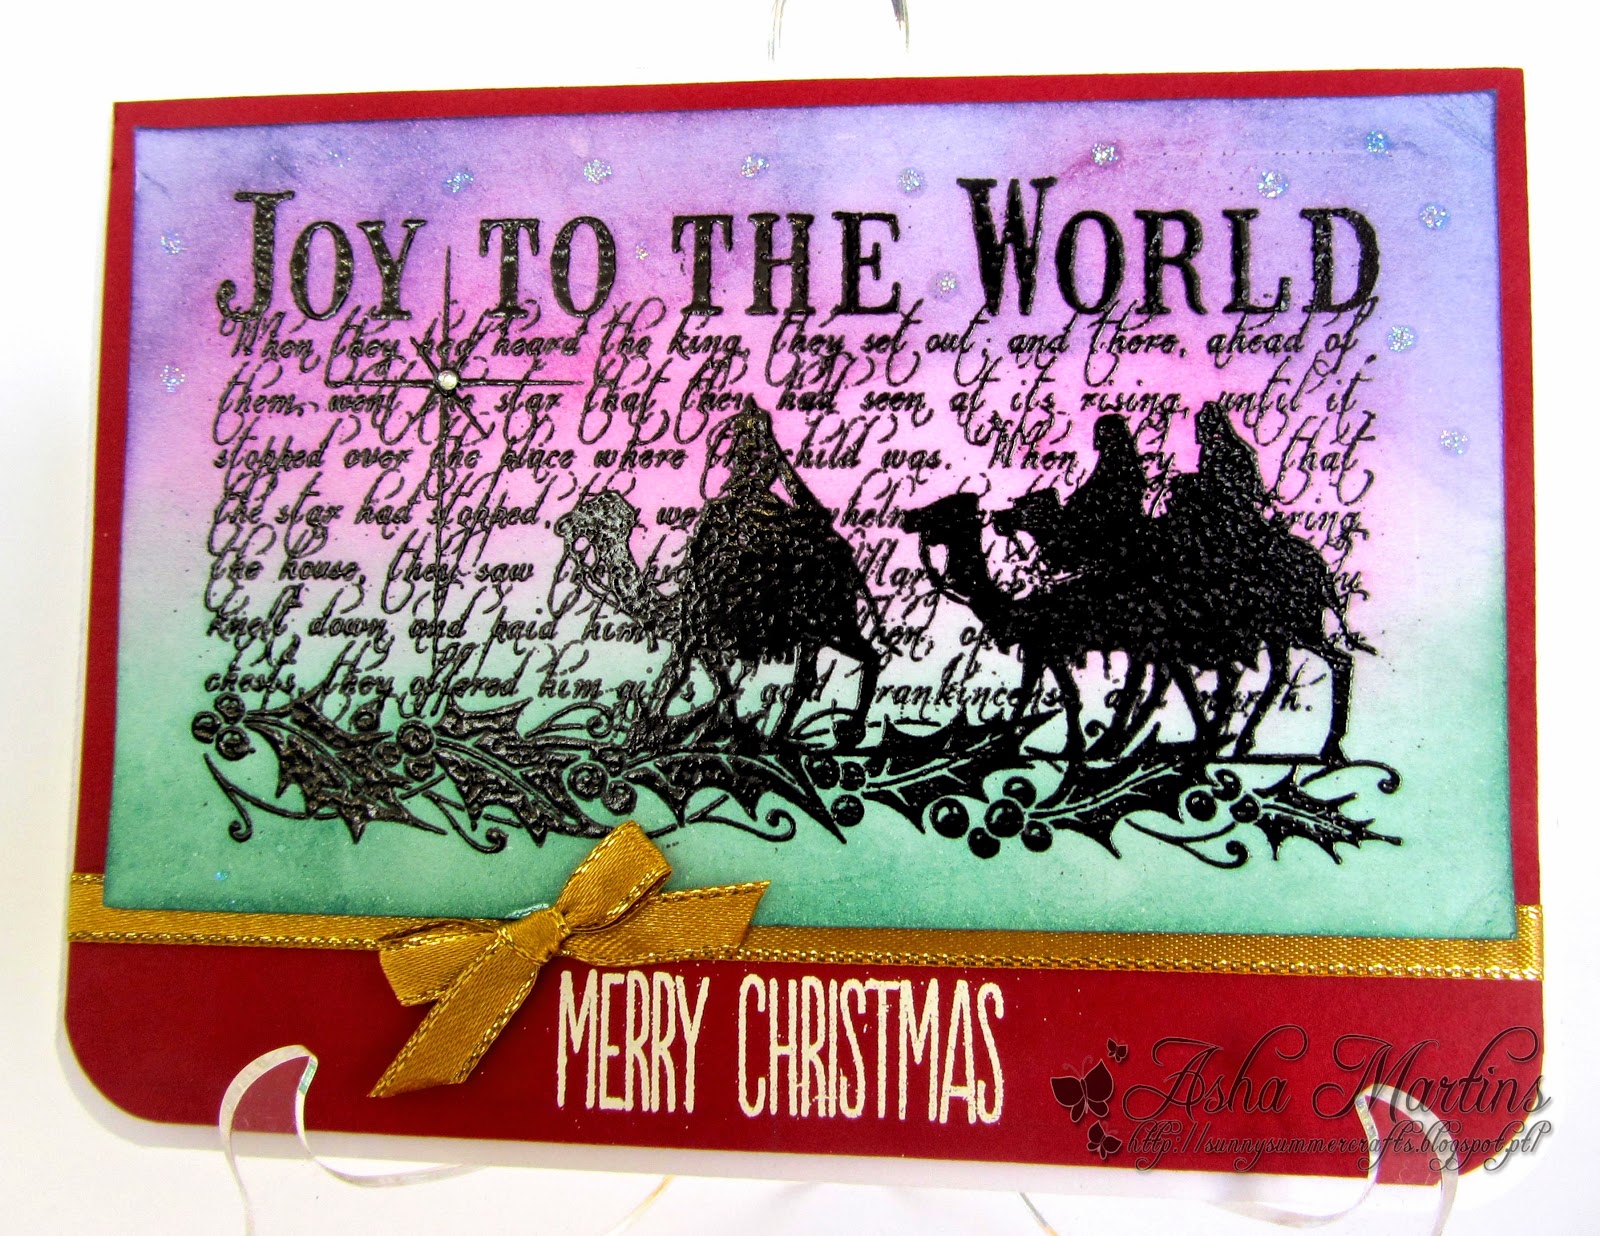
First up is this colourful number showcasing an intricate image from the Peace On Earth A5 sheet released in September 2011. After heat embossing it in black, I blended Distress Inks for the background and added Stickles for some starry sparkle. The greeting is from the Warm Christmas Greetings clear sheet, heat embossed in white.


Next up is a super simple card, perfect for mass producing. This time I'm playing with the Pears and Baubles A4 sheet released in 2012.  The bauble is stamped in VersaFine Satin Red, fussy cut and adhered to the dry embossed the background. I dressed the bauble with Liquid Pearls and Stickles. The greeting is from the same sheet.


Our trip down memory lane ends with this enchanting A4 set called The Gift Of Christmas which was released in August 2012. It also happens to be my personal favourite and my very first set from Chocolate Baroque. The silhouette of the cat and dog looking up at the tree sums up Christmas at our home. I've kept it simple by heat embossing the image in black, lightly inking the background with Antique Linen and the tree with Distress Inks in shades of green. To finish I dressed, the tree with Liquid Pearls and Stickles, added a gold star and a red bow. The greeting is from A Child Is Born A4 sheet and the snowflakes are from Holly Bells A5 sheet.


There you have it - 3 surprisingly quick cards made extra special with embossing, Distress Inks and a little sparkle ... couldn't be simpler! I hope you'll some useful ideas from these for your own Christmas projects. Details of tools and products are available on my Blog.

In the meantime, the rest of the girls are having fun with punky sea creatures. Do drop in regularly to see what they've been up to.

Beijinhos,
Asha  

Wednesday, 3 December 2014

Tangled up under the Sea (posted by Judith)

Hello everyone, I have had great fun playing with the new stamps recently released from Chocolate Baroque and have a project with a difference to show you today.

I have incorporated a bit of Zentangle with the Steampunk Funk Fish and Steampunk Sea World stamp sets. I started my card by stamping the scenery section onto the bottom left hand corner of the background, and then adding the bubble machine. I joined them together with some hand drawn lines using a permanent black pen, and created a sandy floor. I drew some plants using various tangles, and then stamped some jellyfish, seahorses and more bubbles. I coloured everything with a mixture of watercolour pencils, blending with water brushes.I added detail on the metallic areas with a gold pen and a charcoal glitter pen. Finally, I added Glossy Accents to the bubbles.
 This was such a relaxing project to create, as tangling is very calming, and you can add as much or as little as you like to create a scene. For more details on my project, just hop over to My Blog. Keep checking back for lots more colourful inspiration from my Design Team mates over the coming month, Judith xx

Tuesday, 2 December 2014

Imagine the steampunk underwater world.......by Miranda


Hi there,

Today I want to take you on a underwater tour where you can spot the very special steampunk fish........they have that special vibe.......lots of gears and a different shape of card......
I've used both of the new steampunk sheets; Steampunk Sea world and Steampunk Funky fish, you can have a nice shortage when you buy them together........(multi buy)

Well, up to the card now......
and some close-ups to have a better look on details.....

I've embossed the gears with Wow neutral ultra shimmer embossing powder which creates a lovely sparkly effect......


I've coloured the fish with an acrylic based marker and some white accents on the contour...
In the background you can see the Texture fragments, still one of my favorite sheets along with all the  other texture and fragment sheets.....they are so versatile! O yep I forgot to mention that I've used one of the older steampunk stamps too at one of the left panels, they are from the Steampunk flowers. Can you imagine all the possibilities with all these steampunk sheets..........


Well, I hope you enjoyed this tour underwater as much as I did creating it, everyday you will see and enjoy the inspiring creations here of all the DT ladies....so keep watching!

Till next time and thanks for visiting,


November's Blog Comments Winner!

Hello everyone, I hope you are doing well.

Once again we would like to thank you all for your visits here at the Design Team blog.  We truly appreciate the time you take to let us know your thoughts about our designs.  

Each comment in November was assigned a number and we used Random Org to draw a winner.  Congratulations to Coco  you have won a £15.00 voucher to spend on Chocolate Baroque stamps!  Please send a quick email here to confirm your email address and Lesley will send you your gift certificate.

Lesley will be giving a £15 gift voucher to another lucky winner drawn from December's comments. The more comments you leave the better your chances to win!   We hope you enjoy our designs using the new Steampunk Sea World and Funky Fish stamps.

Thank you for your kind words and comments,
Good luck from the Design Team!

Monday, 1 December 2014

Under the sea! (posted by Maria)


 Ahoy!

Hello everyone, as you can see these stamps were really made for me! I love them, they are really fun to play with. Your imagination can take over now, nothing to think about, just go with the flow, and create a fantastic underwater world, just enjoy!
These three samples are made with my precious dylusions. I took some white smooth paper, made it wet by spraying with some water, and took the colours of the sea (from my imagination!). I held the paper straight up, so that the colours could flow and make their own design, it was fun to do and to see how beautiful my papers became.
Then I took the beautiful new stamps sets from the Chocolate Baroque Steampunk Funk Fish and Steampunk Sea World stamp sets and started to make my own seaworld! I also took some stamps from the Punky Flower stamp set. For the bubbles and lights I used some glossy accents. The fish and creatures I stamped on a paper that was already coloured with dylusions, cut them out and with some 3D foam I placed them in place. For the gold and silver colours I've used Wink of Stella glitter marker gold and silver.
I hope you like these gorgeous stamps, they really are fun to play with. I really enjoyed making projects with these stamp sets, and I hope you do too!
Have a wonderful day, and enjoy!

Maria

Sunday, 30 November 2014

Artichokes and Diamonds (posted by Lesley)

This tag started out as a three colour challenge set for me by Glenda when I was up visiting her in Scotland..She picked three colours of Distress inks for me - Seedless Preserves, Crushed Olive and Peeled Paint and I used these to colour the background on the tag. It was then left lying around for a couple of days because, although I loved the colour combination, I didn't know where I wanted to go next.
Eventually I decided to use the artichoke image from the Mellow Fruitfulness set. I stamped it onto a self-adhesive label and painted it using the same three Distress ink colours used to colour the tag.. I added some texture with soft relief paste (watch out for this product coming to the website soon) and the Blazonry stencil, then stamped over the top with a script stamp from Eccentric Edwardian
Next I randomly stamped the image from Harlequin Fragments, and stamped the stamens of the artichoke using white paint. I cut out the artichoke images and split them up before sticking into place. Just a few scraps of toning ribbon finished it off.
Sometimes it's good to walk away from a project rather than just keep going because you feel you have to finish something.  If you give yourself some space you return to it with fresh eyes and often a sudden influx of inspiration. 

Thanks for joining me today and keep tuning in for some gorgeous creations from the girls with the fabulous new steampunk stamps.


Saturday, 29 November 2014

Autumn Edges in Cool Colours (by Shirley)

Hello everyone, I hope you are doing well.    Time is flying as here we are at the end of November already.

I have a design to show today using the new fabulous Autumn Edges stamp set.  As we are getting to the end of Fall Season and the hot colours have left, I've used cool colours for this card. 


The center background was created with Dylusion Spray inks -  I spritz water after spraying the inks, added a little sea salt and let it dry (which creates the watermarks if you are not familiar with this easy technique). 

I shook the salt off and then stamped the Owl from November Fairy and part of the leaf edge to the top and bottom with Cobalt Archival ink.    Using a little bleach and brush (do not use synthetic brushes with bleach) I removed the colour inside the leaves and around the owl.  This technique gives a bit of a batik look.  I added a little colour back onto the leaves using Distress Inks on my craft mat with a brush and water.

The light blue background is coloured cardstock.  I stamped part of the tree and solid leaf edge with Cobalt Archival ink.   The leaf die cuts were coloured with Distress Inks after embossing the back with a stylus.

Thanks for your visit and have a great day,
Shirleyx

Friday, 28 November 2014

A couple of Autumn projects (posted by Claire)

Good morning, Claire here with a couple of quick projects. This time of year is so hectic there isn't always time for elaborate projects. The first is a card made using Autumn Edges. I'm really trying to come up with some fairly flat designs that can be posted cheaply, hopefully this one will fit the bill.


I'd seen a few images around blogland that had been stamped and embossed with white before being coloured and decided to give this technique a try. I coloured the mushrooms with Graph'It markers and then crated a background with PanPastels. The fairy is from the August Fairy set, again stamped with versamark and embossed with white embossing powder. The sentiment is from Fairyland words, this time I stamped with a Memento inkpad in Teal Zeal.

For my second project I've covered a little notebook to be used for jotting down recipes. I began by cutting a strip of red card slighly wider than the book. Using the book as a guide I scored the card to create a spine and left about an inch of card to overlap the back of the book.


Next I cut white card slightly smaller and stamped the images and 'Recipes' from Mellow Fruitfulness in Memento Tuxedo black ink. I coloured the images with my Graph'It markers and distressed the edges with Tumbled Glass Distress Ink

Hope you like these two quick projects, we're all getting in the mood for some steampunk fun with the gorgeous new stamps! See you soon
Claire xx

Thursday, 27 November 2014

Steampunk dives under the sea with our brand new stamp releases

Today we are launching two new A5 additions to our Steampunk themed range. If anyone has read Jules Verne's classic 20,000 Leagues under the Sea I am sure you will agree with me that the images of these marine creature could easily be from the pages of that book.  Sue has really let her imagination loose here and has designed some wonderfully quirky, fun stamps.

The first, which is our Stamp of the Month, is Steampunk Funky Fish

swiftly follwed by Steampunk Sea World

Of course you can purchase these as our usual money saving multi-buy

These new releases mix very well with our other sea related stamp sets so that you can create your own underwater scenes.  The Design Team girls have some dazzling creations waiting in the watery wings, here are a couple to get your creative juices working.

This colourful tag is from Florence, don't you just love those cute shrimps out for an afternoon swim!


And this tag by Doreen really captures the essence of the fantasy ship. I'm sure Captain Nemo would be proud to sail that!.


This is just a small selection of the brillliant inspiration you can expect to see during December. Remember to visit every day to make sure you don't miss anything and if you find time to comment too that would be excellent. It could be your name drawn at the end of the month for our £15 gift voucher. Enjoy


Tuesday, 25 November 2014

Mellow Fruitfulness - Stampbord By Florence

Hi everyone


Today I would like to share with you two project I have made using the fabulous Mellow Fruitfulness Stamp Set.

For my first project I have used a piece of Stampbord to make a fridge magnet.


Stampbord is such a wonderful medium to stamp onto.  There are different sizes available on the Chocolate Baroque Web Site.

I colored my Stampbord with Distress Inks using a piece of Cut-n-Dry foam and left it to dry.  

I stamped my image using Archival Ink.

I then scratched off some of the ink to reveal the white chalky surface of the Stampbord to create some high lights.

I attached a small magnet to the reverse of the board.

For my second project I have used the same artichoke stamp from the set to make a card.


I used one of my own backing papers for this card and just stamped the image directly onto the printed paper using Archival Ink.  

There are lots of pretty papers available on the Web Site in this section here.

I colored the image using water color crayons and blended the colors with a damp paint brush.

I used a die to cut out the ornate edges (fancy edged scissors will create the same effect) and stamped the wording onto them using Archival Ink

I then made up the card as seen. 


If you haven't already, do check out all of the amazing projects made by the DT.  You are in for a real treat.

Take care everyone
Happy Stamping.

Florence x


Monday, 24 November 2014

Fruity Recipe Book by (Debbie)

 My post today has a few photographs as I wanted to show the inside of the
Recipe book I've made.
The front cover is made with A4 white card and I ran it through the embossing machine in an A4 embossing folder.
I cut the card to A5 size and coloured with Vintage Photo Distress ink, a few sprays of water and when dry rubbed a little gold polish. The label was stamped with black ink and embossed with clear powder. I water coloured with distress inks.


For the inside pages I use Microsoft Publisher, drawing lines leaving the top of the page blank to be able to stamp in the space.
The stamping of the fruit inside was done like the front panel.
The edges of the pages were distressed with the vintage photo.


There are ten pages in the book for a few of my favourite recipes that I hunt through my various books for. It will contain chutney, cake, jam and scone recipes.


I bound the book with my Bind it all so in the future can take it to pieces and add more pages.

 
Many thanks for stopping by
Debbie