Pin It button on image hover

Thursday, 22 November 2018

Summer Butterflies (by Julie)

Hello, today I have two more cards with a butterfly theme.


My first card is stamped with Thistle Butterfly The background of this card is created with Distress inks applied with baby wipes. Just simply dab your chosen distress ink onto a fresh baby wipe and wipe in the direction you want the ink to go. In this case just apply your wipe in straight lines from top to bottom.
Once your background is dry ink up your curved leaf design with a light green dye ink and stamp in the centre to create a circle. If you start with your lightest colour and then work up to your darker colour so any overlapping doesn't look messy.
Stamp your butterflies onto spare card. Colour with Distress ink, cut out and attach to your card front with 3d foam pads.
The sentiment is from Paisley Elephant.


My second card is stamped with Harebell Butterfly From each corner I have stamped the single stalk flower with a purple dye ink, so it makes a sort of L shape, backwards or forwards depending on what side you are looking. I then filled the gap between the flower heads with a little lilac butterfly.
I then went over the background with Antique Linen Distress ink. On separate stamp card I stamped the grasses and flowers, coloured with pencils and Distress inks, inked the edges with a purple dye ink and attached to the centre of the card. The card was finished off with crystal, flat backed gems and a stamped butterfly.

Thank you for taking a peek and please call back for daily Design Team inspiration.

Julie xx

Wednesday, 21 November 2018

Fun with lift ink and a journal (by Rachel)


Hello there! Rachel here with some more inspirtion for you from the shows in October. This time I have chosen to share my sample I made using alcohol ink and lift ink..I really enjoyed making this one as I love the concept of stamping in alcohol ink. And I really like the ghosting effect. 

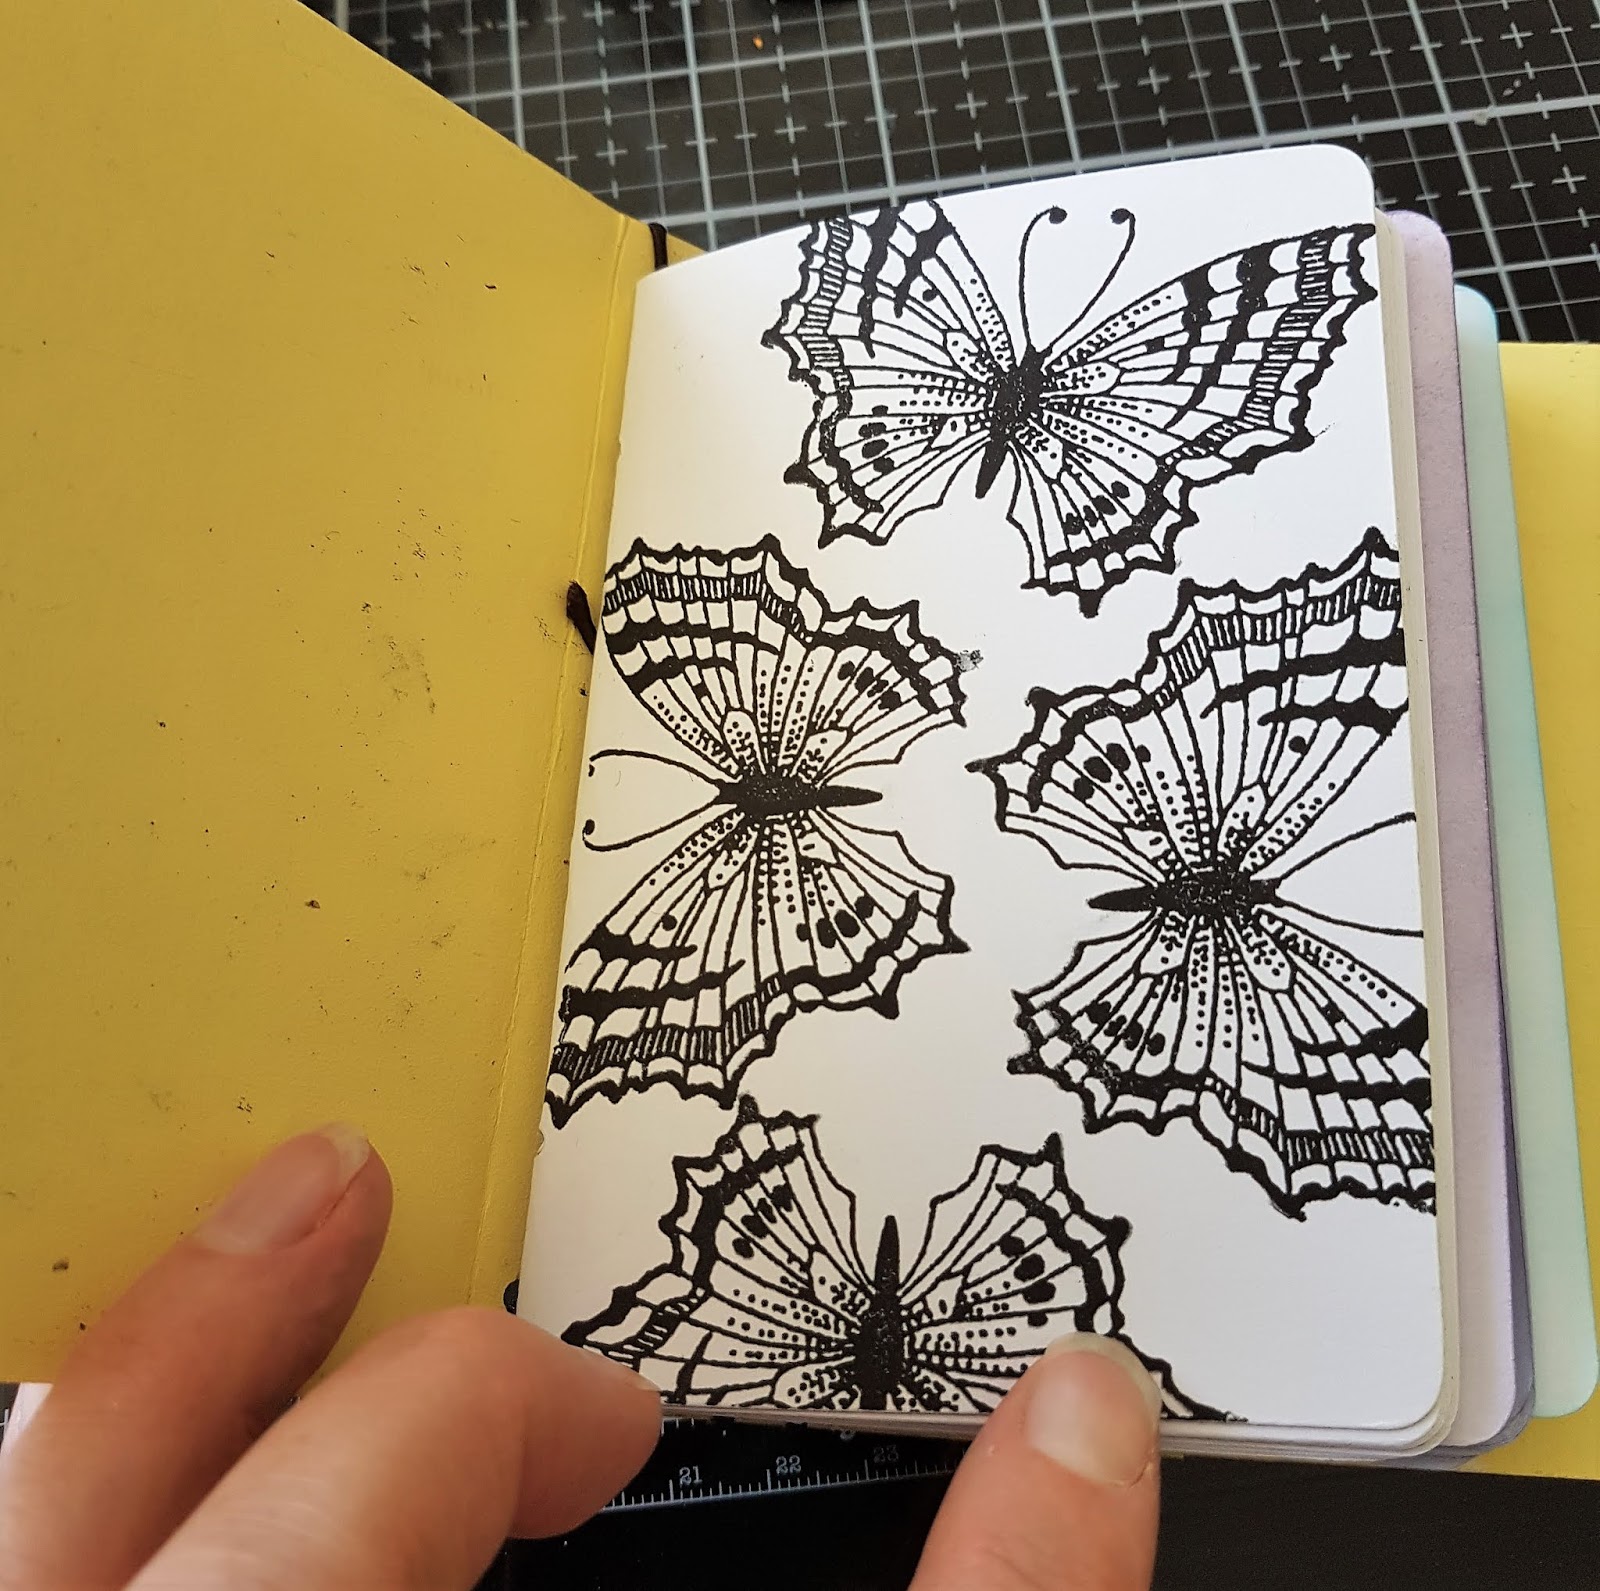
Secondly I wanted to share a journal I created and decorated using the Harebell Butterfly stamp set. 


This is the back of the journal where I did some repeat stamping and colouring with pencils.


This is another part of the journal where I added some more stamps from this set ...


This is the journal front cover all stamped and coloured...


I even added some stamping to the front of the signatures too. This was a watercolour signature I think! 

I hope this has given you more food for thought of ways to use your stamps!

Big hugs

Rachel xxx

Tuesday, 20 November 2018

Pocket Money cards (by Magda)

Hello, my second post for this month wants to inspire you to do some Pocket Money Cards.

I realized two projects that you can use for any opportunity changing the stamps. Chocolate Baroque has a lots of suitable stamps for you. and here below you will find what I used for my cards.

The sentiments of the plates  Let's get Festive and Words to Dazzle & Sparkle
Stamp  Fat Robin
The stencil   Seasonal Elements
White Cardstock    4 pieces:   17,5x14,5 - 15,5 x 10,5 - 11,0 x 6,5 - 7,0 x4,5 cm
Distress Ink Pad to blend and stenciled the background and mat
Versamark and Embossing Powder gold
Stickles glue
Peel off
White Embossing Paste


Thank you for passing by and don't miss the appointments of the Design Team
Magda

Monday, 19 November 2018

Papers and Paint (by Nikki K)

Hello everyone, Nikki K is sharing another sneak peek of those beautiful papers designed by Lesley, and the fabulous new stamps from this month's TV shows on Hochanda. The rest of the Design Team will be sharing their projects with you next month.

Nikki writes:

Morning all,

it's my second post for the Guest Design Team this month, and I've had so much fun with the new stamps! I'm sharing another card with you today using Movie Strip Collage.

 I started this card using the lovely background paper with script from Lesley's new collection of papers, adhered to a card base. The Movie Script Collage stamp was stamped in black ink and embossed clear, to give me an outline. I usually use clear embossing powder quickly over ink, it works well as an embossing ink in most cases, and doesn't leave an embossing powder colour showing where you don't want it. I cut the corners of the card, and shortened the fromt for added detail.

I used the 'tag hole' stamp from Tagtastic to add detail to a couple of corners, and coloured in the flower with acrylic paint in Pthalo Turquoise and Primary Magenta, matching the colours on the card, but just making the flower slightly darker to stand out. The movie strip was painted in a wash of Quinacridone Gold to give it a vintage hue.


I edged the front of the card with Quinacridone Gold, and then went round the card edges with black ink. I repeated the stamping of the film strip on the inside edge of the card, and coloured in a wash of the turquoise and Quin Gold paints.

This stamp is so versatile as you can use parts of it like I have on the inside edge of the card, or you could just use the flower, and fussy cut it and layer it up decoupage style. The papers take paint really well, and it doesn't sit on the surface or resist it, it hardly warped with wet paint on either. They also take inks and stamping really well.

Hope you like my card today, don't forget to check out my teamies' other blog posts.

Best Wishes,

Nikki K.
xxx


Sunday, 18 November 2018

Briar Rose (by Veronica)


for my second post this month i have variations using the briar rose stamp, and back to my favourite brusho powders - sorry!
The first is very simple, stamped with versamark and embossed in white before sprinkling the brusho is roughly appropriate places before spritzing with water.
Base card blank was randomly stamped with the roses using pale inks from an ancient set of mini ink pads, with the pink smudged round the edges.


for the second version the image was stmaped in grey versafine ink and coloured with watercolour pencils to get a misty effect. the butterflies were stmaped with black versafine onto scraps of spare brusho-ed card, cut out and glued over the original images.
i used a foliage image from honeysuckle butterfly to stamp randomly onto the base card in two shades of green ink to create the background.


My final card uses foliage stamps from both sets to create the wreath, very easy to do if you have a stamp press.Butterflies from both sets were stamped onto the wreatjh, then again onto spare card.
The spare inages were coloured with marker pens, the wings cut out and glued into place.
the sentiment is from loving sentiments

Saturday, 17 November 2018

Honeysuckle Tag by Penny

Hello peeps, I hope you're all warm and well today.  I have a pretty card to share with you, one of my samples from last month's tv shows.  This project uses stamps from the Honeysuckle Butterfly, Butterfly Daisy Collage and Briar Rose Butterfly sets, CB Luxury Smooth White Paper, and CB Drawing Cartridge.


I began this project by taking a piece of drawing cartridge and blended three colours of Distress Inks over it.  I then stamped several images randomly all over the panel.


I matted the background panel onto black card and attached it to a base card.


I die cut a tag and stamped the Honeysuckle image onto it, then coloured it with pens.  I used the Kaleidascope of Butterflies stencil to add a couple of butterflies, and I blended ink around the edges of the tag.  I added a bow at the top with some twine and attached the tag to the card.

Thank you for dropping in today, I hope that I've managed to inspire you to have some crafty fun yourselves! 


Take care until next time,


                                          xx Penny xx


Friday, 16 November 2018

Autumn Layout (by Gerrina)

Today sees the second post this month from our Guest Design Team member Gerrina. She has created a colourful scrapbook page for your inspiration.

Gerrina writes:

Hello, I am back again with a layout I made for the Guest Design Team here at Chocolate Baroque. You will find this one not only here, but also at my blog. This week the second one; a Layout with a memory walk in a Castle garden for my 30cms x 30cms photo book:


Used Materials:

Stamps: Autumn Poppy, Autumn Edges
Ink: Versafine Onyx Black, Distress Ink: Salty Ocean, Spiced Marmelade, Fired Brick, Twisted Citron, Peeled Paint, Vintage Photo, Spun Sugar, Victorian Velvet, and Worn Lipstick
Other: 30cms x 30cms Mixed Media paper (or cardstock), masking paper, blending tool, water brush, stamping paper, cork washi tape, string, photo, and black, green and turquoise cardstock.

Instructions:

Mat the photo on several pieces of coloured cardstock and lay aside. Stamp the mushrooms onto watercolour paper and colour them in with Distress Ink and a water brush. Cut them out. Mask a diagonal line with a strip of masking tape on the 30cms x 30cms piece of Mixed Media paper (or cardstock), and sponge the blue colour, a bit darker close to the line. Replace the making paper at the same diagonal angle for the other colours and repeat the spomging. Place and glue the rest as you like, just glue the mushrooms placing them a bit on top of each other to get some dimension.

Creatieve groetjes,


Gerrina


Thursday, 15 November 2018

Fifteen Minute Cards

Hello everyone, it's time for our mega monthly blog post, sharing speedy projects made in fifteen minutes or less by the Design Team as a whole. We aim to share lots of tips and ideas with you to create cards in a hurry, batch cards that are perfect for occasions like Christmas or Weddings, etc., and also cards that could be made for craft fairs or fundraisers as well. If you are a beginner stamper, we will share easy projects, but there will also be something for the more experienced crafter to get your creative juices flowing.

So, grab a cuppa, and enjoy this month's selection....

We are starting with some cards from Brenda this month, and for her first card, she has used sparkle pens to create the background, adding water to blend. She stamped the image with Versamark and heat embossed with white detail powder. She stamped the largest butterfly plus one other onto vellum, cut out and mounted them onto the background.

She used Distress Inks to create the background and stamped the image with Versafine black ink. She stamped the butterfly a second time onto vellum, cut it out and coloured with the same colour of water based markers. She highlighted the stems with a white marker pen.

She used some patterned paper, stamping the corners and butterflies with Versamark and adding copper embossing powder. She matted the panel onto copper mirri card.

She used Distress Inks through a mask, and with the mask still in place, stamped the flowers. She removed the mask and stamped the sentiment and added some gems.

She picked out some of the little worker stamps and using different coloured inks, created a background panel. She created a banner for the sentiment, and matted both pieces onto black card.

Distress Inks were used through a stencil before adding the main image and sentiment.

A card from Carole next. She stamped the words, and tore a mask to fit over the words. The image was stamped over the mask and the card was cut into an oval shape before inking the edges. Sunrays were stencilled in the top corner.


Zoe has created a very pretty card using embossing to act as a resist. She has added a Distress Ink background. She has stamped a sentiment onto a strip of vellum to finish.

Vronnie has used a common theme for her cards, but varied the colour and image. She has created a very pretty collection, but they are all different. These would make a lovely gift, but are very useful to have as cards to give at short notice.


Rachel's first card uses a mask to create an area to add an area of colour. She has then stamped the image and sentiment using black ink.

She stamped four butterflies on her card, rotating the card 90 degrees between each stamping. Next, she added Distress Ink through a butterfly stencil.


She coloured a piece of white card with Distress Inks before stamping the main image and adding a bit of colour to the image. She stamped the foliage using one of the background colours.

A quick watercolour card from Magda, giving a real sense of Autumn with the colours that she has used.

Her second card uses just one colour; she has stencilled the word Autumn repeatedly, stamped the sentiment several times and coloured the image with Walnut Stain Distress Ink.


Finally a couple of cards from me. I have used the same layout, but varied the colours and stamps. I masked the top and bottom of a white card blank, using strips of masking tissue, before adding Distress Ink. I stamped the foliage, and then stamped the butterflies onto sparkly acetate. I added coloured vellum behind the acetate, and adhered the butterflies to the card. A sentiment completes each card.


That concludes our projects for this month. We hope that you have enjoyed what we have shared with you, and we will bring you another selection next month. In the meantime, do keep visiting the blog for a daily dose of inspiration from our regular Design Team posts.

Thanks for stopping by,


Wednesday, 14 November 2018

Painting with Bleach (by Judith)

Hello everyone, I am back with another project to share with you showcasing the stamps that we brought to you on last month's TV shows on Hochanda. I wanted to revisit a technique that I love to use in conjunction with Distress Inks, painting with bleach, it works so well, and these stamps are a great way to show off the technique. I made a larger project a while back using the very same technique, and I will share a couple of photos of that project with you at the end of my post.

I started my project by creating two panels, one large and one smaller, shading them with Distress Inks in a rainbow panel. I started in the middle with yellow, and worked out using orange and red on one side, green, blue and purple on the other side. I made sure to blend the colours smoothly, going back over the joins where necessary with the previous colour. I matted both layers with black card, and turned them so that they were facing the opposite way to each other when I put them together.

I coloured some spare card with Distress Inks, and stamped a couple of flowers and a butterfly from the Butterfly Daisy Collage stamp set onto the card using Archival Jet Black ink. I painted parts of the image with neat household bleach and a fine brush. IMPORTANT: do make sure that you are working in a well ventilated area when you do this. I cut the images out, and stamped a foliage image onto the smaller background a couple of times using black ink. I curled the petals of the flowers and butterfly slightly before adhering them to the background. I added a sentiment from the Loving Sentiments stamp set.

As you will see, I was very much inspired by my previous project! This flag book uses lots of our other stamps, but incorporates stamps from other companies too. Lesley is a huge advocate of mixing and matching our stamp sets together, but encourages you to use your Chocolate Baroque stamps with your other stamps as well.


I used the same techniques throughout this book, Distress Ink backgrounds, stamping with Archival Ink, and painting with bleach. I have added a bit of stencilling here and there for added texture, and a few small embellishments. I hope that you will give this technique a try, it's a lot of fun, and depending on the colour of ink that you use, the results vary.

I will be back later in the month with more inspiration, thanks for stopping by,

Judith xx

Tuesday, 13 November 2018

It's All About Love (by Zoe)

Good morning Lovelies and welcome to my second post this month featuring these beautiful stamps. I have loved making samples with these stamp sets, so versatile!

I created this Eclipse card by cutting four sets of the letters and layering them after I had replaced the top layer to stamp and colour in with pencils, a very simple and effective techniqie, I think?

The second card is a fun technique I had seen on YouTube.
Using Yupo paper, you drop alcohol inks and blending solution and blow it around with a straw to spread it out. It dries fast, but some areas stay a bit sticky for a while, so at that stage I put some foil on and burnished it. When you lift the foil you get a random but stunning effect. I then used an inkpad to remove some of the ink with the lovely large corner flourish stamp in the top corner. Give it a minute or two to dry before buffing with a soft dry cloth to reveal the design. I used the same technique for the butterfly, using Archival Black Tuxedo inkpad.


The last three cards are gelli plate backgrounds using chalk paints.

Thank you so much for visiting, I love to hear what you think.
Have a wonderful day xx Zoe xx