Pin It button on image hover

Wednesday, 6 August 2014

Guest Post - A Colourful Trio by Gerrina Poncin

Our guest blogger this week is Gerrina Poncin who lives in the Netherlands. She has designed three beautiful cards for us so please enjoy.


I started by stamping the flower from Fantasy Meadow onto white paper with Versafine Sepia, then sponged it all with Shaded Lilac distress ink and coloured it with distress inks and a water brush. I glued it on a brown piece of cardstock and put some pearls on it. Then I made the background by sponging through two stencils from Crafter's Workshop with Picked Raspberry and Peacock Feathers distress ink, then sponged the whole thing with Antique Linen. Next I stamped the text from Artistic Affirmations with Versafine Sepia and put some clear embossing powder on it that I heat set with the heat tool. Last I stamped, with the same Sepia ink, just the flowers from the flower stamp I had used on the white piece.

I stamped the flowers from Spring Foliage and the quote from Artistic Affirmations with Versafine Onyx Black.  Then sponged with Salty Ocean, Wild Honey, Bundled Sage and Gathered Twigs distress inks. I colored the flowers with a water brush using Salty Ocean and Dusty Concord and used Scatterd Straw on the the twigs. With the empty cardboard tube from a kitchen paper towel roll and Versamark I stamped circles and heat set them with clear embossing powder. The other circles are with the same tube and Spiced Marmalade distress ink.


On this card I stamped the text from Artistic Affirmations and flowers from Fantasy Meadow with Versafine Black Onyx. Then took the round blending tool and used that as a stamp for the coloured circles with Salty Ocean, Squeezed Lemonade, Spiced Marmalade, Shabby Shutters and Barn Door distress inks. The same colours and some water were used with the water brush to make the splatters.


Creatieve groetjes,
Gerrina


Thank you so much for these colourful cards Gerrina, they really reflect a bright summer day. I hope you can leave a comment to show your appreciation and for more creative inspiration please visit Gerrina's blog, Gerrina's Creatieve Wereld



Tuesday, 5 August 2014

Thistle Butterflies (by Debbie)

My cards are made using the same stamp from the new Thistle Butterfly stamps set.
I love the size of this stamps and it fits beautifully on a 6 inch square card.
I spotted a few crafters have been using Brusho which I've used many times as a watercolour for backgrounds. I love the technique of dropping it onto pre wet card and watching the colour spread.


 I had a great afternoon playing  making many backgrounds and stamping over them.
For the first card I used turquoise and the colour split into blues, greens and yellows.
The second card colours are emerald green and ultramarine.


Different effects can be obtained by differing the amounts of water added.
 For the second I spritzed with water when the granules had been sprinkled for a
more watercolour effect.
 
Many thanks for stopping by
 
Debbie

Monday, 4 August 2014

Wishing You Love by Doreen

Hello to you all, I am sharing a sample made from the new stamps that have just been released for August . 

My card uses one of the stamps from the "Honeysuckle Butterfly" stamp sheet...


I have used Faded Jeans,Black Soot and Frayed Burlap for my background while masking off the moon,I then stamped my image twice with Black Versafine ink before painting in with Acrylics. Last of all I stamped my sentiment withCornflower Blue Archival ink.xxx

Sunday, 3 August 2014

Purple Honeysuckle and Butterflies (by Shirley)

Hello everyone,  I hope you are doing well.

I have a couple of designs today featuring the gorgeous new Honeysuckle Butterfly set.   I love these beautiful butterfly stamp sets, Chocolate Baroque's designer is mega talented :) 

This first card was a bit of an experiment.  I worked on it in a few stages, partly because I've been very busy and partly to let it dry between layers.   These are fantasy as I've never seen Honeysuckle this colour :)


I started by stamping the flower & butterfly image from Honeysuckle Butterfly with black Archival ink on mixed media paper and then dry embossed with the swirls.  Sorry but the embossing folder doesn't say which company it's from.     I used coral chalk ink to darken the embossing.

Next I sprayed with Purple and Midnight Dylusions inks.  After drying I painted here & there with white Gesso and finally I painted with Silks Acrylics over top.

I coloured the main image with Prisma pencils.   I stamped the image a second time on separate card stock, coloured and decoupaged the butterflies.  I embossed them on the back with a stylus for dimension and added stickles.   I also added lots of clear rhinestones on the background as you can see.

Next I have similar colours again using Dylusions inks but I did not add acyclic paints.


I stamped the daisy image from Honeysuckle Butterfly.  I coloured it with Prisma Pencils.   The background is Midnight and White Dylusions inks.  I stamped the thistle (which I coloured with Prisma pencils) and flourish from the same set in the the background.   I stamped, coloured and decoupaged two butterflies from the set to pop up onto the card.  Die set used:  Spellbinder Opulent Ovals.

If you've missed the previous post from today, the blog comments winner was announced :) 

We hope you come back often as my talented team mates have lots of beauties to show you again this month!  Thanks for your visit and have a great day,

Shirley

July's Blog Comments Winner!

Hello everyone, we would like to thank you for your visits here at the Design Team blog.   We love working with Chocolate Baroque's gorgeous stamps and appreciate the time you take to let us know your thoughts about our designs.  

Each comment in July was assigned a number and we used Random Org to draw a winner.  Congratulations to Jackie of Jackies Crafts you have won a £20.00 voucher to spend on Chocolate Baroque stamps!    Please send a quick email here to confirm your email address and Lesley will send you your gift certificate.

Lesley will be giving a £15 gift voucher to another lucky winner drawn from August's comments   The more comments you leave the better your chances to win !   

The prize has been slightly reduced but now you have twice as many opportunities to win a gift voucher if you enter into the Chocolate Baroque Colour Challenge each month as well.  We welcome you to join in the fun, please visit our Challenge Blog for all the information.

Thank you for your kind words and comments,
Good luck from the Design Team!

Saturday, 2 August 2014

Having a little flutter (by Asha)

Good morning, fellow Chocoholics! Today is my turn to show you a project featuring the new and delightfully luscious Honeysuckle Butterfly. I'm using the same image showcased by Judith is yesterday's post BUT this time the end result is anything but similar. Don't you just LOVE the versatility of these images?  

I'm playing with 2 contrasting colours - blue and orange - for a dramatic effect. My inspiration came from an ancient oriental embroidered scarf I saw at a museum recently. With minimal distractions, this card is all about that gorgeous image. For background stamping, I used the tiny leafy stalk which looks like bamboo shoots.


Here's a closer look at the image. I coloured it with Graph'It markers. For a warm glow I sponged the edges with Distress Inks. (A full description of the colours used is available on my blog.)


Thank you for stopping by today. Make sure you drop in regularly to see more inspirational work from the rest of the Design Team. You don't want to miss anything - trust me!

Beijinhos,
Asha

Friday, 1 August 2014

Honeysuckle Hues (posted by Judith)

Hi Folks, I have a project to show you today using the Thistle Butterfly/Honeysuckle Butterfly Multibuy stamp sets. These new sets are a lovely addition to the range of floral butterfly stamps, and great for mixing and matching with older stamps in the range, or using by themselves.

For my project, I covered a canvas with vintage music paper, and then painted it with various shades of acrylic paint in greens and blues. I stamped the flourish from the set around the edges in teal and burnt orange ink to create a border. This is such a lovely stamp. I stamped the honeysuckle image onto the background, and again onto some white card. I coloured the image on the card with pencils before cutting it out and adding it to the canvas.

I coloured some scrap card using Distress Inks in shades of blue and orange. I stamped some letters from the Newsprint Alphabet onto the card to spell the word 'Fleur', before cutting them out. I distressed and inked the edges of the little panels, and added these to my canvas.


Keep checking back for lots of lovely samples from my Team mates over the coming month. Judith xx

Thursday, 31 July 2014

Have a butterfly ball with our August Stamps of the Month

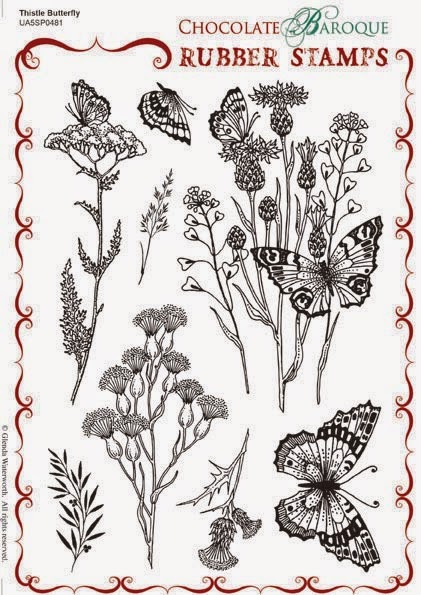
Well here we are at the end of July ready to launch brand new stamps for August and this month we have two gorgeous A5 sets. First there is Thistle Butterfly


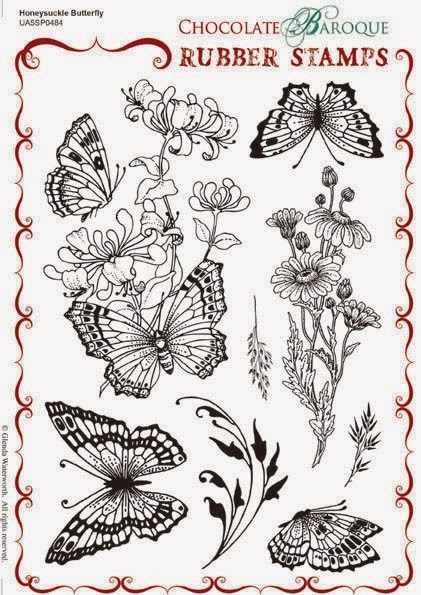
then we have Honeysuckle Butterfly,

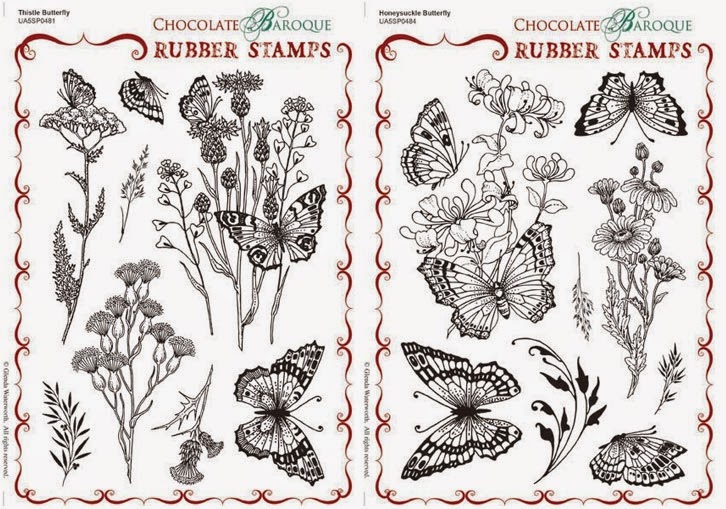
and, of course, our usual money saving multi-buy.


Both sets are packed with stunning botanical images and fluttery butterflies and will have you grabbing your inkpads and colouring mediums in an instant. Those keen eyed stampers amongst you will notice that these are a wonderful complement to our Briar Rose and Harebell Butterfly stamps. So don't forget to visit this blog regularly as I know you will be blown away by the wonderful samples that the Design Team girls have come up with. And here is some beautiful artwork from Glenda using the Honeysuckle Butterfly


 Aren't those colours dreamy?

We are also releasing two individual clear stamps today. Snowy Cottage and Winter Church are available as singles or a multi-buy

These beautifully detailed stamps are a good size and could easily be the focal point on your Christmas cards, thus allowing quick and easy batch card making. You just need to add a sentiment from our Christmas Magic set and you're done. And the versatility of these stamps means that if you change colours you have images that can be used all year round. That church would be gorgeous for a wedding card wouldn't it? Glenda has produced some more stunning cards with these little beauties, I think the Scottish air is really working on her creative mojo!


To find out how Glenda made all three of these fabulous samples please keep checking out her blog, where she will be giving you more details about them.

Ok folks, have fun and enjoy our new stamps and all the inspiring artwork that is to follow.


Wednesday, 30 July 2014

Guest Blog Post - Live Laugh Love by Linda Simpson

This is the final in a trio of guest posts from Linda Simpson, who has created a wonderful stepper card using the Tangled Fragments and Flora and Fauna.

Here is my final card as part of the Chocolate Baroque Design Team


1. The base card is a centre stepper cream card on which I stamped one of the stamps from the Tangled Fragments set with Versafine Imperial Purple. I then matted and layered purple card onto the centre of the card.
2.  The background of the topper was created using shaving foam and inkadinks in Lilac Heaven and using a cocktail stick to swirl the ink into the foam, I then placed the card onto the foam. Once I was happy that all the card was covered with the foam I lifted it off and removed the excess shaving foam to reveal the pattern.
3. I stamped the image with Imperial Purple and embossed, then matted and layered onto the purple card.
4. I stamped the dragonfly from the Flora and Fauna set onto the excess patterned card with Imperial Purple and embossed, cut out and adhered to the card with Pinflair.
5. To finish off I added Tim Holtz Chit Chat Words, Live, Laugh and Love.

We hope you have appreciated the last three weeks' contributions from Linda, we have certainly enjoyed showcasing her beautiful artwork. If you would like to catch up with more of her designs don't forget to visit Linda's Crafty Piece of Heaven 

Tuesday, 29 July 2014

Only use Tangled Fragments to make your ART by Maria

Hey everyone,

I hope everyone is fine and can enjoy the nice weather for the moment ( I hope it doesn't rain in the UK?). But of course when it rains we still have our exciting hobby!
Today I made some samples with the new Tangled Fragments stamps, they are real fun to use! As you see you don't need any other stamps to have a nice result.


As you all can see I have played with my pan pastels, I've used Orange, Burnt Sienna, Bright Yellow Green and Rich Gold.


For the first card I took some white paper, some versamark to stamp with, and then put on the colours with a pan pastel tool. For the flowers, I've used the leaf fragment stamp, cut all the leaves out and played with them till I had the right flowers, aren't they lovely? The butterflies were cut out first and then I used the patterns to stamp on their bodies, great isn't it?

On the second card I used the leaf fragment again, cut the leaves out, and made a kind of frame on my card with them. The butterflies are made like my previous sample. I used some cut leaves to add more details. For the background of the second card, I used my acrylic block, put some versamark on it and stamped with it onto some white paper. I started with my block at the 4 corners, then I used my orange and afterwards my gold pan pastels and coloured the whole paper in the background colours!

I really enjoyed playing with these new fragment stamps I hope you like what I did and try it out!

Have a wonderful stamping time and enjoy summer!

Greetings
Maria


Monday, 28 July 2014

A Snowy Scene and a Fragment Flower (posted by Claire)

Good morning, Claire here with a couple of samples to share. I always look forward to the release of the new Christmas stamps and this years stamps are gorgeous. I've used the gorgeous snowy cottage from Snowy Scenes as the focal image from this card


The background was made using some of the new snowflake stamps and the Christmas Magic clear stamp collection. I stamped and embossed the sentiment with silver embossing powder. Next I  stamped the snowflakes using Distress Ink in Iced Spruce and lightly distressed the edges of the card before matting on grey card. I stamped the image with the same ink and used a waterbrush to add some shading. Next I used a zig glue pen and clear glitter to add some sparkly snow. I die cut the image with a spellbinders die and layered it up over another die cut adding some silver gilding wax to highlight the embossing. I added a de cut poinsettia and a holly vine to finish off.

My second sample today was made using Tangled Fragments. As soon as I saw this stamp I had the idea to use it as a flower head.


I began by stamping the fragment in versamark on some card that I'd covered with some Ranger Tissue Wrap. I embossed with Gold embossing powder and added some colour with a red Graph'It marker.


 I stamped in the stem using a stamp from Diamante Delights and added some black seam binding ribbon. To finish off I added a couple of crystal buttons topped with little twine bows.

Thanks for visiting today
Claire xx

Sunday, 27 July 2014

Tangled Fragments - By Florence

Hi everyone

I hope you are enjoying the weekend.  

Today I would like to share two cards I have made using the new Tangled Fragments rubber stamp set.   I don't think I am going to put these away.  They are such good fun to use and so versatile.

Here are the cards.  I hope you like them.


I dabbed some Distress Inks onto a piece of plastic and spritzed it with water.  I then swished my card stock around in it, picking up the color.

I stamped my image using Archival Ink and colored just parts of the image in  in using a damp paint brush and Distress Inks.

I added some dots using a mask and Distress Ink and two wooden leaves.


The second card is really all about patterns.


I created the background on this card in the same way as the card above but this time I used coated card stock.

I stamped my pattern across the top part of the card using Blue Archival Ink and colored it using felt pens.

I then used a stencil to create the square boarder and then stamped the sentiment using one of the stamps from the Artistic Affirmations set and Archival Ink.  I added three little splashes using the little stamp from the Wisteria Lane stamp set.  I love that little stamp.  It is so useful.  I then added the bling.

I embossed a piece of blue card and then just mat and layered my card up as seen.

Thank you for looking.

Take care and happy stamping.

Florence x

Saturday, 26 July 2014

Flowers and Christmas (by Debbie)


Good morning. I have a couple of cards today. The first uses the beautiful buttercups
from the Briar Rose Butterfly set.
The flowers are stamped with Versamark Ink, heat embossed with black powder and coloured with Alcohol Pens. I used a hexagon die set to cut out and Stormy Sky Distress Ink for the rest of the card.


I've fallen in love with these little chaps, they are so cute. The girls have previously shown how the owls stamp can be extended. I have used the owls as a single and they will be the card I use for the children at school as they are a quickie make for a smaller card.


This card shows how the smaller images from the Snowy Scenes stamps
fit well into baubles.
 
 
Many thanks for visiting
Debbie

Friday, 25 July 2014

Best Wishes (by Doreen)

Hello to you all, I am back sharing another sample using the gorgeous 
I first inked up my card with Picked Raspberry and Faded Jeans Distress inks then I sprayed my fragment stamp with water and stamped this onto the inked card. This then removes the ink......
Once this was dry I then stamped the Harebell Butterfly image over the top and coloured in with distress inks.  I inked the edge with Black Soot to add depth then mounted onto white card.


Oh Christmas Tree
I am also sharing a Christmas card this time using stamps from the  "Turtle Doves stamp sheet". I first of all clear embossed the stamp with black Versafine then using a mask for the moon blended Faded Jeans and Black Soot distress inks for the sky. The hills in the background were made using some torn card and  more fade jeans on some sponge.The tree has been coloured in with Distress inks and the gorgeous sentiment is from Newly released Christmas Magic stamp sheet .xxx


Thursday, 24 July 2014

Snowy Christmas in July (by Shirley)

Hello everyone, I hope you are doing well and ready to see some Christmas designs during the hot months of summer :)   At least it's hot where I live in Ontario, Canada which feels great after our long cold and snowy winter. 

I like to get started on Christmas cards early and as soon as I saw the Harlequin Fragments I thought they were a great match with Harlequin Christmas.


The background was created by blending Festive Berries and Aged Mahogany Distress Inks. I stamped the fragment from Harlequin Fragments with Festive Berries DI.  I stamped the bubble edge from Decorative Edges with Seedless Preserves DI and I coloured them with a white gel pen.

The Harlequin ornament and sentiment from Warm Christmas Greetings were stamped with Cobalt Archival ink.  I coloured the ornament with Dylusions inks and cut it out to attach over the background. 

I was very happy to see the two new Christmas sets, Snowy Scenes and Turtle Doves.  Both sets are full of beautiful smaller designs which have been great fun to use while getting a good start on Christmas cards. 


The background above was created a while ago and sitting in my stash.  It looks like I used Turquoise Dylusions inks (possibly a 'mop up' sheet) which I stamped with Big Bold Background Snowflake Shadow and coloured the snowflakes a little with a Tombow marker.   I stamped the Snowy Scene with Colbalt Archival ink, coloured with Prisma pencils and die cut with an ornament.   I was inspired by a design former DT member Elaine created a year & half ago using the same die.  As soon as I saw the little scenes in the set, it came to my mind to use my die for the first time.   Let it Snow is a clear stamp available on it's own or part of the Big Bold Christmas Words clear set.


I have one more card using the same little Snowy Scene image:


The background above was created with Lime and Green Dylusions inks.   I over stamped a little snowflake from the Snowy Scenes set and used TCW Starfall stencil with Distress Ink and TCW Circle Explosion stencil with Viva  Mother of Pearl light blue molding cream which has a silver hue.  I coloured the main image with Prisma pencils and added lots of glitter to the snow.   


Thanks for your visit and have a great day!
Shirley