Pin It button on image hover

Thursday, 26 March 2015

Stunning new stamps launched today (by Lesley)

It is almost the end of another month so today is the launch of our April stamp sets and are you in for a treat.

When we launched our first individual cling mounted stamps back in December the response was terrific and now we are adding four more to the collection.

First we have Birdcage Collage and Ladys Slipper Orchid
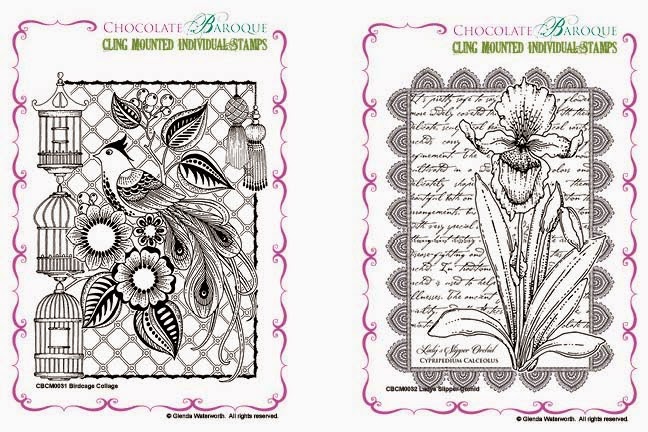

All four stamps are available individually or as a money saving multi-buy.

Here is a stunning card made by Glenda using the Birdcage Collage


Stamped and then painted you can see this design is ideal for colouring and many of the elements are crying out to be decoupaged. And coming soon on the Shop Blog will be a post from Glenda on how she made this beautiful card, so watch out for that.

Our other stamp launch for April is an A5 clear set entitled Awesome Orchids.

This clever set features two orchid flower images and a sentiment plus a single stem and four individual orchid heads. Now you can design your own flower, how cool is that?
Here I have created three mini cards using the single stem and a selection of the orchid heads, which have then been coloured with watercolour pencils. The backgrounds have been stamped with the crackle and speckled patterns from the Natural Eggs set and the ART letters are from our Newsprint Alphabet clear set.

I just know you are going to have fun with these new stamps and keeping checking back on a daily basis for some truly inspiring projects created especially for you by the Design Team. 

Told you you were in for a treat.



Wednesday, 25 March 2015

Spring Bird - Tulips - By Florence

Hi everyone

I hope you are all having a good week.  

Only a couple more days until the weekend...yey!

Today I would like to share some projects made using the new Spring Bird Tulip rubber stamp set.  

All three of the new stamps sets have been a delight to work with this month. Although this is my last post for this month I am certainly not putting these stamps away just yet!


I have used a die for the alarm clock but it is an easy shape to cut out.

The main stamping piece has been created by stamping the bird and nest image, masking it off and coloring the background with *diluted Distress Ink.
The masks where removed and the image colored using water color crayons.
The clock embellishment has been made up as seen with the addition of the flower sprays which have been created using the flower stamp from the Tranquility rubber stamp set.


I have used a die for the base card.  
The main focal piece and the small lady bug embellishments have been made in the same way.
I stamped the tulips and the lady birds, masked them off and colored the background using *diluted Distress Ink.
I then removed the masks and colored the images with water crayons.
The card has been made up as seen.

My final project today is a very simple design.  

Lots of inky fun.


I wanted to share this card with you today because I think it illustrates how the focal pieces on the cards above have been made.

 The only difference is, when I removed the masks, I didn't color the images.

*To dilute Distress Ink, pat the ink pad onto an acrylic block and spritz with water.  Take your stamped piece (with the masks on) and place it into the ink and move it around slightly so that the card picks up the ink.  Repeat this if necessary for more coverage.


Thank you for stopping by 


Happy Stamping 
Florence x

Tuesday, 24 March 2015

Pretty Pink Tulips (by Debbie)


Good Morning.
It's so lovely to see the new seasons flowers appearing and these tulips are a delight to colour.
I chose soft pink as the card is a Mothers Day card I'm making for a friend to give to her Mum.


I stamped the tulips with black memento ink so I could colour with alcohol pens. I trimmed the card and mounted on pink card.
The die is rather delicate and it fell into my shopping basket at a show last year. I highlighted the embossed areas with spun sugar distress ink. The final touch was the ribbon.
 
Thanks for visiting
Debbie

Monday, 23 March 2015

Spring Is In The Air (posted by Julie)

Good morning, I have two cards for you today which have both been created using the new Spring Bird stamp sets.

My first design is an A5 card that has been designed with the Spring Bird Crocus set.

  • To start with I inked up the stylised crocus with Onyx Black Versafine Ink and stamped them in a row just below the mid-way point of the card. 
  • The larger crocus was stamped onto a separate piece of card which has had the corners rounded.
  • All of the images have been coloured with coloured pencils and the background was created by sponging Squeezed Lemonade and Dusty Concorde Distress Ink through a hexagon stencil.
  • Both the background and main image have been mounted onto purple cardstock before being glued to the base card.
For my second card I have used the bird and small flower from the Spring Bird Daffodil along with the tulip image from the Spring Bird Tulip. The background has also been created using a stamp from the Texture Fragments along with the Texturised stencil.

  • I cut a frame and coloured with turquoise ink before stamping the small daffodil stamp using Onyx Black Versafine.
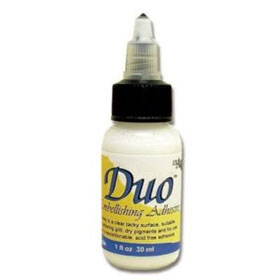
  • The middle panel was stamped with the texture fragment and tulip stamp using Cracked Pistachio Distress Ink. I then sponged Duo Embellishment Adhesive through the Texturise stencil and when the glue was shiny I added silver gilding flakes.
  • The bird image has been stamped onto a die-cut acetate circle using black Staz-On and then on the reverse side I coloured with alcohol pens. I then dabbed cream acrylic paint on the reverse side of the coloured image to make the colours pop.
  • Before mounting onto the card I dabbed the Duo Embellishment Adhesive around the edges of the acetate and then added silver gilding flakes like before.
Many thanks for stopping by and if you wish you hop over to my blog for another Chocolate Baroque creation, but please be sure to come back tomorrow where one of my design team member's will have some more to share with you.

Sunday, 22 March 2015

Spring Daffodils and A Regal Bird (by Asha)

Good morning, all. I have 2 projects to share with you today. Both cards feature stamps from the brand new Spring Bird - Daffodil stamp sheet. Without a stamped sentiment, these cards will work for any occasion. 

The first project showcases the lovely daffodil. I did some masking and stamping to get the flowers in overlapping clusters. I used Distress Inks to water colour the image and background.


On my second card, I created a frame by repeat stamping the smaller accents stamps from the Spring Bird - Daffodil sheet and heat embossing in gold. I used watercolour pencils on the image.


Thanks for stopping by today. I hope you're having fun with these gorgeous stamps. If you want more ideas, come back often for more inspiration from the Design Team. As always, details of how I made these cards will be available on my blog .

Beijinhos,
Asha

Saturday, 21 March 2015

Pan Pastel Eggs (by Judith)

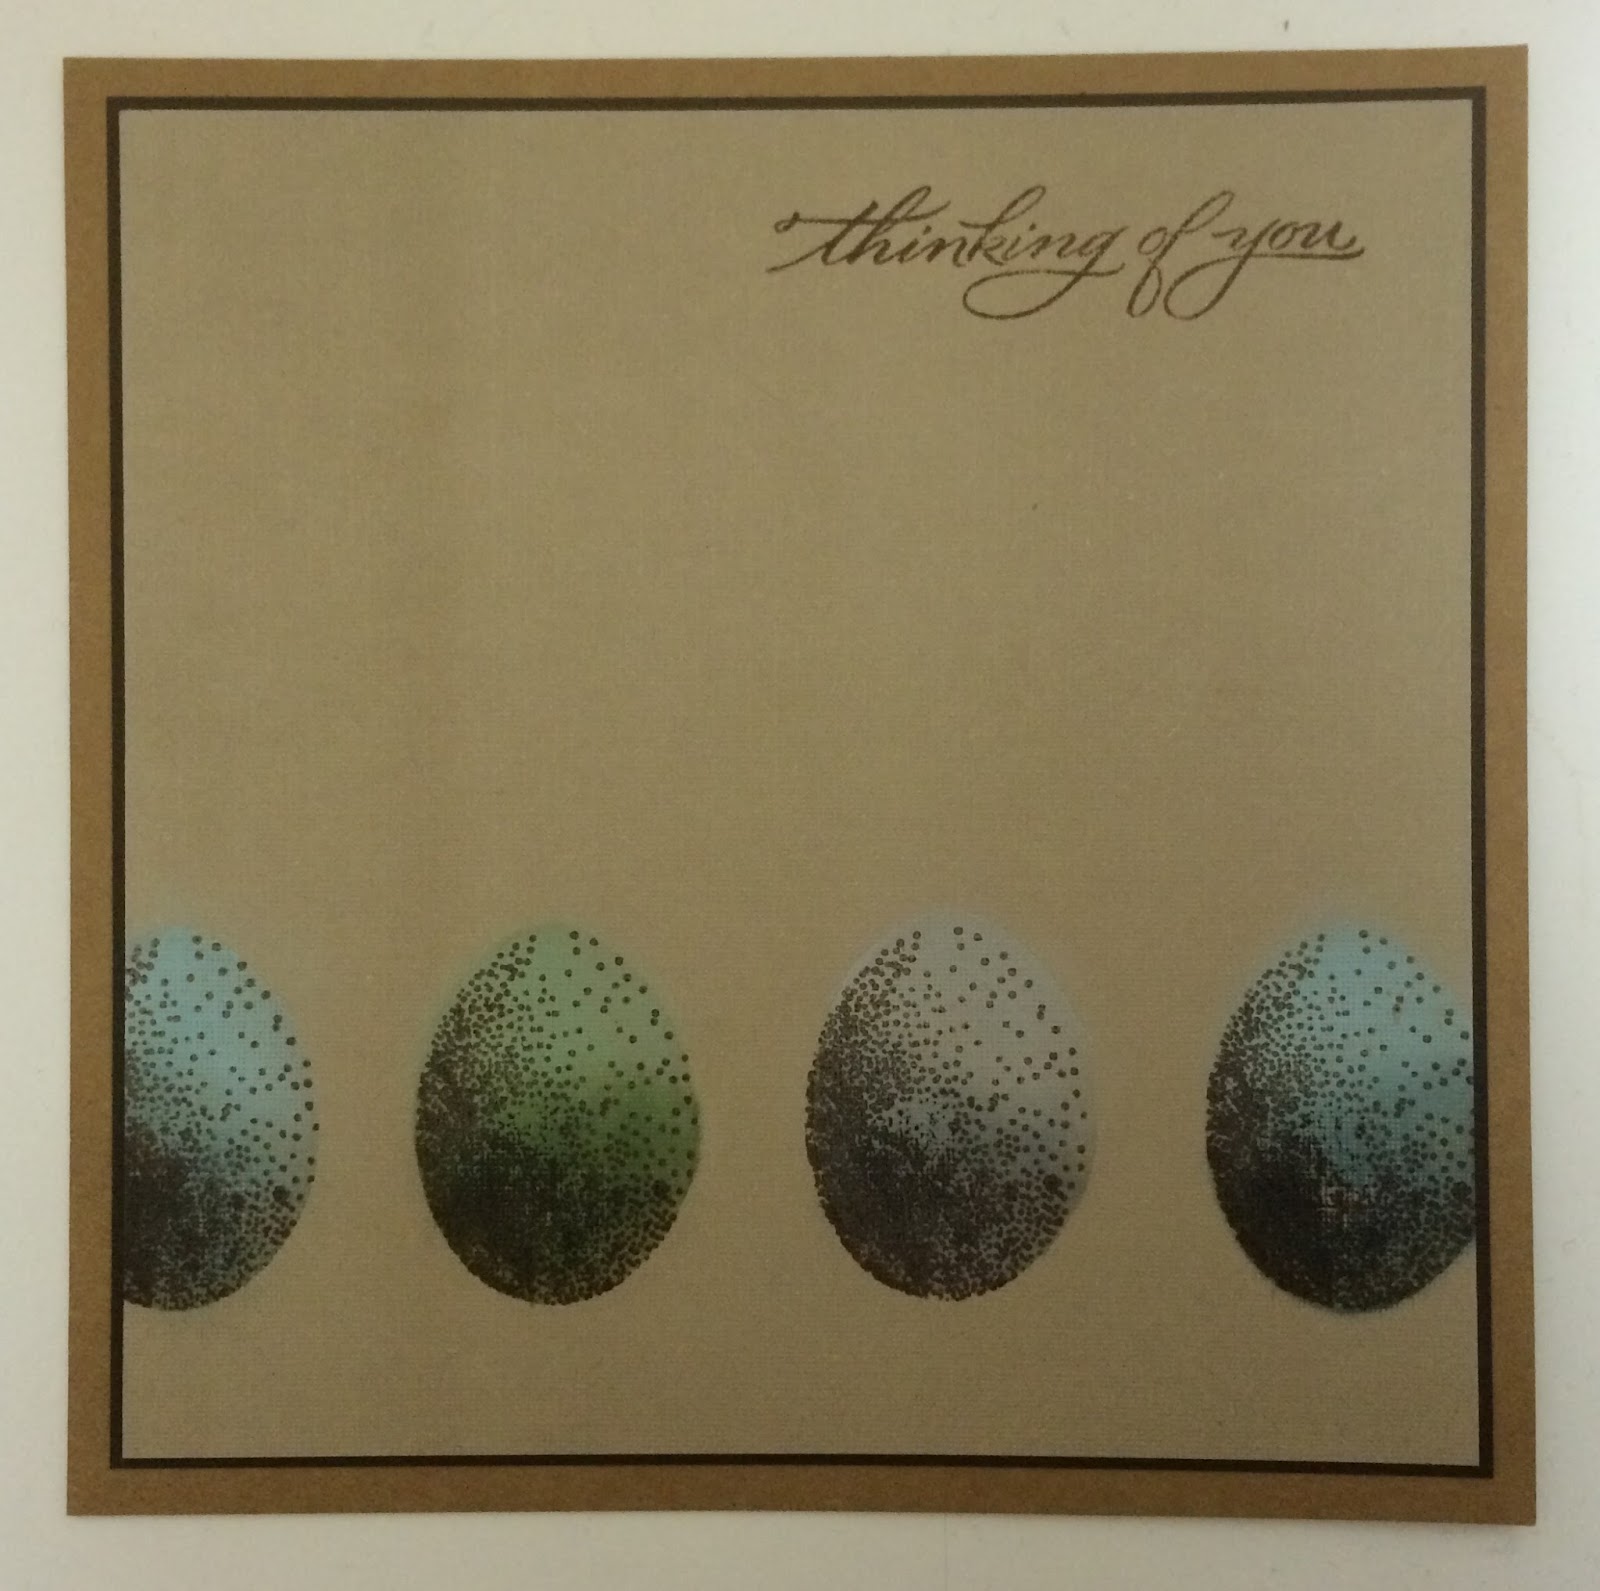
Hello everyone, I have been working with the incredibly useful Natural Eggs stamp set to make a clean and simple masculine card to show you today. Cards for men are so difficult to make, and these eggs lend themselves to a Nature themed card suitable for any time of year.

I took the solid stamp, inked it with Versamark, and stamped it across the bottom of a piece of beige linen card four times, overlapping the edges. I coloured the eggs with Pan Pastels, using a lighter colour at the top of each egg, graduating to a darker colour at the bottom. I then used the speckled stamp over the top of each egg, using a brown ink.

I added a sentiment from the Thinking of You Sentiments stamp set, and matted the background onto dark brown card before placing it onto a kraft card blank.


A quick bonus project for you, is a tag made using stamps from the Dawn Chorus stamp set. Details of how I made this tag can be found on My Blog.


Thanks for stopping by, Judith xx

Friday, 20 March 2015

In the early morning (by Maria)


 Hello everyone, these Spring stamps are so lovely, I especially love the bird stamps, aren't they sweet?

Here some samples from me, a bit dark with these blue and brown colours but it's to show you some pictures early in the morning, just before the sun comes up. I hope you like them!

I made my backgrounds with my favorite Dylusions. I took some blue and brown and put some salt on some areas of the card. I let everything dry and then stamped my images with Versafine Onyx black ink. With some bleach and a very small paint brush I removed the colours from the design. With some watercolour paint I painted the image again with the colours I wanted. Then I took some Tyvek envelopes, cut out some triangles and coloured them in with Distress Inks in the colours of the Dylusions Ink. I took my iron and placed it for a few seconds on the Tyvek to have these beautiful shapes.

I placed the card on some cardstock, arranged my Tyvek underneath it and glued it under my card as you can see on the samples.

I hope you like my cards, and I really hope you will try it one day, these stamps are so beautiful, you really need to have them, I'm sure.

Have a nice spring time!
Greetings,
Maria

Thursday, 19 March 2015

Three Little Eggs (by Lesley and Glenda)

I am starting with a confession. The beautiful card you see here was not designed by me, I received it in the post a few days ago. So today is the first combined blog post from Glenda and myself and we want to show you how easily you can achieve the layered look with our clear stamps.


  • On an A6 card, and using the solid image from the Natural Egg clear set, stamp each colour in turn with new Archival ink colours Tea Rose, Sky Blue and Buttercup. Allow to dry thoroughly.
    • Next use the same ink colour and the small multi speckled image to stamp over the solid coloured eggs. Again allow to dry
    • On the middle egg ink up the crackle pattern with Buttercup and stamp over the solid image. Repeat with the right hand egg using the second generation stamping technique and Jet Black Archival ink (second generation stamping means you ink up the stamp with your chosen ink, stamp lightly onto a piece of copy paper and then stamp your image again where you want it. This allows for a more subtle version of the image).
    • Now add the same last layer to each egg with Jet Black ink using the larger speckle pattern.
    • Stamp the sentiment from the Thinking of You Sentiments clear set with Buttercup.
    • Finally, send it in the post to a friend!
    I hope you have enjoyed our first joint DT post. Please come back again tomorrow for another inspiring project from one of our talented team.


    Wednesday, 18 March 2015

    Spring Blue Bird (by Shirley)

    Hello everyone, I hope you are doing well.

    I have a design today featuring the new Spring Bird -Tulip set. 


    The background is Dylusions inks with a little Brushos sprinkled over top and then spritzed with water.  I stamped in the background with the little decorative stamp at the top and tulips (hard to see) on  the bottom half which created some depth.  I coloured the sweet bird image with pencils which I love to use for small detailed images.  I added a little glitter to the flower centres.

    Thanks for stopping by and have a great day,
    Shirleyx

    Tuesday, 17 March 2015

    Spring Bird Tulips (posted by Claire)

    Good morning, Claire here with a sample made using the gorgeous Spring Bird Tulip DL stamp set


    I've used the tulips on this card, inking up the stamp with Peeled Paint and Worn Lipstick distress ink and stamping directly on to the card blank. I added some little flourishes and also distressed using the same colours of ink.

    I used distress markers directly onto the stamp and misted with water to create the focal image which I die cut with a spellbinders die and again added some distress ink. To finish off I added some lace, ribbon, pearls and a seambinding bow topped with a little button and some twine.

    Monday, 16 March 2015

    Spring Bird Crocus - Altered Slide Mailer By Florence

    Hi everyone

    I hope you have all had a lovely weekend.

    Today I would like to share with you a slide mailer that I decorated using the new beautiful Spring Bird Crocus Rubber Stamp Set.  The multi buy option for the 3 new sets can be seen here.  These stamps are stunning.

    I had so much fun with this project.  I hope you like it.


    All images have been stamped using Archival Ink and colored using water color crayons.
    The panels have all been made in the same way.  The images have been stamped and masked.  The panels where then dipped and swished into some diluted Distress Ink.  Dilute the ink by patting the ink pad onto an acrylic block and then spritz it with water.


    The Front Cover


    Base coat the slider with one coat of Gesso and two coats of purple paint.
    Stamp the images for the front cover, the inside front cover and the back cover onto white card stock, color the images and trim to size.
     Attach the stamped pieces to the front and the inside cover of the mailer using PVA glue.


    Inside the Mailer


    Using old book pages or pretty papers, cut out two panels and attach them to the slider with PVA glue as seen on the right hand side of the photo above.
    Stamp two Crocuses (I used a stamp from the Elegant Crocus set) or stamp and cut out two Crocuses from the larger stamp image shown below.  Color the two Crocuses and keep them at the side for the moment.


    Tear some thin strips from a book page or pretty papers and attach these, using glue, to all of the edges as per the photos.
    Attach the stamped image to the back cover using foam pads.  Place the foam pads on the underside of the panel at the top and at the bottom leaving a space in the middle to place the ribbon.


    The Back Cover


    Apply some gold wax or paint to all of the edges of the slider including the painted area as shown below.


    Finally, attach the two Crocuses using silicon or foam pads to raise the heads of the flowers slightly.


    That's it from me today.  
    Thank you for looking.
    Have a great week.

    Florence x

    Sunday, 15 March 2015

    Spring Bird on a blossom branch (by Debbie)


    Good morning.
    A card and a tag from me today using the bird on a branch from Spring Bird Daffodil
    My card is a design that I've admired for a while and I put twist onto it.

     
    I added the pink that highlights the flowers on the branches. This little bird is lovely to colour and suits many colours.
     
    My tag is from the Prima Hancock Park Tag Pad that I bought some time ago.
    I stamped direct to the tag and coloured the flowers, berries and branch. The bird was stamped onto white card and coloured then cut out and glued. I stamped on the bottom of the tag and trimmed a fancy edge. This tag is going into my tag book that's a work in progress.


    Thanks for visiting
    Debbie

    Saturday, 14 March 2015

    Framed Tulips by Julie

    Good morning to you all, I hope your weekend has got off to an enjoyable start. As tomorrow is Mother's day here in the UK and it will also be Easter very soon, I thought a gift idea might be useful, so I have up-cycled a 13.5 cm x 18.5 cm photo frame using the new Spring Bird Tulip stamps and a couple of Crafter's Workshop Templates.
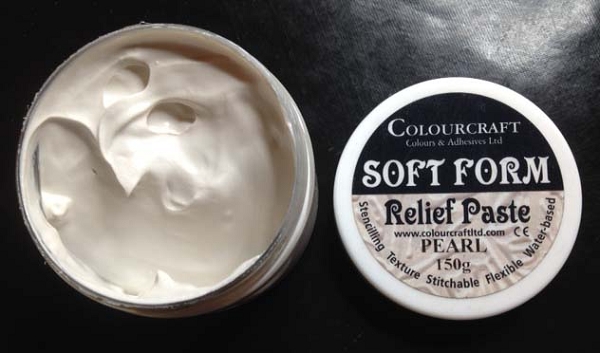
    • Start off by spreading Soft Form Relief Paste through the 12 x 12 Texturize template and then paint with blue, pomegranate and green acrylic paint. Finish off with gold gilding wax.
    • Cut a piece of white card measuring 9.5 cm x 14.5 cm, ink the triple tulip stamp using Onyx Black Versafine and stamp twice, also make a mask of this stamp.  Now cover the tulip stamp with pearl Soft Form Relief Paste and leave 24 hours to dry. You can then colour with red, purple and green alcohol pens when you have peeled the image from the stamp.
    • Colour the two stamped tulips with red and green water colour pens and then place the mask over them. Using Broken China Distress ink, sponge through a 6 x 6 Tattered Lace template for the sky and sponge Peeled Paint Distress ink through a 12 x 12 Texturize template for the grass.
    • Finish off by mounting the Relief Paste tulip onto the picture with silicone glue.
    Many thanks for looking and if you wish you can find another Chocolate Baroque design using the new Spring stamps over on my blog at http://craftyjools.blogspot.com/.

    Please be sure to pop back here tomorrow when another Design Team member will have a wonderful project to show you.

    Friday, 13 March 2015

    Dancing Tulips and a Shaker Bird (by Asha)

    Good morning, fellow Chocoholics. It's my turn again to show you what I've been up to with the gorgeous March release stamps. Today I'm playing with the Spring Bird Tulip DL sheet.


    These are delicate flowers and I felt that water colouring would be best. I started by applying Winsor & Newton's Masking Fluid on the tulips before giving the background a wash of blue and green. Next I worked on the flowers with Tim Holtz Distress Inks and Winsor & Newton water colours. I also added some Iridescent Medium to the water colours to give the blooms a delicate shimmer. I finished the project by tying some green ribbon in a simple knot. The sentiment is from the Easter Traditions A5 sheet.


    My second project is a shaker card and for this I'm using the nesting bird stamp from the Spring Bird Tulip DL sheet. The focal image is water coloured while a simple frame maintains attention to the Spring Bird.  I used just a few pastel sequins on the inside so as not to lose the image in unnecessary clutter and also to emulate falling blossoms. The greeting is from Birthday Words A5 sheet, heat embossed in white.


    So there you have it - 2 water colour projects that work for any occasion. As always, I have more photos on my blog together with details of products and tools used in making these cards. Don't forget to swing by often for more crafty inspiration from the rest of the Design Team.


    Beijinhos,
    Asha


    Thursday, 12 March 2015

    Daffodils for Mum (posted by Claire)

    Good morning, Claire here with a sunny card made using stamps from Spring Bird Daffodil, one of this month's beautiful new releases. As soon as I saw these stamps I couldn't wait to colour this image as I love daffodils, they are always such a welcome sight after a long winter.


    I stamped the images on smooth white card and coloured them with Graph'It markers before die cutting them. I stamped the sentiment using Bamboo Leaves Memento ink and then inked around the edges with Squeezed Lemondade distress ink.

    I made the easel card using craft card, popping my die so that it overlapped the fold and running it through my die cutting machine in an embossing sandwich. This creates an embossed effect slightly larger than the die cut shape so you can cut it out and layer up your image.


    To prop the easel up I decoupaged the daffodils and added a little green bow topped with a pearl.

    Thanks for visiting today
    Claire xx

    Wednesday, 11 March 2015

    Lovely Spring birds.....by Miranda


    Hi there,

    Today I have the honor to show you a creation made with the new Spring birds stamps. Aren't they lovely? 
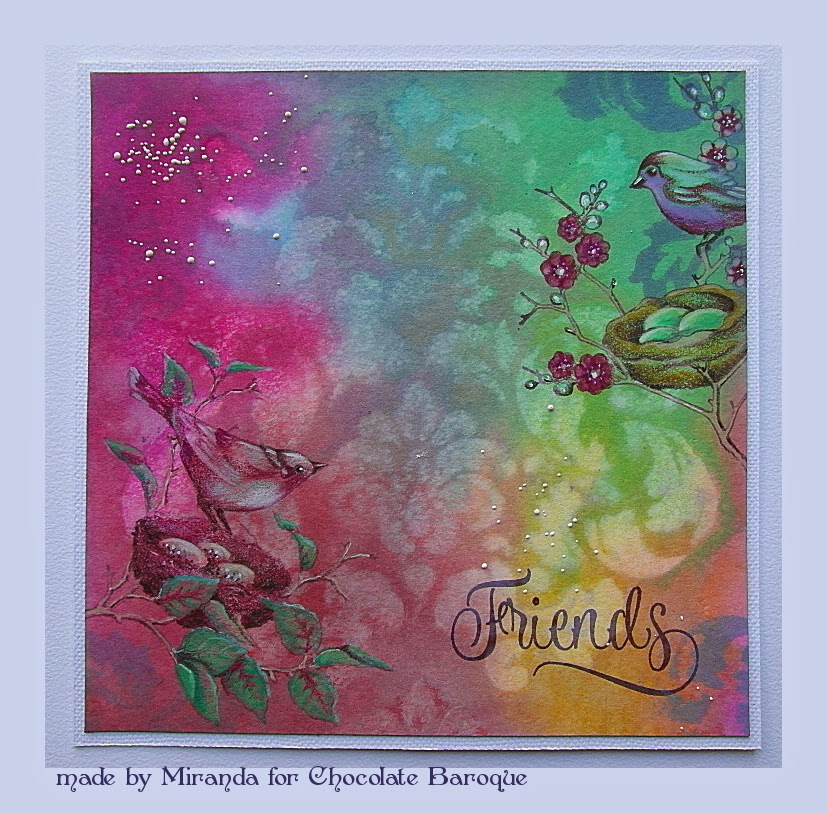
    I have worked with the Spring Bird Crocus and Spring bird Tulip sheet. No crocuses or tulips this time but only those lovely birds with their nests. This background was also made by my son some while ago and I did the stenciling, stamping and colouring. 
    Here is my card....

    The white spatters are made using the Chunky white embossing enamel from Stampendous which give a lovely effect.
    The word is from the Amazing Birthday clear stamp sheet.


    Hope to have inspired you and keep your eye on this blog for more beautiful artwork made by the DT!

    thanks for visiting and till next time,


    Tuesday, 10 March 2015

    Spring bird Daffodil and Spring bird Crocus (by Maria)


    Hey everybody! Here some more samples with the Spring stamps:

    To make this card I took the two small flower stamps from the new Spring Birds multi-buy stamp sets and on kraft paper I have stamped them the way I like them to be, using black ink.
    I coloured them with pencils, in yellow, orange and some greens. I took a smaller piece of kraft paper, stamped the flowers once and coloured them again. In the middle I placed my "Thank you". I put some   dragonfly embellishments next to each flower, and placed some orange ribbon at the top and bottom of this piece of card.  I placed the small card with some 3D foam pads underneath on my main card. I placed everything on my black cardstock.

    This card I made with some Brusho. I used a white card (14cm x 9cm). I just took a very tiny bit of Brusho, spread some water on it and dried it with my heat tool.
    Then I cut out an oval of white card, I stamped my tulips on it and coloured them in with some watercolour markers. Then again I took a tiny, tiny bit of Brusho to colour the oval card. You do not need to spread too much water because the flowers can 't be touched by the water! I've placed a orange bow with a glue pad
    on the tulips.
    I placed my card again on a black cardstock card as usual, (15cm x 11cm).

    Have a lot of fun with your stamp sets!
    Maria.


    Monday, 9 March 2015

    Simply Black and White (by Lesley)

    I have always loved black and white, not just in stamping but in photography, fashion, art etc. So my card today is just that, clean and simply black and white.

    • Using the least acute curve from the Tonic Shape Mate Rulers draw a faint pencil line along the curve across a piece of A4 160gsm paper, then cut along the line.
    • Ink up the flower from the Spring Bird Crocus set with Versafine Onyx Black and stamp three times as illustrated. 
    • Use a A4 piece of black card to make a DL card. Trim 0.5cm off both long sides of the A4 160gsm white paper. Now trim approximately 7cm off the short straight edge and fold in half. This becomes the wrap around for your card. Stamp the sentiment from the Thinking of You Sentiments clear set in position using Black Onyx.
    • Place a small strip of double sided tape on the front and back of the card next to the fold and attach the wrap. Finish with a length of black satin ribbon tied around the inside of the card and fastened in a bow at the front.


    A plain black and white card can be used for a variety of occasions but you could just as easily use a pastel or strong colour as the base for your DL card and stamp in a co-ordinating ink. 

    Thank you for dropping by, I hope you keep visiting to catch up with all the gorgeous designs coming your way from our talented girls.

    Sunday, 8 March 2015

    A Taste of Spring in Pink and Orange (by Shirley)

    Hello everyone, I hope you are doing well.

    I have a few designs to show today featuring stamps from the new gorgeous Spring Bird- Tulip, Daffodil and Crocus sets.  The pretty images are just we need to cheer us up as we are weary of snow and extreme cold temperatures here in Ontario, Canada.  


    The background above was created with Ripe Persimmon and Picked Raspberry Distress Inks using an acrylic block, heat drying and then picking up the drops left on the block.

    I stamped the decorative design, bird and flowers from Spring Bird - Daffodil and the foliage from Spring Foliage sets.  'Best Wishes' is from the Spring Bird - Tulip set.    I enjoyed colouring these images with pencils.

    And below are four ATC's that I created using stamps from Spring Birds with Tulip, Daffodil and Crocus sets.   I'll use them as gift tags, but they are cut in the ATC size.


    The backgrounds above were created with orange and pink Dylusions spray inks.  I added white Acylic paint using Memory Box stencil.  The images were again coloured using pencils.

    I have one more design to show today which was very quick to create.


    I painted the tulip stamp from Spring Bird - Tulip with water colour markers and then stamped onto water colour paper.  Using a water barrel brush I blended the paint.  I added a little green Brushos crystals with water to the bottom to create grass.

    Thanks for your visit and have a great day,
    Shirleyx

    Saturday, 7 March 2015

    Springtime Flowers on Kraft (posted by Judith)

    Hello everyone, I have a couple of cards to show you today using the Spring Birds multi-buy stamp set. These stamps are so versatile and you can use them to make cards suitable for occasions across the year, which hopefully my first card will demonstrate.

    I hand cut a circle from the front of a kraft card blank, by drawing around a circular die with a pencil as a guide. I then stamped the small motif using Versamark and white embossing powder around the edge. TIP: I stamped the four main points,  top, bottom, left and right, as if I was making a clock, to start. Then I filled the rest of the spaces in afterwards, it was much easier that way.

    I stamped the flower image seven times, starting at the bottom, masking them as I went along, so that I did not stamp over the previous one. I then used a couple of sprig stamps from the Briar Rose Butterfly/Harebell Butterfly multi-buy stamp set, which I coloured with water based markers. I stamped these a couple of times, before re-inking so that some of the images are less defined, giving the impression of the images being in the background. I added a couple of butterflies, and coloured all of my images with waterbased markers and a waterbrush. Finally, I stuck the card behind the circle aperture.


    My second card uses a piece of scrap card left over from another project. When I was colouring some seam binding recently, I used some watercolour paper to mop up the excess moisture from the ribbon, and the background on this card is the result. It provides a perfect match to the ribbon that I have added to the card.

    I stamped the tulips onto the card, masking one set, before adding the second. I then stamped two rows of the small motif along the top and bottom of the background using black ink. I also added a sentiment from the stamp set, before matting the background onto black card. I stamped the tulip images onto spare card, and coloured them using watercolour pencils. I cut them out and added them to the card.

    I stamped two rows of another small motif onto orange vellum, using Versamark and white embossing powder to create a lacy border effect. I cut this out, and attached it to my panel, before sticking the panel to a kraft card blank.

    I hope that I have given you some inspiration for using these lovely stamps, particularly some of the smaller motifs, which are often overlooked on a stamp plate. They make great borders and edges for your cards. Thanks for stopping by, Judith xx