Pin It button on image hover

Thursday, 16 May 2019

Fifteen Minute Cards

Hello everyone, here we are with our regular monthly post featuring cards and projects from the Design Team created in Fifteen Minutes or less. Our aim with these posts is to share time saving tips and ideas and to show you how to create beautiful projects in next to no time. So grab a cuppa, and enjoy this month's selection.

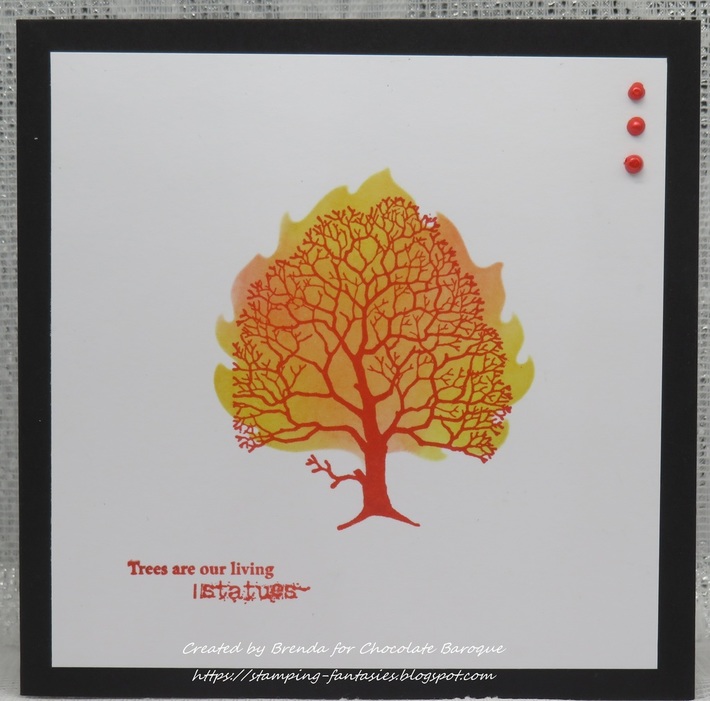
I have created two projects to share with you this month. My first card was made using a scrap of background from my stash, which had originally been created by inking around some leaves from my garden. I stamped the large tree from Trees a Crowd onto a piece of watercolour paper using Black Archival Ink, then carefully sprinkled red, green and orange Brushos just where I wanted them. I spritzed the Brushos with water. I inked around the panel with Distress Ink. I added a sentiment strip to complete the card.

My second project is a large tag, I added background colour by covering a large acrylic tag with Distress Ink and spritzing it with water before swiping it across the tag. I used the same tree image as before and added a smaller tree image from the same stamp set stamped using green ink in first and second generation stamping to create the foliage. A sentiment, ribbon, and hand drawn birds completed the tag.

Brenda has created a series of cards using leaf stencils and Distress Inks. She has then stamped an image from the Trees a Crowd stamp set onto the background using coloured ink. She added liquid pearl dots to finish.


For her final card, she stamped and embossed the tree onto vellum, laid the vellum over a piece of patterned paper and added a bow. She added a sentiment stamped vertically onto the background.

Two from Rachel using the large tree image next, showing how you can vary the look of this image once again. For her first card she has used white embossing on kraft card and coloured the leaves using pens and pencils.


To create her second card, she used white embossing on black card, and added colour with mica powders, a fabulous dramatic effect.


We have more dramatic colour up next from Zoe, who has created two beautiful envelopes. We love seeing Zoe's beautiful Mail Art each month, and it is very quick to create, a bit of masking to create a window or a strip, and you have areas of colour or spaces to write an address.


We have a selection of projects from Magda next, she has created a tag which has been coloured with Distress Ink and flicked and spritzed with water. The image was coloured with watercolour pencils.
 

 She has created a Brusho background for her next project:

 Finally, she has used watercolour pencils and added Distress Inks to edge the background. She stamped the images with Distress Inks also.

Carole has created a very pretty card for us, she pressed Victorian Velvet Distress Ink randomly over the card, and spritzed lightly with water. On a spare piece of card she repeated the process, dried the card and stamped the top part of the Briar Rose stamp, and cut out a square. She repeated the process for the sentiment. She dried the background and stamped the Briar Rose image. She positioned the square so that it overlapped perfectly on the background.

Finally, we have three projects from Penny, to create her first card, She stamped and embossed the fir trees on black card using black ink and clear embossing powder. She repeated this step and added moon and clouds. She used a silver pen to add highlights and to ground the trees. She stamped and embossed the tag over the scene, cut it out leaving a border, then added silver pen to the edges. She attached the tag to some greyboard and added some ribbon and lace to finish.


For her next project she stamped and embossed the small trees using white embossing powder onto navy card. She used a white gel pen to ground the trees and add a snow drift, then painted some shadow with light blue pearlescent paint. She added glitter to the trees the die cut the image into a circle, adding silver pen around the edges. On a card base she stamped the trees in one corner and added the sentiment along the bottom before adding the main circle to the card.

Lastly, she stamped the Heath Robinson House onto drawing cartridge using grey ink. She used Koh-I-Noor pencils to colour parts of the image, and matted it onto red card before adding some ribbon and a button. She stamped a sentiment and attached the panel to a base card.

That brings our collection of projects to a close for this month. We hope that you have enjoyed what we have shared with you, and that you will try out some of the designs for yourselves. We will be back next month, but in the mean time, do check out our regular Design Team posts.

Thanks for stopping by,


Wednesday, 15 May 2019

Floral Birthday (by Pat)

Hello everyone, today sees the second post this month from our Guest Design Team member Pat. She has created a pretty floral card for your inspiration. 

Pat writes:

Hi everyone, I decided that after the more masculine card last week I would feature some flowers, and I chose the Floral Harmony stamp. I used Distress Inks, grey permanent ink, alcohol inks, and blending solution, clear and gold embossing powder, a piece of backing foam and cling film.


I stamped the image on to a piece of white card with the grey ink and heat embossed with the clear embossing powder, and coloured it with some Distress Inks applied with a water brush. I then fussy cut it out, but if this sort of cutting is not for you, then you can of course just cut round the outside edge leaving a narrow white border, and it will still look fine.

I cut a 2" wide strip roughly 7" in length and applied the alcohol inks and blending solution, and moved them around with a brush. I then covered it with the slightly scrunched cling film which when removed leaves a lovely pattern. When adding this, I cut the card down slightly to allow for the overhanging flowers and so there would be no problem fitting it into the matching envelope.

I then cut a piece of white card 6.5" x 3.5" and stamped a sentiment from the Paisley Elephant set and heat embossed with the gold embossing powder, and added the piece of foam to the back to raise it up before adhering this to the card. I finished by adding the flowers using glue gel to give more dimension.

Thank you for joining me today and I will be back next week with my last post for now, but I am looking forward to returning later in the year.

Best Wishes,

Pat x


Tuesday, 14 May 2019

Tag Cards (by Magda)

Hello,  I am back today with two Tag-cards.
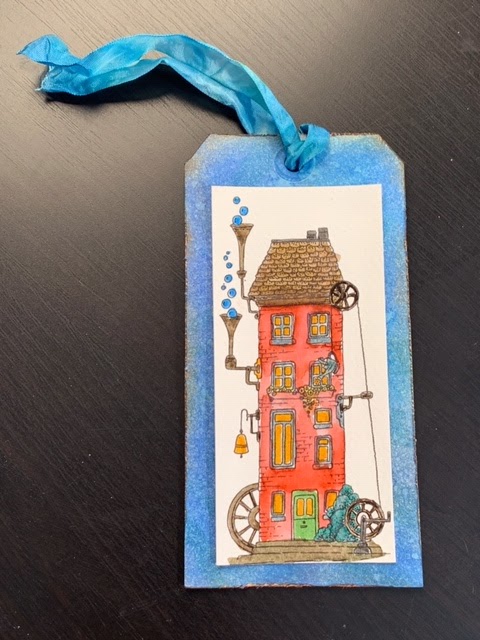
I used for the first one the new stamp "Heath Robinson House". This image is really in Heath Robinson's style, the famous illustrator.

Step by Step

1. Stamp the House on a tag with Archival Jet Black 
2. Repeat point 1 on a second tag, cut the shape and cover the image of point 1
3. Colour the background of the tag 1 with several blue shades of Distress Ink pads


4. Colour the house with Faber Castell watercolor pencils 
5. Draw white circles for having more bubbles on the blue backgrounds.
6. Glue the Tag on the left-over Tag of point 2 with PVA
7. Stamp with Archival Jet Black  a chimney and more bubbles on it and colour these images
8. Colour highly the front of the card
9. Use the new Tag as a mat and glue it on the card
10. Colour with a blue Distress Ink pad  a white piece of cardstock and stamp the sentiment in
      Archival Jet Black 
11. Cut the sentiment and glue both pieces as shown.


Be Different :  for this Tag- Card  I used 

1. a brick shaped stencil and colored the Tag with green and brown Distress Ink pad
2. Archival Jet Black for stamping only the upper part of the "Garden House" stamp
3. Faber Castell watercolor pencils 
4. White cardstock that I cut as a Tag Card
5. The sentiment is in the same plate "Garden House"


I hope you liked this idea of Tag-Cards, hugs
Magda


Sunday, 12 May 2019

designer houses (by Veronica)

 Good morning everyone, today I am sharing my samples of the gorgeous quirky houses from Chocolate Baroque - definitely something different for new home cards!
The stamps are book mark sized, but easily make larger cards...
The card on the left is 8" square, just to prove it can be done.  I started out with scraps of bleeding art tissue laid onto white card to create the background and brushed with water. Once dry, the tree house was stamped using black versafine ink and coloured with watercolour pencils. A narrow black mat, then glued to the card at an angle. The sentiment is from punky expressions


The next ones are both on diffent size card blanks, the left is 5"x7", the right DL. The one on the left has a distress oxide background for a night effect, while the one on the right is just stamped onto white card  and then edged with different colured marker pens. tjhey are both coloured with watercolour pencils

 The Heath Robinson house stamp was stamped onto grey card using black versafine ink and coloured with a mix of brusho powders and watercolour pencils. I cut it out into a sort of bubble shape to echo the bubbles, then cut the same shape out in black as a mat and orangy red to match the colours of the house. The sentiment was also cut into a shape and given a black mat, then glued at an angle
 The last one is simply stamped onto grey card  and coloured with brusho powders, mounted onto a DL card blank.

I loved these quirky houses, especially the tree house, and can see them getting quite a bit of use - the tree house would make a great halloween card.......


Saturday, 11 May 2019

Lazy Days and Purple Haze by Penny

Goodly morning peeps, I hope you are all well and happy.   I am here with the first of this month's DT posts featuring the beautiful stamps from last months shows.  These two cards feature a couple of the lovely tree images, one of my favourite subjects to stamp!

Lazy Days

I have used images from the Trees A Crowd, Floral Edges and Country Views sets, Distress Inks, Black Versafine ink and clear embossing powder.
I stamped and embossed the tree with hills image onto white card, then did the same with a sunset image, placing it next to the tree.  I then joined the images up with a black fine liner pen, and extended the hills.  I painted the images with Distress Inks, and used a watercolour ink for the sky. I added clouds with a white charcoal stick.


I stamped the grassy edge image along the bottom of the panel then blended ink around the edges.  I matted the panel onto black card and attached it to a white base card.  I stamped and embossed a sentiment, die cut it, added some ink around the edges and attached it to the card.  I added a couple of die cuts and gems from my stash to complete the design. 


Purple Haze.


This project also uses stamps from the Trees A Crowd set, Distress Inks and white Gesso.  I wanted to create a misty morning effect for this one, I began with a piece of white card and placed a circular mask near the top.  This will create a sun.


 Using a scenic mask and Distress Inks I created a landscape in several hues of purple, with a pale lavender sky.  I used a dry paint brush to gently add white gesso to create a misty effect.  I then stamped a tree using black ink, and stamped another one next to it without re-inking, pushing it  behind the first tree.  I then stamped the smaller tree in second generation ink, making it appear in the distance.  I used DIs to ground the first two trees.


I matted the focal panel onto purple card, then stamped the small tree around the edges of a white base card.  I turned the image around at each stamping to create a lovely patterned border.  I attached the panel to the base card and added a small sentement panel.


Thank you for popping in and spending a few minutes with me, I hope you feel a little inspired.  I shall be back later in the month with more crafty fun to share, in the meantime my team mates will be here to feed your crafty appetite!

Take care,


                       xx  Penny  xx

Thursday, 9 May 2019

Beautiful Homes (by Judith)

Hello everyone, I am sharing two projects today showcasing the fabulous bookmark style houses that we brought to Hochanda last month. These lovely designs drawn by Sue have been a delight to work with, and I hope that you will enjoy what the Design Team are showing you this month.

My first project is an acrylic tag, and I have stamped the Garden House onto the reverse of the tag using Archival Ink, then painted the image using acrylic paints. I used a piece of patterned paper from the Chic Script Designer paper pack, and stamped the sentiment onto the paper before adhering the paper to the tag using Matte Medium.

To create my second project, I stamped the Acorn House twice, masking the image as I went along. (I took care not to ink the sun in the second repeat of the image, by covering it with masking tape first, inking the image and peeling off the masking tape before stamping). I coloured the background with a watercolour wash, then stamped the large tree several times. I added foliage using Glade Design a Tree and several colours of ink, building the colours with first and second generation stamping.

I removed the masks and coloured the house with pencils. Finally I added a sentiment to finish.

The sentiments on these stamp sets are so uplifting and would be suitable for lots of occasions.

I will be back later in the month with more projects to share with you, thanks for stopping by,

Judith xx


Wednesday, 8 May 2019

Steampunk Balloon (by Pat)

Hello everyone, our Guest Design Team member Pat is sharing three projects with us this month. Today she has created a Steampunk style card in shades of blue.
Pat writes:

Hi everyone, it's great to be back here again with another three posts this month. I can't believe I am now into my second year and I am thoroughly enjoying being part of the Guest Design Team. If you are anything like me, making a man's card always seems much more difficult, so I decided to address this and start my month with one.

I used Steampunkery for the main image, and Paisley Elephant for the sentiment, Distress Inks, a grey permanent ink, clear gloss embossing powder, silver mica powder, a piece of acrylic and a waterbrush.


I started with the background using three blue inks and laid them on to the piece of acrylic and spritzed with water, then pressed the inky acrylic on to my white card. Using the acrylic allows you to place the colours more specifically, and I didn't want them to be more central leaving the outer edges fairly white. I added more colour, drying in between, until I was happy with the result.

I then stamped the airship using the permanent ink and heat embossed, then coloured it with the waterbrush using two blues and a purple ink. I then mixed some mica powder with a little bit of water and painted the propeller shaft, which in the light is nice and shiny, though unfortunately it never shows up well in a photo.

I finished the background by adding the words in second generation blue ink and also stamped the little parachute keys using the same ink, and coloured with a turquoise blue to tone in with the rest of the card. I stamped a sentiment straight on to the balloon, again using the blue ink, and finally mounted it on to a piece of blue card and added it to a square white base card.

Thank you for joining me today, and I look forward to returning next week with my second post.

Best Wishes,

Pat x

Monday, 6 May 2019

Is it too early for Christmas - By Zoe

Good morning Lovelies, I hope you all had a lovely Easter, wasn’t the weather superb?

So for my first post this month I have created a couple of CAS Christmas cards and a couple of colourful cards with the fantastic trees stamps the were featured on Hochanda last month, I hope you managed to catch our fab Lesley and Judith? 

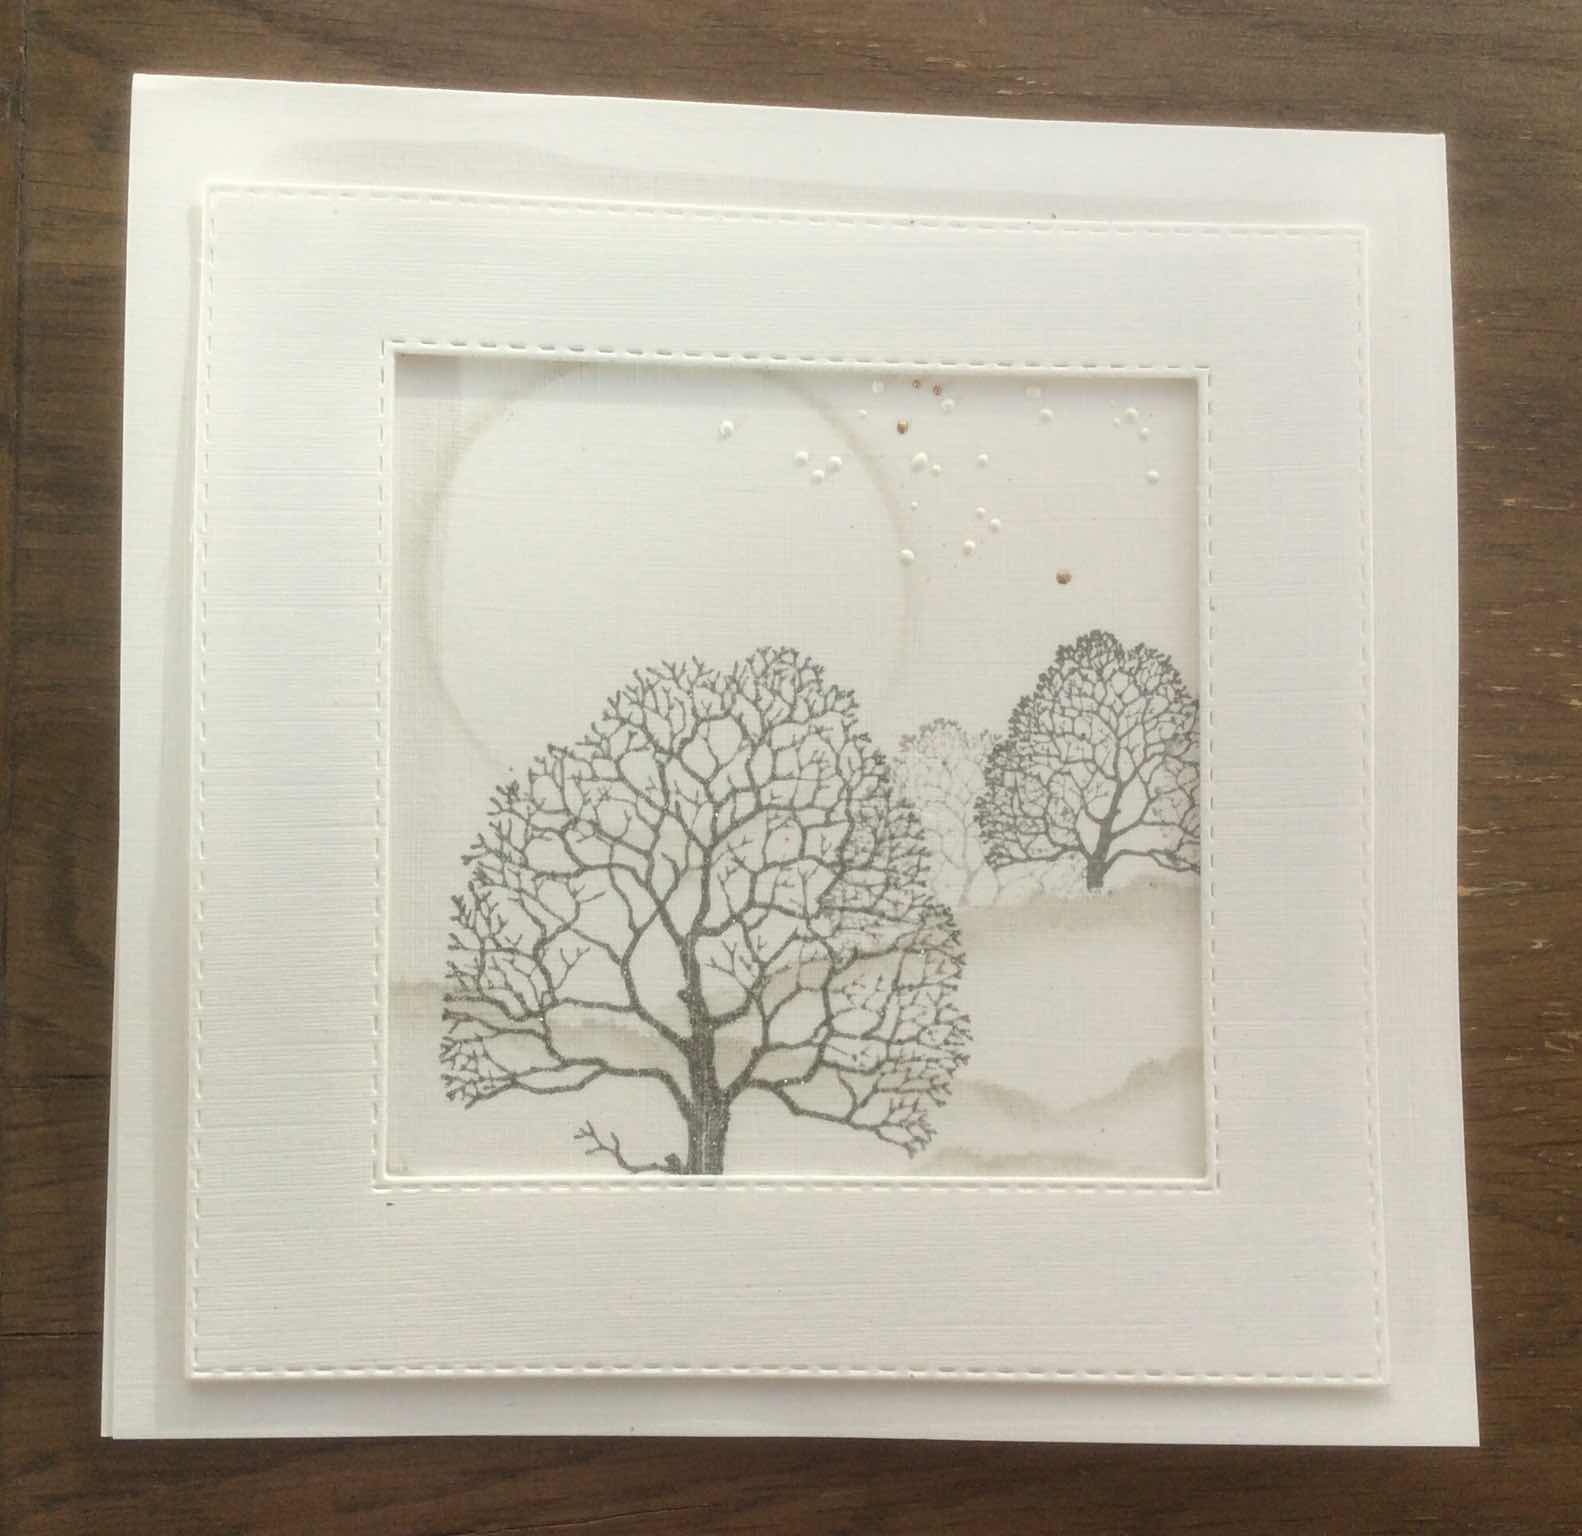
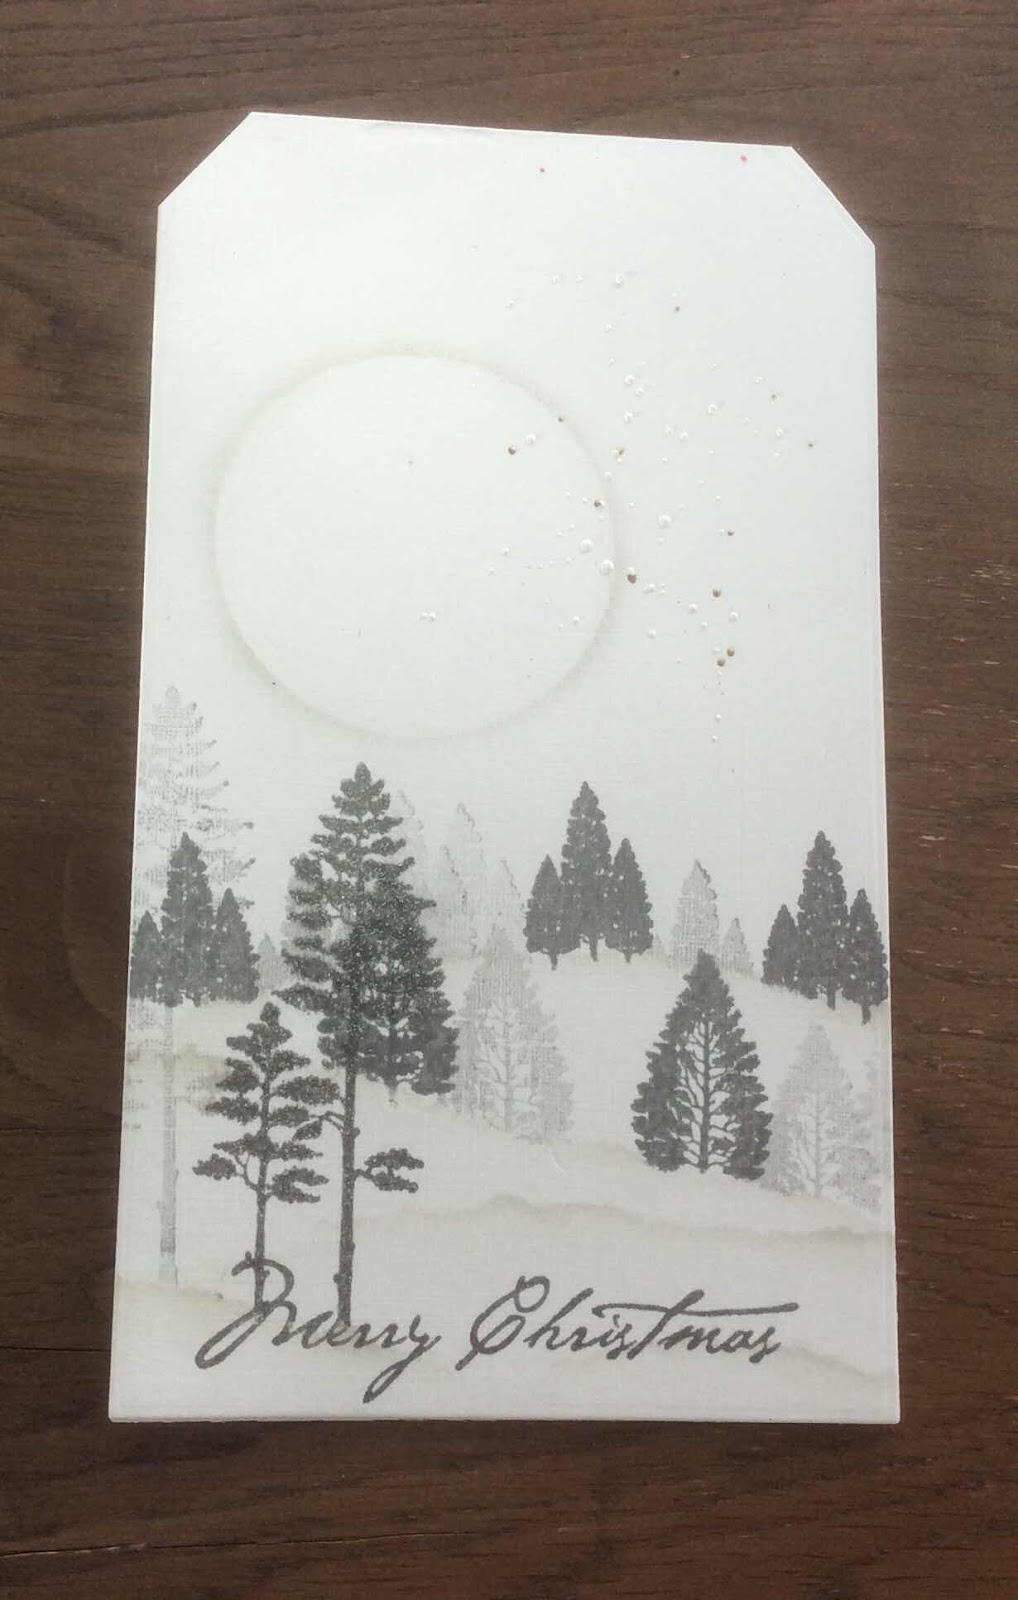
I used Linen textured cardstock for my 2 Christmas cards, first one folded and diecut with a large tag die, second creating a frame with a stitched edge nesting die.

I used torn paper and a circle mask with shades of grey inkpads, stamping using greys tones too, I finished off with some chunky Embossing powder to give some texture and create a snow effect.


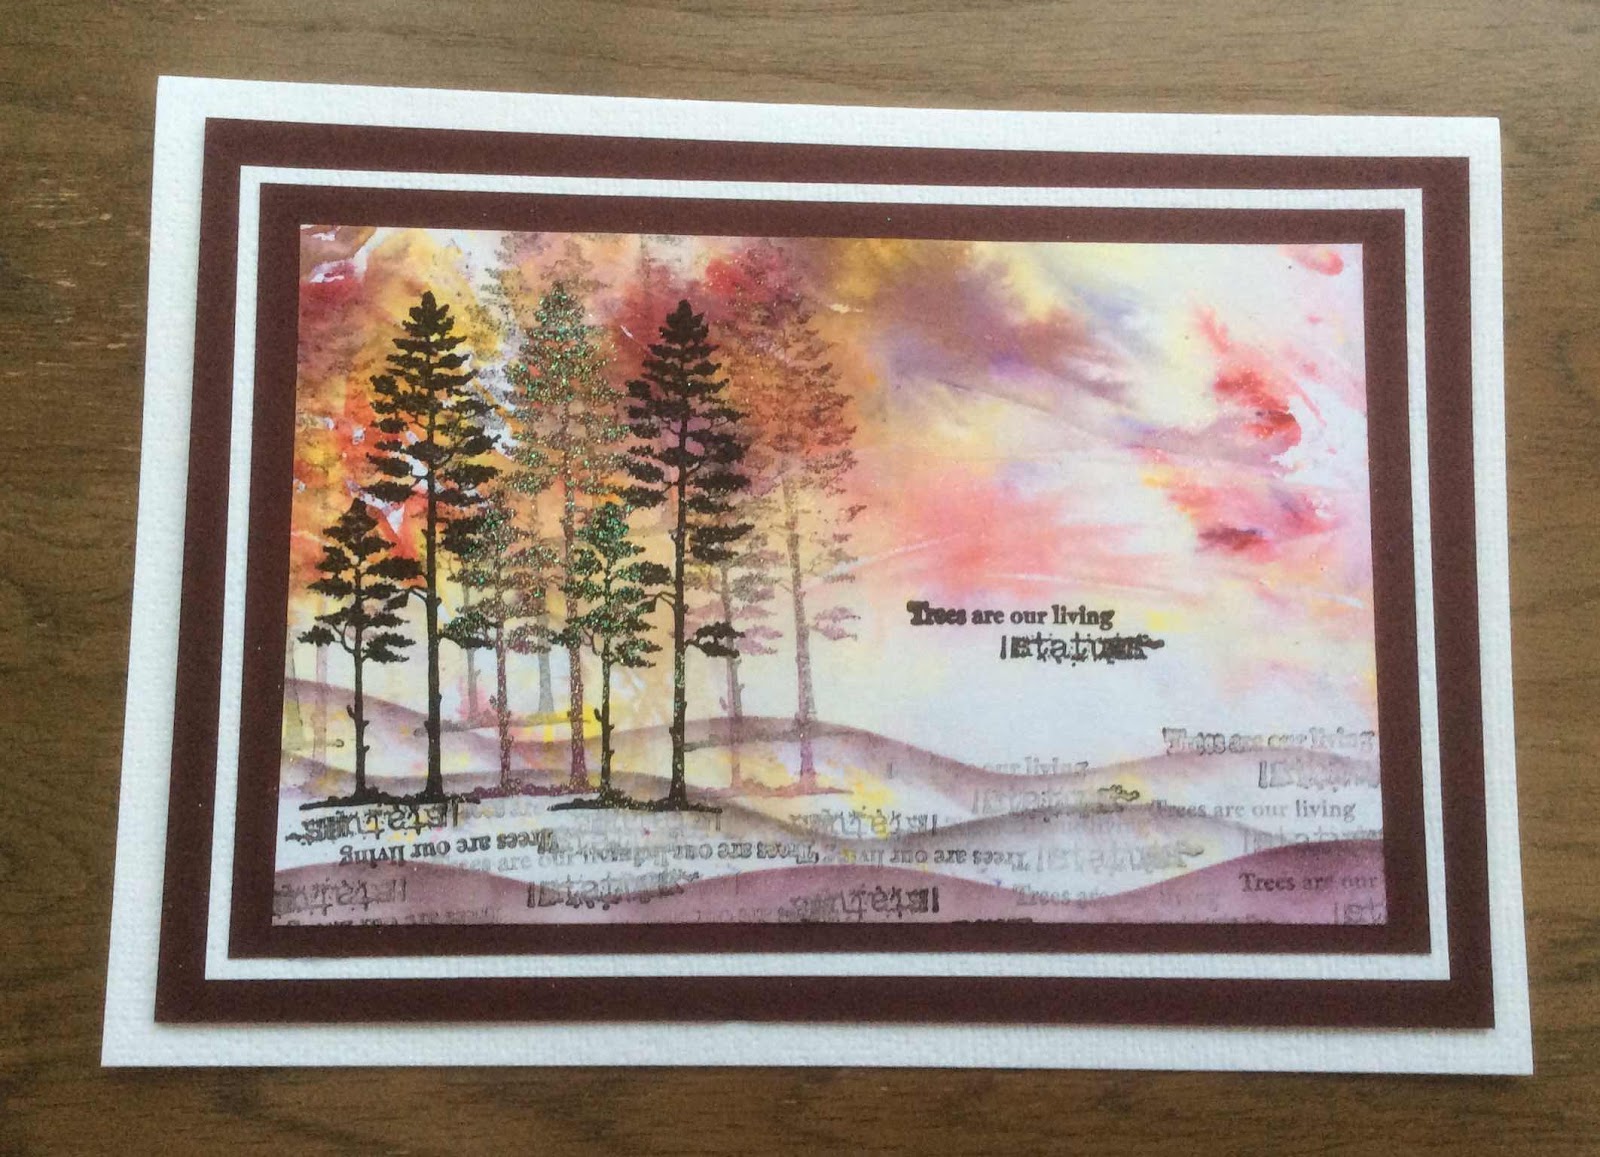
I used Watercolour Card which I sprinkled with Brusho’s, sprayed with spray starch, sprinkled with fine glitter, wrapped in wrinkled up cling film and left to dry.
 I stamped using Versafine Claire inkpads in Nocturn and Chianti, first and second generation to create some perspective, the very top image I added a clear sparkle Embossing powder and heat embossed, then using a stencil and the Chianti inkpad I created hills, repeat stamped the sentiment for more texture over the hills.

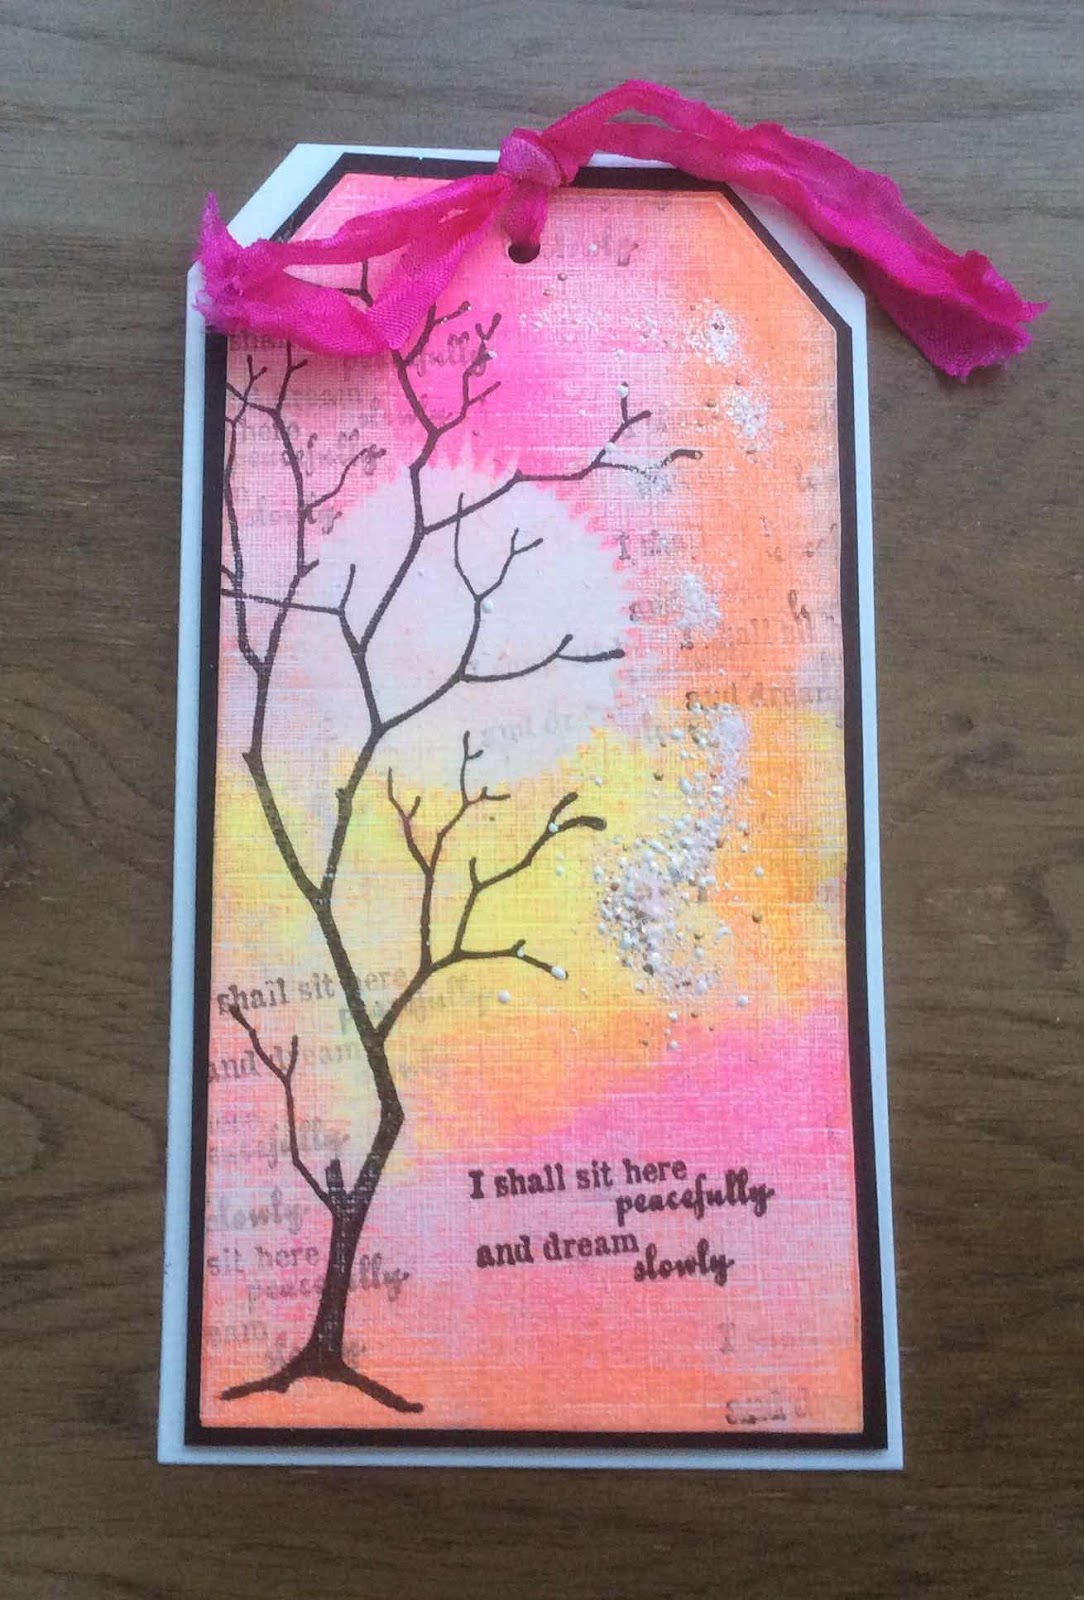
My final card I used Linen textured cardstock and a nesting tag die. I simply brayered neon acrylic paints in a very random fashion, whilst still slightly wet I used a starburst type stencil from my stash and a damp cloth removed some of the paint, simple stamping and some chunky EP for texture.
Thank you for taking the time to leave a comment, have a wonderful day xx Zoe xx 

Sunday, 5 May 2019

Autumn sunset by Brenda


Good morning everyone, Brenda here with some of my creations made for Lesley's Hochanda shows where she showcases some wonderful new stamps.

I've always had a bit of a thing for tree stamps so was really in my element with the new Trees A Crowd set which I used for the above card. I started by creating a background using masks and Distress Inks plus Pan Pastels, I then stamped four of the trees from the set, used second generation stamping to create the shadows in the water and used a fine line pen to continue the ground lines. The sentiment is from the new Acorn House set.


This one features Garden House which I repeat stamped to extend the fence line and flowers which I decided are Hollyhocks, coloured in with pencils, added some clouds with Pan Pastels and matted onto a back panel stamped with the honeycomb pattern from Honey Bee set. The sentiment from the same set as the focal image is stamped onto a torn piece of vellum along with a Bee also from Honey Bee set.


A simple four panel base created on a score board and Acorn HouseGarden HouseHeath Robinson and Tree House stamped onto tags using Versafine Majestic Blue, some ink splattering around the images and just yellow colouring added.


For this one I used a frame card inking the frame with DI's and using Versafine Clair stamped trees from Trees A Crowd (before assembly) and on the insert I used deeper shades of DI's, a sun mask and stamped the tree using the same Clair ink and added some branches around the top of the piece plus some hand drawn birds.

Thanks so much for visiting today.

Friday, 3 May 2019

Houses ( By Marga)

Hello everyone, here is Marga again with a new post today.

Today I want to show you two cards with the Acorn House and the Tree House


The Tree House I inked with different colours of ink and then I washed it out with a waterbrush.
Put some shadow around the stamped image and you have a watercolour look.


The Acorn house I stamped on a old book page and I only coloured the sun in it.

Hugs Marga

Thursday, 2 May 2019

April's Blog Comment Winner

Hello everyone, 

We truly appreciate the time you take to let us know your thoughts about our designs, so each and every comment is very important to us.
Each comment in April was assigned a number and we used Random Org to draw a winner.
Congratulations to Christine, you have won this months £15.00 voucher to spend on Chocolate Baroque stamps. To claim your prize, please email here to confirm your email address and Lesley will send your gift certificate.

Lesley will be giving another £15 gift voucher to another lucky winner drawn from May's comments. The more comments you leave the better your chances of being the winner.

Thank you so much for all the kind comments you leave.

Good luck from the Design Team


Wednesday, 1 May 2019

Landscape bowl and cards (by Rachel)

Hello there! Its a new month and so we are going to be focusing on some different stamps in our projects. This month the projects are from April's shows and the first one I want to share with you is the bowl I made for the shows. I used one stamp from the Trees a crowd stamp set in my design and just did repeat stamping around the bowl plus one inside the bowl. After stamping I overpainted in glazes of several colours.


 I thought the repeat stamping gave the impression of an entire landscape around the bowl and was pleased with the way the whole thing turned out.


This is the stamping and the continuation of the glaze colours inside the bowl. 
These stamps are just so versatile... using some of the other stamps from this set I also made the following samples:


A simple stamped card.


A 3D ATC made using layers of acetate and paint.


Finally another card - I used paper and ink and a mask to create the landscape then added the tree to the card. Simple and effective I think.

I hope this has given you some inspiration on how you could use your stamps!

Big hugs and have a great day!

Rachel xx


Tuesday, 30 April 2019

Punky Love by Penny

Hello peeps, I hope you're all well.  I'm back with my second post this month, and in this project I've been able to indulge my passion for Steampunk!  I have used stamps from the Punky Romance set, some acrylic paints, a stencil from my stash, and a metal embellishment and chain also from my stash.


I began by stamping the large mechanical image, some cogs and the clock image in black Versafine onto black card and embossed them with clear powder.  I masked the images and then used a sponge to add acrylic paint, creating a textured look to the background.  I removed the masks and painted the images.  On spare card I stamped and embossed the pocket watch cover and the word 'Love', embossing one with gold and the other with copper powder, then cut them out.  I matted the panel onto black card.  


On a white base card I stamped a couple of cogs randomly along the edges and stencilled a few as well.  I attatched the focal panel to the card, added the word with 3D foam pads, and attatched the pocket watch cover with 3D pads and a chain with a butterfly at the end.

  
Thank you for popping by today to look at my post, I hope you enjoyed it.  I'll be back next month with some more crafty fun!


Take care,


                          xx  Penny  xx