Pin It button on image hover

Tuesday, 15 October 2019

Magnolia Butterfly (by Julie )

Hello, today I have two cards featured around the lovely Magnolia from Happy Flower's Day


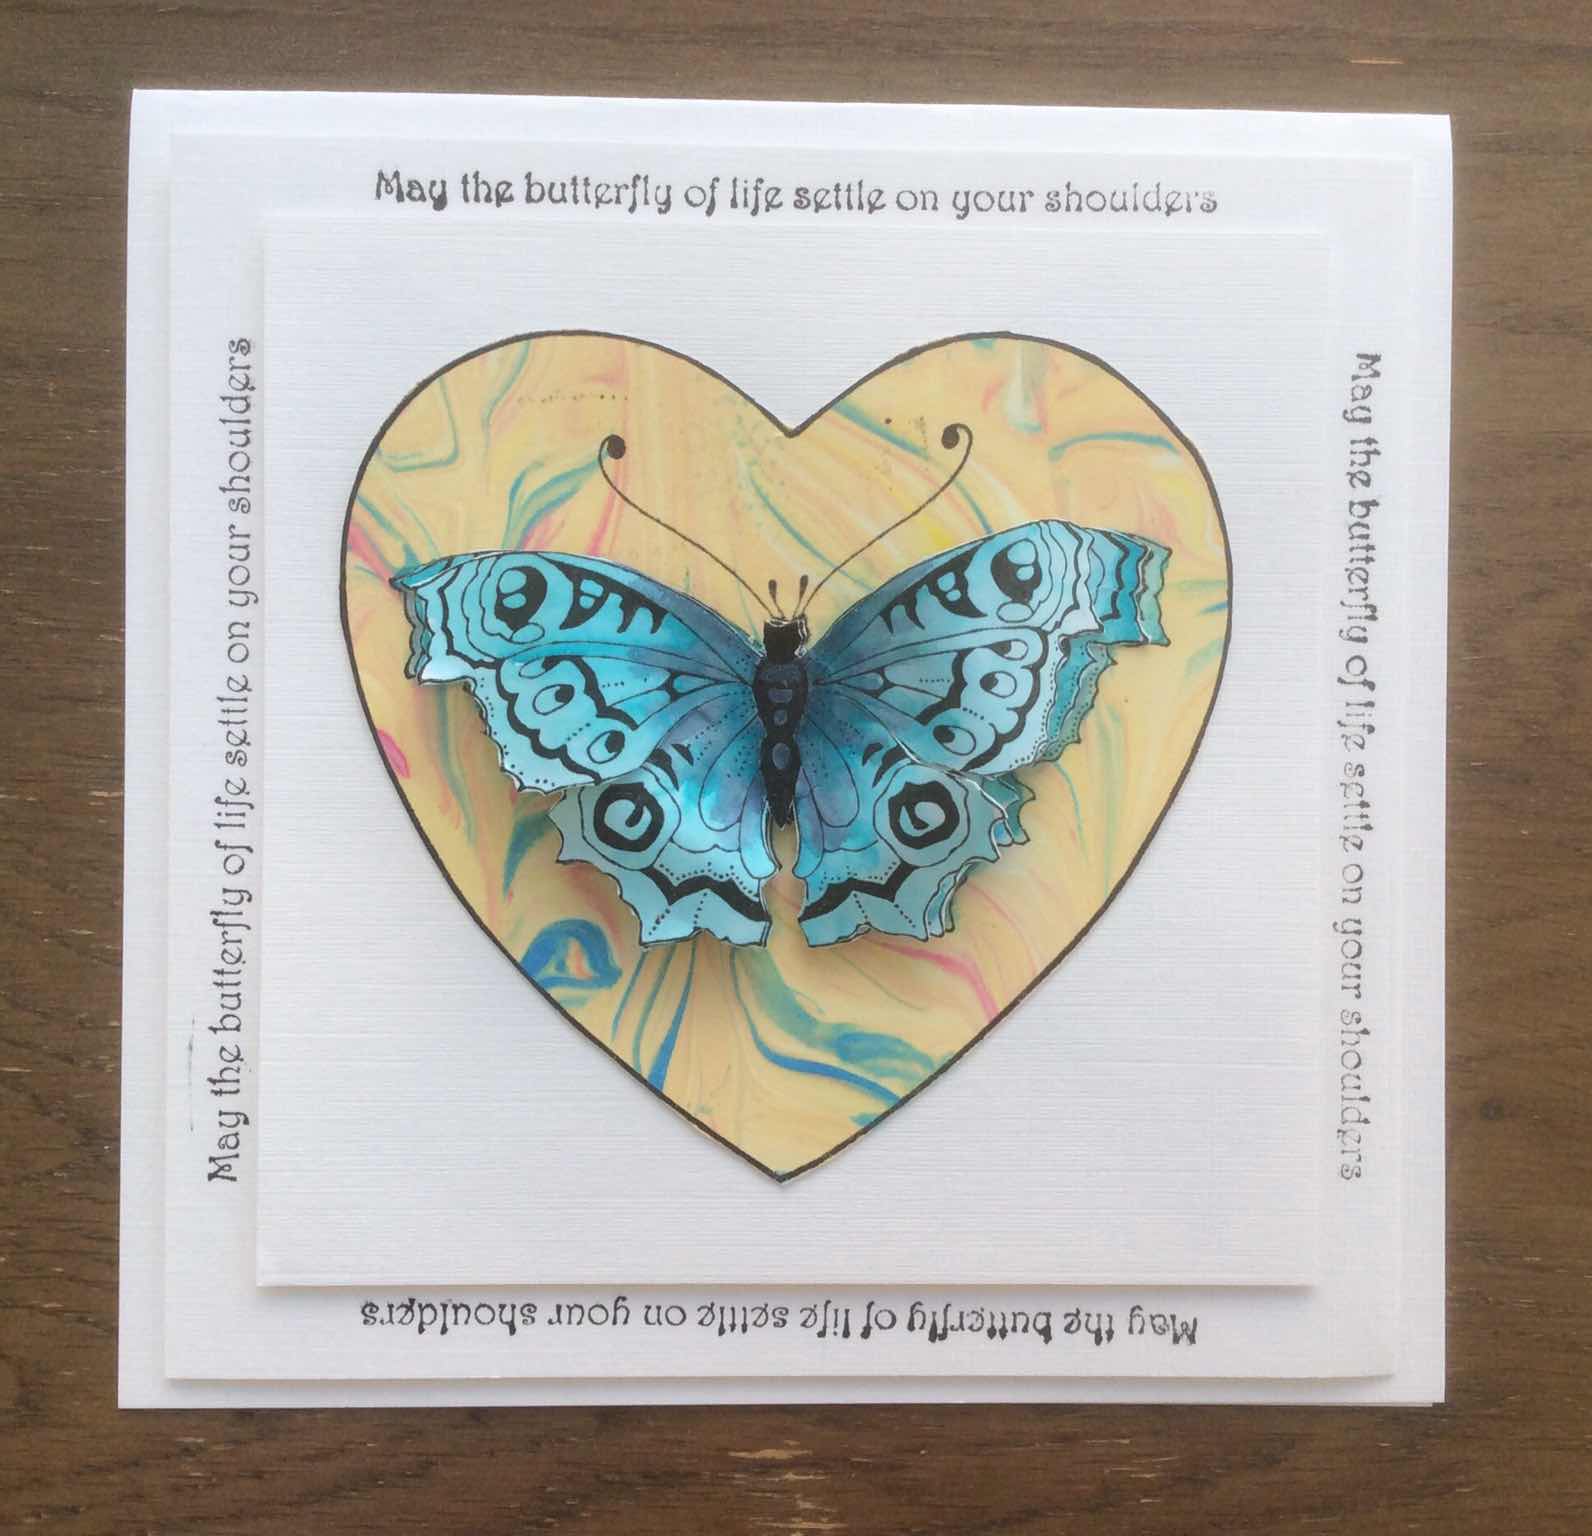
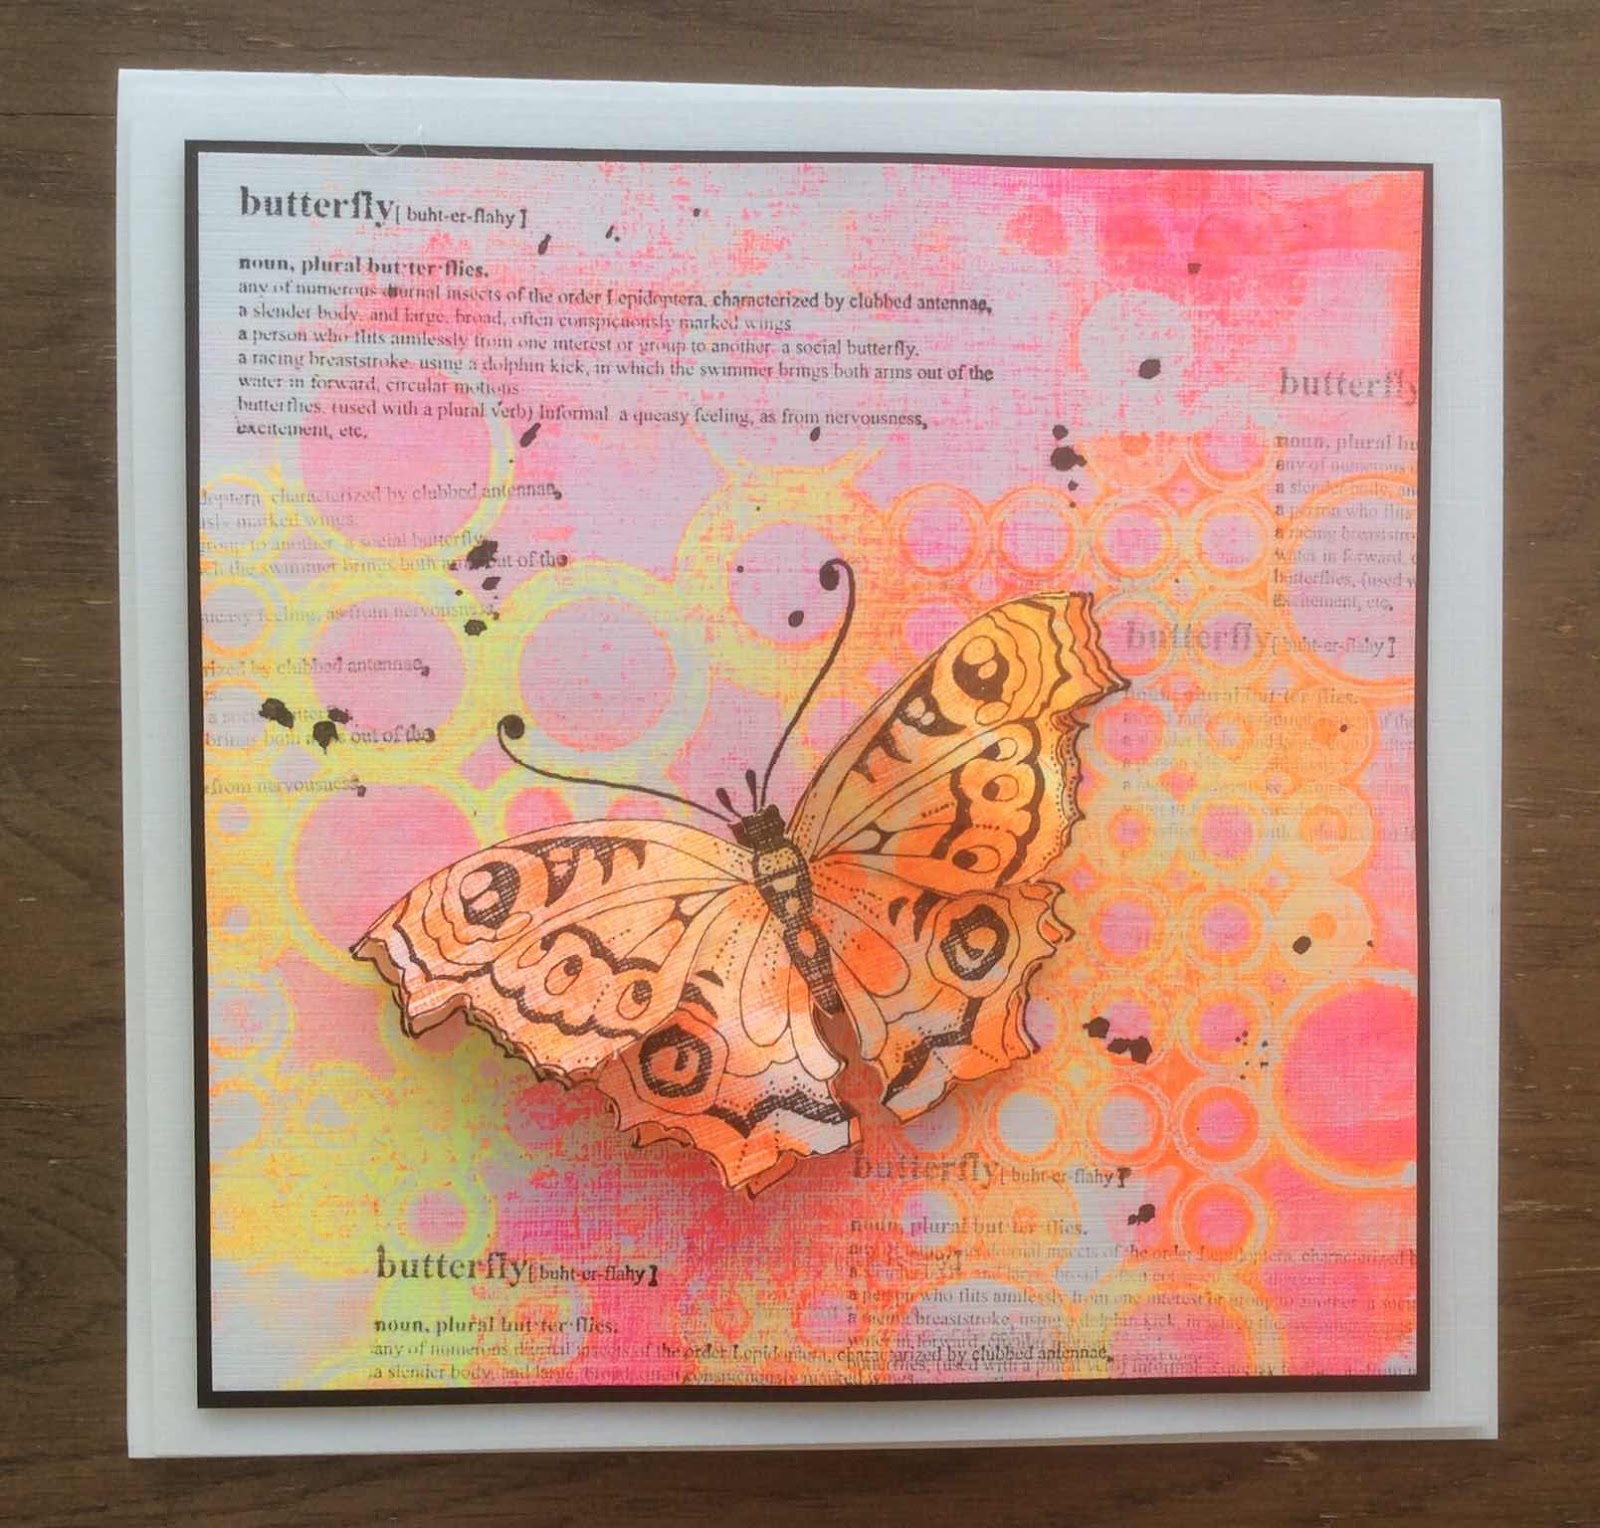
My first card is a simple stamp and colour. I started by stamping the Magnolia to the bottom left of the card along with the Butterfly sentiment next to it. I coloured the Magnolia with polychromus pencils and the background with Distress inks. The black splats are from a black ink spray bottle that I carefully dripped over rather than spraying as I wanted a more controlled look. The butterfly was stamped onto spare card-stock, coloured with Distress inks before being cut out and mounted onto the design with 3d foam pads.


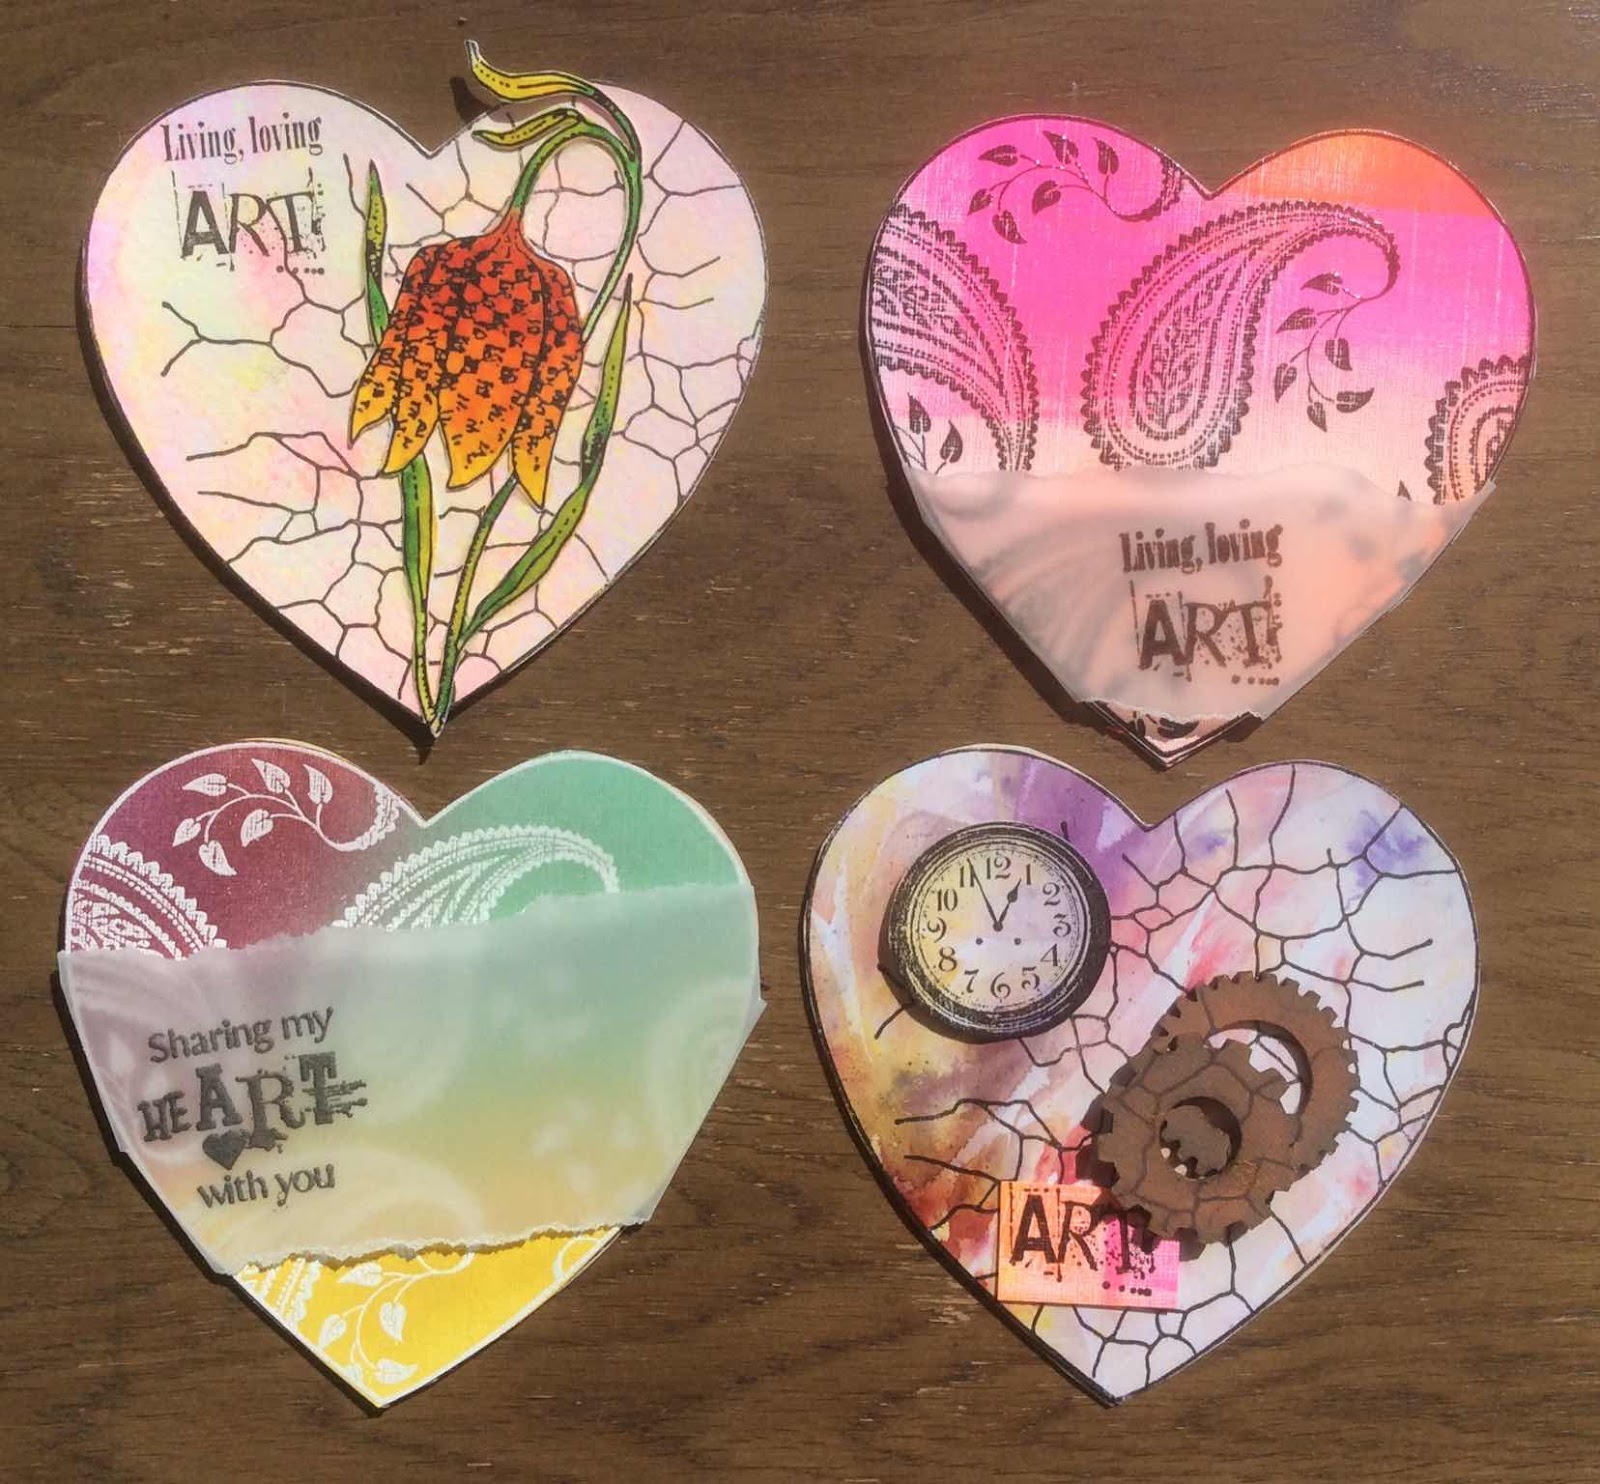
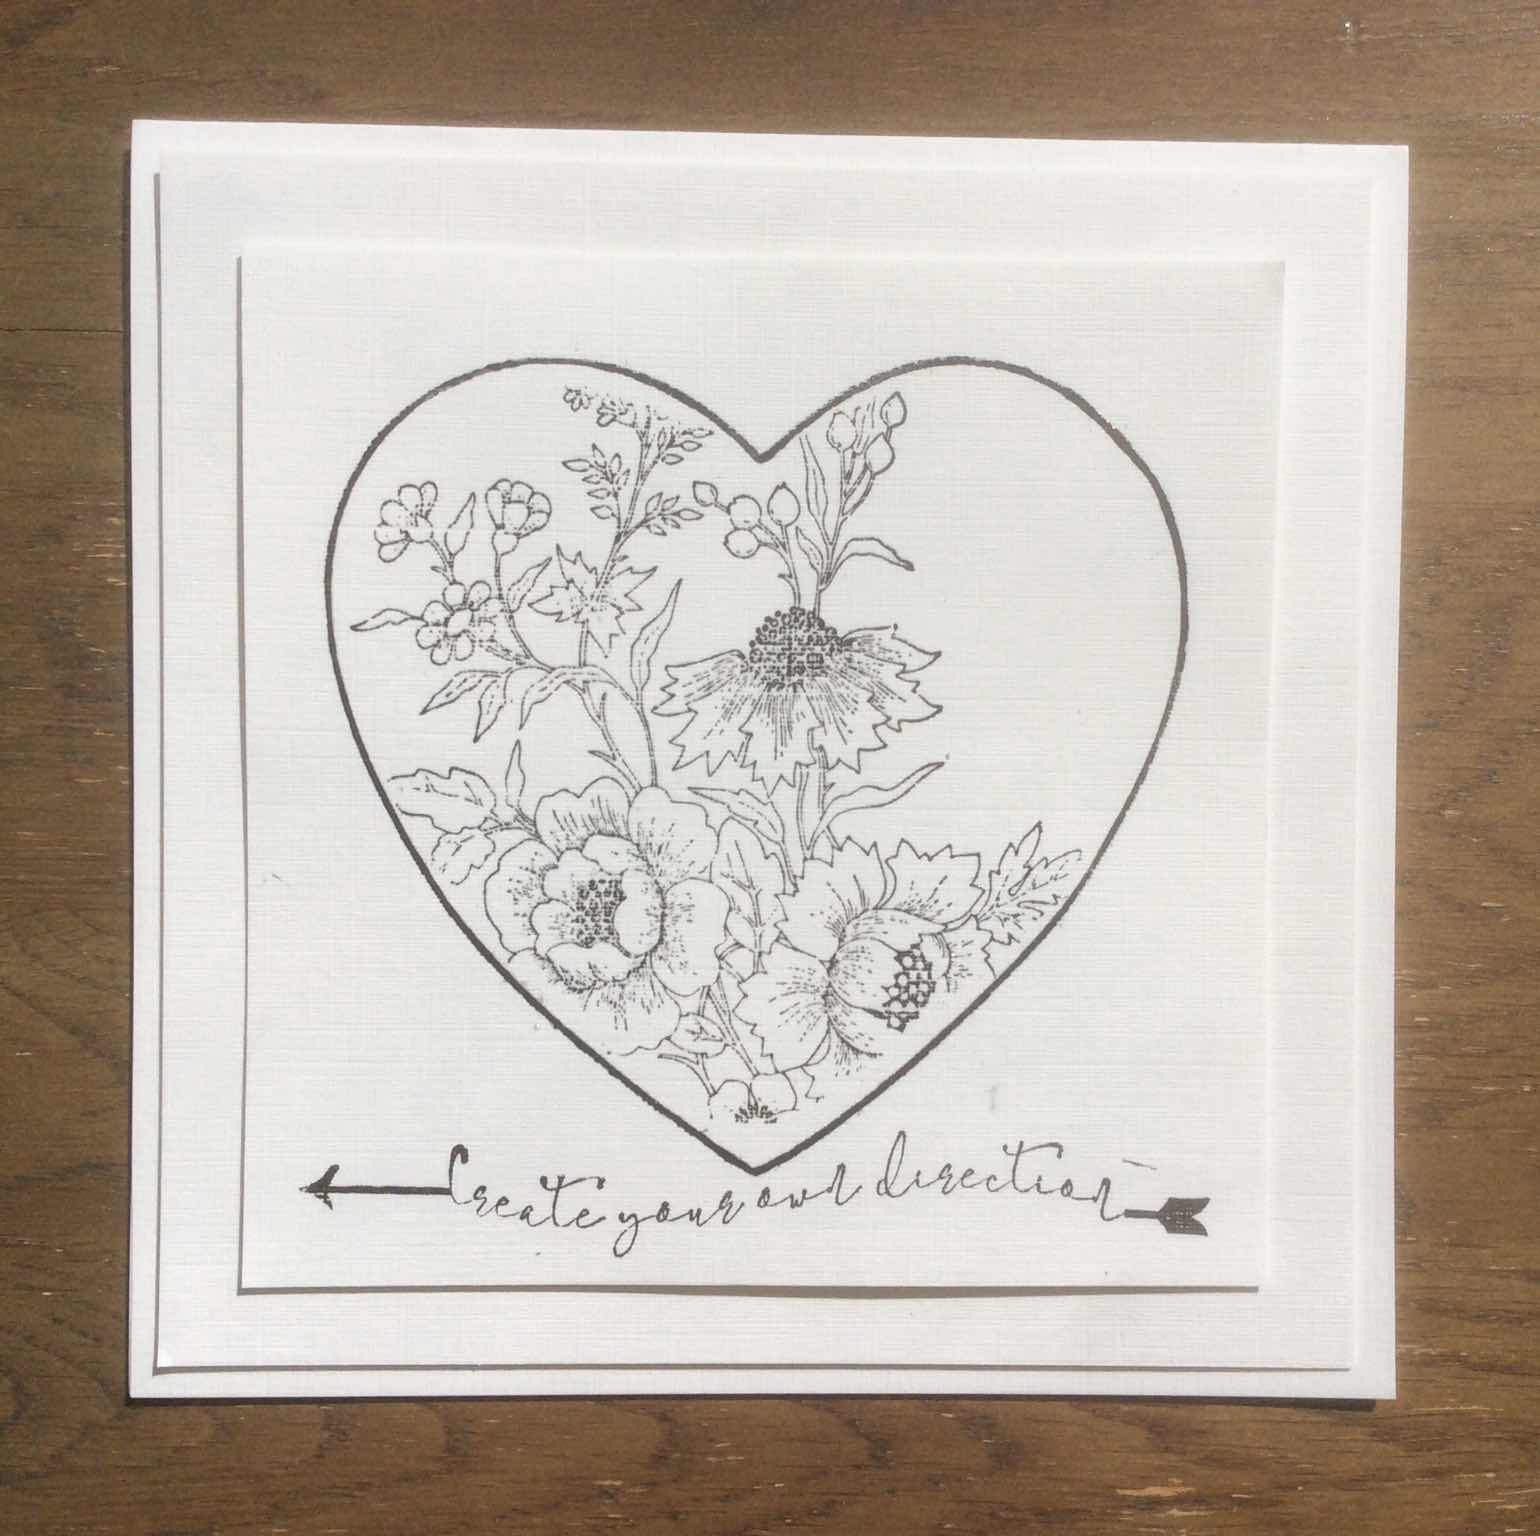
For my second card I started by stamping the heart from Artist Trading Heart onto the card blank and I also made a mask by stamping onto a piece of copier paper. Carefully cut out the heart from the copier paper and place the negative part onto your card design and stamp the Magnolia into the blank heart so that it appears in the heart. Swap your mask for the positive bit so your magnolia heart is now covered, before stamping the geometric heart from Geometric Trading Heart, to the right of your design. Remove your mask and you should have two hearts.  Stamp the sentiment, colour the stamped images with polychromus pencils and the background with Distress ink. The splodges are from a cerise pink, spray ink bottle which have been dripped over the background rather than sprayed.

Thanks for stopping by and please call back soon for more Design Team inspiration.

Julie xx

Monday, 14 October 2019

Beautiful Magnolia by Rachel

Hello there! Rachel here today and I would like to share my makes from the September shows - particularly those involving the magnolia from the Happy Flowers Day stamp set.

First of all my ceramic piece. Curved stamping surfaces are always more of a challenge but this large stamp worked easily on the vase. I stamped in ink which burns off on firing, then over painted in glaze and outlined in brown. I added the butterfly on the rear of the vase too.


This next card involved a gelli plate background that I created using inks on a 6x6 inch square gelli plate. I applied the ink with my brayer and played around with using the brayer to make 'mountains' at one area. Then I added some splats of water before pulling the print. Next I stamped the artists trading heart and the magnolia before colouring with water colour pencils.


This final background was made using pixie powders and a stencil before stamping the image and again colouring with water colour pencils. 


I do hope this has given you a little inspiration of ways to use your stamps!

Have a great day!

Hugs

Rachel xx

Sunday, 13 October 2019

Happy Hearts and Flowers Day by Debbie


Hi everyone, it's my turn to show you the samples I designed for the September Chocolate Baroque Hochanda show. We had some lovely florals & hearts to choose from and a wealth of options for your imagination. 

Here's my first design using Celebration Bouquet


For this one I simply embossed the image with white powder onto Kraft Card and sponged with Distress inks Blueprint Sketch, Peeled Paint, Barn Door and Fossilized Amber.

I then layered onto white & Kraft card before attaching to an A5 Kraft card blank. Very simple but clean and delicate. I just love all the fine detail in this stamp. 


Next, we have Happy Flowers Day


This is one of my favourites and for this one I began by flicking some brown ink onto an 

8 x 8 ivory card blank. Next I die cut some hexagons and then stamped parts of the magnolia, butterfly and script using a black inkpad. I coloured with pencils and attached 2 strips of burlap onto the card blank before attaching the hexagons.


I just loved September's stamps and once I got going, I just couldn't stop! My next sample incorporates the great Artist Trading Heart and Geometric Trading Hearts.


This again is a simple design. I stamped both hearts onto card which I had smooched (wipe the card through watered ink on your craft mat) Distress inks onto using a black inkpad. I then cut them both out and stamped the sentiment and image onto the plain one.

I stamped Square Bubbles onto a 6 x 6 white card blank using a grey inkpad and sponged Distress ink Wilted Violet  around the edges.  


 Finally, we have the Snakehead Fritillary from Happy Flowers Day  


For this card I stamped onto a white die cut oval (a smaller one for the sentiment) using a purple inkpad and then stamped again without re inking the stamp (secondary stamping) which gives you an interesting shadowy effect. I coloured the flowers in the foreground using pencils and mounted onto a grey A5 card blank.


That's all for this time but I'll have lots more to show you layer in the month including the samples which didn't make it onto the show. 

Thanks for visiting Debbie


Saturday, 12 October 2019

More Flowers (by Magda)

Hello,
I would like to encourage you to use the new "Happy Flower's Day" stamp.  I had a lot of fun using this new plate from Chocolate Baroque and I share with you 3 Cards and a Tag.

Two of the cards have a layered stenciled background, coloured with Distress Ink pad, stamped images with Archival Jet Black and coloured with Faber Castell Art Grip Aquarelle Pencils

The white card has a coat of gesso on the stamped image and the texture is the result of random strokes done with a spatula.

The craft Tag is stamped with Versafine Vintage Sepia and coloured with chalk pencils.

You can find the sentiments on the "Words to Dazzle & Sparkle" plate.

I hope you like my projects and thanks for passing by.
Magda 


Thursday, 10 October 2019

magnolia (by Veronica)

  The stamps for the September shows were all lovely, but I am sharing my absolute favourite today , the magnolia from the the happy flowers day sheet. It is a large image, just perfect for colouring, and suitable for so many occasions - I never got round to making the sympathy card version.
Both of these card are 8" square, so that gives you some idea of the size of the stamp. very similar technique for both. The first version began with white card, spomged with distress oxide inks, mostly using antique linen and wild honey, with a heart shape masked off (I used the heart stamp to create the mask) after stamping the heart from geometric trading hearts. I randomly stamped the same heart stamp in the background using it hand held. The m   agnolia was stamped in versamark and white embossed before colouring with koh-i-nor watercolours. The sentimnent and butterfly were stamped with black versafine

The second card has a base of kraft card, stamped with various small wordstamps from the sets in the show, using vintage photo distress oxide ink, which was also sponged round the edges.
Magnolia again white embossed and watercoloured - the colours were those in the first card, but the darker base really makes them pop. The sentiment was also white embossed.

Wednesday, 9 October 2019

Autumn Mushrooms (by Gerrina)

Hello everyone, our regular Guest Team Design member Gerrina is her with us this month. She will be creating three projects for your inspiration, and here is the first one, a lovely Autumnal scene:

Feels so good: it is my turn again for my posts as a member of the Guest Design Team! Three weeks in a row you will find not only here, but also on my blog, makes from me with the beautiful stamps from Chocolate Baroque.
This week the first one of this month, I made an Art Journal page for my long Art Journal. Because it is Autumn, I used the gorgeous mushrooms from two Chocolate Baroque stamp sets:


Used Materials:

Stamps: Autumn Edges, Autumn Poppy
Ink: Versafine Onyx Black, several colours of Distress Ink


Other: Art journal, watercolour paper, masking tissue, brush, water.


Creatieve groetjes


                              Gerrina


Tuesday, 8 October 2019

Bouquet of Sunshine and Smiles and Pink Magnolia by Penny


Bouquet of Sunshine and Smiles.

Morning Peeps!  I hope you are all well and enjoying the lovely Autumnal colours that are starting to come through!  I'm back to share my first post with you this month featuring stamps from the Celebration Bouquet, Happy Flowers Day and Filigree Trading Hearts sets, CB Mask/ Stencil   Useful Leaves and Kaleidoscope of Butterflies, Distress inks, black Versafine ink and alcohol markers.  


I began by stamping the bouquet image onto a piece of CB Luxury SmoothWhite Paper using Versafine ink and coloured it with pens.  I did the same with a butterfly then fussy cut both images.    


On a plain piece of CB's Designer Papers I added DIs through a couple of stencils to create a background, then added gold pen around the edges.    I took a white base card and stamped one of the worker images around two edges.  I attached the background panel to the base card, off setting it to the side.  I then attached the bouquet and butterfly with 3D glue, stamped and die cut a sentement then attached it to the card with 3D glue.


Pink Magnolia.

This project uses stamps from the Happy Flowers Day, alcohol pens, Distress Inks, CB Stencil Kaleidoscope of Butterflies, black Versafine ink, clear embossing powder and an embossing folder from my stash.


I stamped and embossed the Magnolia image onto smooth white paper, then coloured it with pens.  I added a few stencilled butterflies using DIs then blended ink around the edges of the panel.  I took a piece of Kraft card and embossed it through a folder, then attached it to a white base card.


To complete the card I stamped a sentement along the bottom edge of the base card.


Thank you for popping in today, I hope that you have enjoyed this post and that I've encouraged and inspired you to have a go!  I'll be back later in the month with some more crafty fun!

In the meantime take care,


                        xx  Penny  xx


Sunday, 6 October 2019

Blue Butterfly (by Judith)

Hello everyone, I have a project to share with you today featuring stamps from last month's TV shows on Hochanda.

I have chosen to make a card using stamps from the lovely Happy Flower's Day stamp set, which is such a versatile collection of images. The flowers and butterfly are just delightful, and the script is incredibly useful to add as a background or embellishment. I think these are going to be a long time favourite of mine!

I started out by creating a background using the large butterfly, and stamping and embossing over a piece of drawing cartridge with white embossing powder and Versamark Ink. I added Brusho powder in Sea Green and Turquoise, then spritzed with water. I dabbed the background with a piece of kitchen towel to blend the background, and the butterflies acted as a resist for the vibrant colour.

I used the damp kitchen towel to colour a whiteboard heart, creating a much paler colour, which was exactly what I wanted. I then stamped the butterfly definition over the top using a green Archival ink. I stamped and embossed the butterfly once more onto a piece of coloured vellum, and cut it out, attaching it to the whiteboard heart. Finally, I used a piece of deep green card to mat the background, and pull everything together.

I will be back later in the month with more projects to share with you. Thanks for stopping by,

Judith xx

Saturday, 5 October 2019

Who can resist hearts and flowers by Zoe

Good morning and welcome to my first post for October.

I hope you managed to catch the show on Hochanda featuring these stunning florals and exciting new ATHearts?

Here are some of my samples I made for the show.

I just adored using these hearts, flowers and that butterfly is just beautiful, such a great size and easy to cut out.

I’ve used a variety of techniques with my samples from Brayering neon acrylic paints, using Stencils and the Shaving foam technique.

As you can see I got very inspired with these stamps and the ideas just kept coming.


Thank you so much for stopping by. 

I hope you’ll pop back each day to see what the rest of the Design Team have created and of course I shall be back later in the month too.

Have a wonderful day xx Zoe xx 


Friday, 4 October 2019

A Bouquet of Smiles by Brenda


Good morning Brenda here with some samples from last months programmes on Hochanda which features lots of beautiful new stamps.

My first share above used the pretty Snakes Head Fritillary from the Happy Flowers Day set. My starting point was an inky background using Distress Oxides along with some stencilling and a die cut corner. The flowers were stamped using Distress Markers direct to stamp along with a spritx of water, cut out and arranged on the base, some twine,  sentiment and shrink plastic Butterfly from the same set.


Another Oxide background and stencilling but this time I used bleach through the stencil to remove the colour and leave the flourish pattern. Sentiment and Butterflies from the same set as the above card stamped with Versafine Clair.


This is the beautiful Celebration Bouquet, stamped in Versafine Clair onto a background created with a stencil and Distress Inks, the adding colour to just a few of the blooms.


The new Filigree Trading Hearts and Geometric Trading Hearts were really popular on the show and for this one I die cut three different sized hearts onto card which I first covered with some DP, stamped onto them with three of the hearts from the sets, the sentiment and coordinating DP down the leading edge.


Finally the beautiful Magnolia from the Happy Flowers Day set, stamped with Versafine onto black cardstock and heat embossed with detail clear EP, then coloured in with Twinking H2o's along with a sentiment from the same set.

Thanks so much for your visits today.


Thursday, 3 October 2019

Marvellous Magnolias

Hello
I'm sharing some of the cards I made for the August show on Hochanda which featured the Happy Flower's Day stamp set. This set contains a lovely selection of flowers, butterfly, sentiments and dictionary definitions.

I did a few cards featuring the Magnolia stamp and did different techniques for each of them.

My first card, I stamped and embossed onto Kraft card and used thin bleach to lighten the card, added a sentiment and a pretty punch down the side.


 For my second card I stamped and used water colours and a sentiment from Birthday Words


For my third card I stamped the Magnolia and then masked it off and stamped again.


For the last card I stamped the image onto some card 3 times and used two of the images to decoupage the Magnolia.


Also on the stamp set are the Snake's Head Fritillary and a butterfly. I have used them here with words from Artistic Expressions in the background.


Thank you for looking
Sandra x

Wednesday, 2 October 2019

September's Blog Comment Winner


Hello everyone, 

We truly appreciate the time you take to let us know your thoughts about our designs, so each and every comment is very important to us.
Each comment in September was assigned a number and we used Random Org to draw a winner.
Congratulations to KraftyK, you have won this months £15.00 voucher to spend on Chocolate Baroque stamps. To claim your prize, please email here to confirm your email address and Lesley will send your gift certificate.

Lesley will be giving another £15 gift voucher to another lucky winner drawn from October's comments. The more comments you leave the better your chances of being the winner.

Thank you so much for all the kind comments you leave.

Good luck from the Design Team

Tuesday, 1 October 2019

Latice Heart (by Julie)

Hello, Julie here and it's my turn to kick off a new month. The stamps we will be showcasing throughout October were featured on Hochanda at the beginning of September, however if you are keen for more brand new stamps you can catch Lesley on Hochanda TODAY where she will be showcasing the very latest from Chocolate Baroque.


This grey-board hanging heart has been created by attaching two separate hearts, back to back with double thickness 3d foam pads. To start with I stamped the Artist Trading Heart twice onto greyboard. You can also use White Board Hearts and this would then save the next step of having to cut the hearts out and painting them with white gesso.
Once you have your hearts prepared take a sticky note or printer paper and place it over the right side of one of the hearts, ink the latice heart from the Geometric Trading Hearts and stamp over your partially covered grey-board heart. Remove your mask and then cover up your just stamped, latice design before inking up Celebration Bouquet and stamping onto your heart again. Remove the mask and you should have a latice and flower heart design. Colour the flower with polychromus pencils and attach small flat-backed gems to the stamped latice.


For your second heart, stamp the geometric heart from Geometric Trading Heart with a light blue dye ink. Stamp the sentiment onto white card and cut out the words so they can be attached individually  to the heart and then finish the design off with liquid pearls.
Once dry attach a layer of double thickness 3d foam pads to the back of one of the hearts and stick the hearts back to back. I found some brown jute chord in my stash to stick around the edge so the  gap and foam pads are hidden.

Thanks for stopping by and please call back soon for more Design Team Inspiration.

Julie xx

Monday, 30 September 2019

Quirky structures part 2 by Zoe

Good morning Lovelies and welcome back. This is my final post for September using these fabulous stamps, I really enjoyed playing with them.

My first card I simply stamped onto Hopsack textured card which is Ivory in colour for a change, simply coloured in using pencils, I think the texture gives it quite a classy effect, I’m really into using the same cardstock to mat and layer too at the moment.

The obligatory envelope lol! Coloured in with Inktense pencils, bit of distress ink around the corner using a brush to add some interest.

My last card I stamped and heat embossed onto Watercolour card then wet the card generously and just added Watercolours, letting it move and bleed over the edges and adding more colour to build up and create depth, few splatters and a sentiment from the set.


Thank you so much for visiting, hope to see you again next month?
Have a great day xx Zoe xx

Sunday, 29 September 2019

Colourful village


Morning Peeps, Brenda here again and this time I do have the right cards as the lovely Lesley very kindly took photos of my work (some will remember in my last post I explained I forgot to take photos before posting off my samples.......naughty corner for me), so a big thank you Lesley.

The card at the top uses all four of the new houses which you can find on the multi buy here, all were stamped in versafine black and masked so I could add the background, a Pan Pastel sky and some worker stamps around the houses. I coloured them with Koh-i-nor paints


I kept Kim Moody's Poppy Cottage fairly simple as I wanted to use red to reflect it's name stamping in Versafine Clair, adding just a little colour, matter and layered and some Poppies from Pretty Poppies which I coloured with pencils.


Here we have Bridge House which I stamped first onto acetate to get a reverse print and laid my card onto that, then stamping a second time to extend the house, coloured in with Koh-i-nor paints again as well as some Distress Markers and some foliage stamped in the foreground.


Both of these were stamped with Versafine Clair inks, some colouring added with pencils and stencilling in the background.


Poppy Cottage again, this time with a background stamped with Versafine Clair and Poppies again from the Pretty Poppies set. I added some colour to the doors of the house and inked around with DI's along with a sentiment from the same set.


Bridge House again, this time coloured in with Distress Inks and Markers, a tree created with stamps from Orchard Design a Tree along with more leaves from Take it or Leaf it set.

As always, many thanks for your visit today.