Pin It button on image hover

Tuesday, 8 April 2014

Springtime Moon (by Asha)

Good morning, folks! I'm back with another look at the lovely April release stamps. I have 2 cards to show you.

The first is an exotic birthday card featuring a floral stamp the Springtime Edges set.  I used Memento Inks to colour this card. First, I did a colour wash on heavy weight watercolour paper, building layers of colours on the night sky and dessert. Next I fussy cut the Moghul Palace from the Indian Textiles set, and adhered it on the horizon. Finally, a row of exotic flowers from the Springtime Edges set, also coloured with Memento Inks, then fussy cut and adhered to the foreground.

Here's a close-up of the Springtime Edges. These stamps are so versatile, you don't have to limit yourself to just spring projects.

*********

For my second card, we're moving from night to dawn. I'm featuring a tree from the Patchwork Landscape set. My colouring mediums of choice for this project are Tim Holtz Distress Inks and watercolour pencils.

First, I stamped the tree from Patchwork Landscape, with VersaFine Black Onyx. Then I worked on the background by blending various coordinating Tim Holtz Distress Inks for the sky and grass. The greeting is from the Patchwork Landscape set, stamped with VersaFine Majestic Blue.

Here's a closer look. I masked out the moon before blending, of course! And then applied some watercolour pencils on the patchwork treetops. Whimsical and so much fun to colour!

I hope you've been inspired to ink up your new April release stamps! Watch out for more great ideas from the rest of the Design Team.

Beijinhos,
Asha

Monday, 7 April 2014

Patchwork Sunrise (posted by Judith)

Hi Folks, I had a lot of fun creating this 'patchwork' sample with the new Patchwork Landscape stamp set. The stamps are such great designs, and just encourage lots of colour.

I stamped the main image, and then masked this off, by stamping the image again onto masking paper, and covering the main areas. I then covered sections of the background with sheets of paper, just leaving a segment uncovered, which I coloured with Pan Pastels. I stamped the section with a stamp from various texture stamp plates, Abstract Fragments Nature Fragments Texture Fragments using Versamark, and then I covered the Versamark with Pan Pastel again. I moved around the page, completing a segment at a time, covering over any finished area to keep it protected. Once I was finished, I added hand drawn pen lines to resemble stitching. I coloured the central image with Inktense pencils, blending the colours with a waterbrush. I added a sentiment from the stamp sheet. Finally, I made some small flowers from handmade paper to resemble the Hollyhocks on the stamp plate, and added some black buttons to the centre. A die cut flourish completes the card.

Thanks for stopping by, Judith xx

March Blog Comments Winner !

We appreciate the time you take to leave us kind comments here at the Design Team Blog.  We hope you are enjoying the designs as much as we do creating them.  

Each comment in March was assigned a number and we used Random Org to draw a winner :) 

Congratulations to Susan C  you have won a £20.00 voucher to spend on Chocolate Baroque stamps!    Please send a quick email here to confirm your email address and Glenda will send you your gift certificate.

Glenda is giving away another £20.00 voucher this month.  Another lucky commenter will be drawn again from all of April's comments.    The more comments you leave the better your chances to win !

Thank you for all your visits and Good luck from the Design Team!

Sunday, 6 April 2014

The new Patchwork stamps and Tyvek (posted by Maria)


Hey everyone,

Aren't they magnificent??  I really love these stamps!!!!  They really bring these trees alive with all this Patchwork!!  Here you can see some other creations of mine, the first one is again made with dylusion inks. The house and the tree are stamped with archival jet black ink.  The tree canopy was stamped on an other piece of paper (coloured with red dylusion ink) cut out and I than I've glued it over the tree canopy on the card.

I bleached out the house and coloured the roof with copics, the  border is from the new Elegant Edges stamp set,  isn't it pretty?? Then to have some more structure, I took a piece of Tyvek envelope and coloured it with the same colours I already used on my card, heated it with my iron and put it on the border of this card!! Don't you feel Spring already!!??

On the second card, I took the big Patchwork Tree, isn't it wonderfull?? The big tree can really be used on is own for a lot of occasions, I love it!!! Here I first made the background with distress ink and I used the background stamp from the set Texture Fragments to give some structure to the background!! Then in the front I used some Tyvek again, combined with a flower and leaves from the stamp set Sunny Sunflowers.

I hope you enjoy my creations and that I have inspired you all!!

Greetings and have a great creative time!!

Maria

Note from Glenda: If you haven't heard of Tyvek before, it's an interesting paper like material that is used in house construction and to make non tearable envelopes.  You can also find decorator's overalls made from it in many DIY stores which can be a cheap way to get hold of some.  It takes inks well and reacts to heat to give interesting shapes.

Saturday, 5 April 2014

Rainbow colours in Patchwork landscapes (by Miranda)


Hello there,

Did you seen them? The beautiful new stamps at Chocolate Baroque? Aren't they gorgeous?
I've been playing with the Patchwork landscapes and I wanted to play with some bright colours.......a touch of Spring..... I had this background with some gesso on it already waiting in my stash and I've use the acrylic bloc technique and Distress inks. The flower is an image from the Tangled garden sheet which matches perfect with these stamps.The trees and flower are coloured with the matching Distress markers. And of course for the finishing touch I've used a white acrylic marker and some fine holographic glitter.
another angle......


And with the 2nd one I've used all the rainbow colours. This time I've played with (my neglected) Distress stains. I've misted my paper with some water and let the inks just flow......I've added here the tangled leaves from the Tangled garden sheet and masked them. On the left panel I've used a stencil and added some Memorybox die cuts.


Well, I hope that I have inspired you and gave your day a colour boost! Sometimes we can use that......

Thanks for visiting , always appreciate your comment and hope to see you next time,


Friday, 4 April 2014

Feeling Blue? (posted by Claire)

Good morning, Claire here with a quick and easy card made using the beautiful new stamps 'Patchwork Landscape' 


I began by masking the edges of the card and then stamped the images with blue Versafine ink. I masked the moon and inked in the sky using a shaving brush and distress inks (Faded Jeans, Stormy Skies and a little Chipped Sapphire). I coloured the images with Derwent Colorsoft Pencils and added the sentiment and a couple of punched butterflies.

Thanks for visiting today
Claire xx

Thursday, 3 April 2014

Elegant Edges - By Florence

Hi everyone

Thank you for calling in.  It is great to have your company.

This week I have been playing with the Elegant Edges rubber stamps.  

Love, love, love this set.  This is a set that I would like to have with me on a desert island.  You guys will know what I mean.  When you start using a stamp for the first time and know it is going to be a favorite, one that will cover every eventuality and every occasion......Mother's Day, Father's Day, Birthdays, Weddings, Christenings, creating backgrounds.......the list is endless.   This set is one of those.

The other thing that struck me with this set is that it would be great for scrap booking and for making mini albums

If you are new to stamping this would be an ideal set to have in your stash. 


I have gone back to basics with my first two cards.  

Please click on images to see the detail


I have just changed the colors and the format for the second one.


I used the small honeysuckle stamp for both of these cards.

I stamped randomly over a piece of white card stock.  Some times I re-inked my stamp and some times I didn't. 

When the ink was dry I used a punch to cut out the squares.  I added the dragonflies here and there.

I then just mat and layered my stamped squares onto some pretty papers and card.


50th Birthday Card

For my next card I used the little leaf stamp to create a background.  


I started by stamping all over a piece of white card stock using the small leaf stamp and Orange Blossom Archival Ink.  I then stamped randomly over the top of my first stamped images using Red Geranium Ink.  These are both fabulous colors. 

When the ink was dry.  I used a piece of Cut n Dry Foam and Old Paper and Pumice Distressing ink.  I then removed some of the ink with a damp paint brush to high light some of the leaves.

I cut out the numbers and stamped over them again using the leaf stamp and Walnut Stain distressing ink.  I applied just a hint of the same ink to the edges of the numbers.

I then just mat and layered my card up using pretty papers and adding some ribbon.

That's all from me today.

Happy Stamping
Florence x

Wednesday, 2 April 2014

Patchwork Trees in Blues (by Debbie)

I usually start by stamping my new stamps with black ink but felt I needed a change and used Cornflower Blue Archival ink which is a firm favourite colour.


I had a piece of card that I'd stamped the flower pattern from Texture Fragments with Versamark ink and left to dry. I then rubbed an acrylic block with Tumbled Glass Distress Ink, spritzed with water and laid the card on to it. When the card had dried I stamped the Patchwork trees and flowers with the Cornflower Blue ink. I used a little of the blue to water colour under the flowers to give them a grounding. For the base of the card I used masked a border and stamped the fragment. I added a sentiment and mounted onto blue card.
                                                              
                                                                  Thanks for visiting
                                                                           Debbie

Tuesday, 1 April 2014

Patchwork Landscape Door Hanger (By Doreen)

Hello to you all, I am so excited as this is my first post as a DT member. I am  sharing  a wooden Door Hanger that I have decorated  using the fabulous Patchwork Landscape and Springtime Edges stamp sheets .


 I first made my background by painting with a coat of Gesso and then blending various colours of  acrylic paints over the top. I stamped my images using  black Versafine onto some white tissue paper and  then coloured the flowers on the reverse before applying PVA glue and attaching this to the hanger. After letting this dry I went on and stamped a script stamp in various places using white acrylic paint followed by one of the stamps from the Eastern Grasses stamp sheet this was stamped with Black Versafine.... The edges were then inked with Black soot Distress ink. Last of all was the sentiment stamp inked up with black Versafine.

Monday, 31 March 2014

Country Home (posted by Shirley)

Hello everyone, I hope you are doing well.

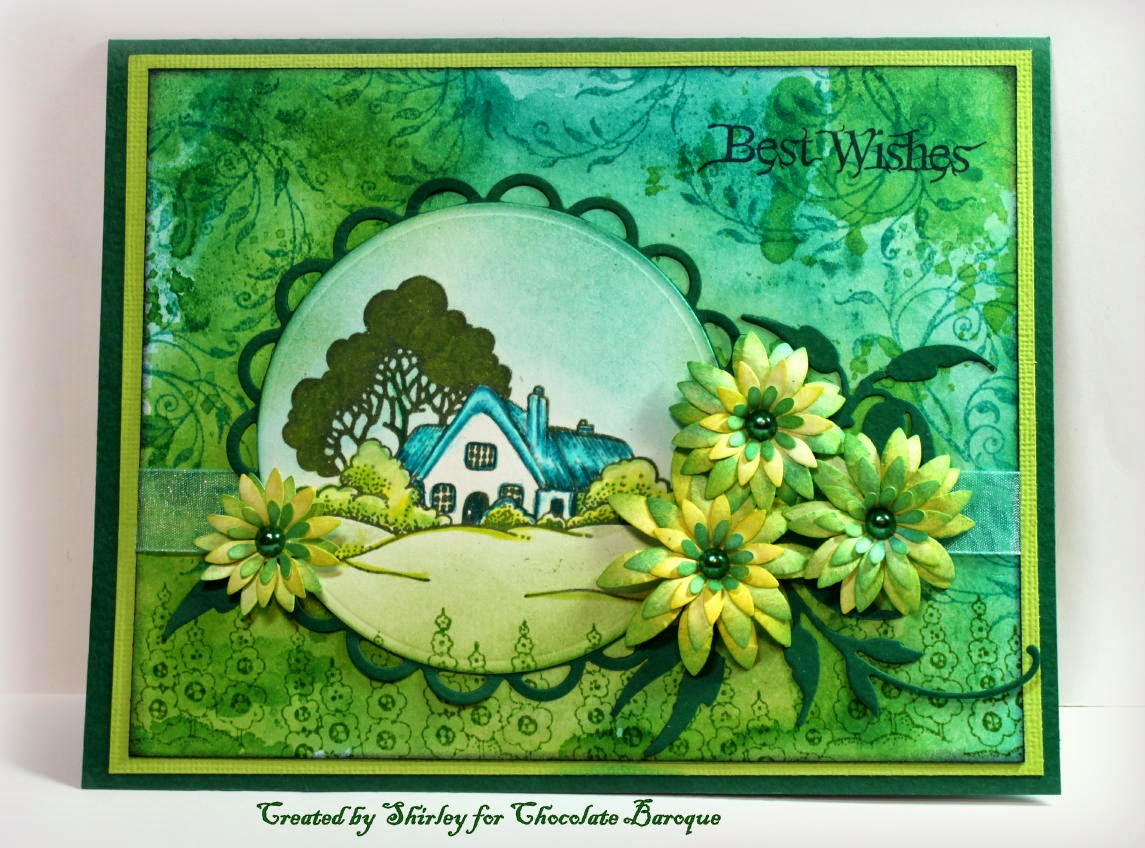
The new whimsical stamp set, Patchwork Landscape is so much fun to create designs with.  My card below features the lovely cottage from the set.


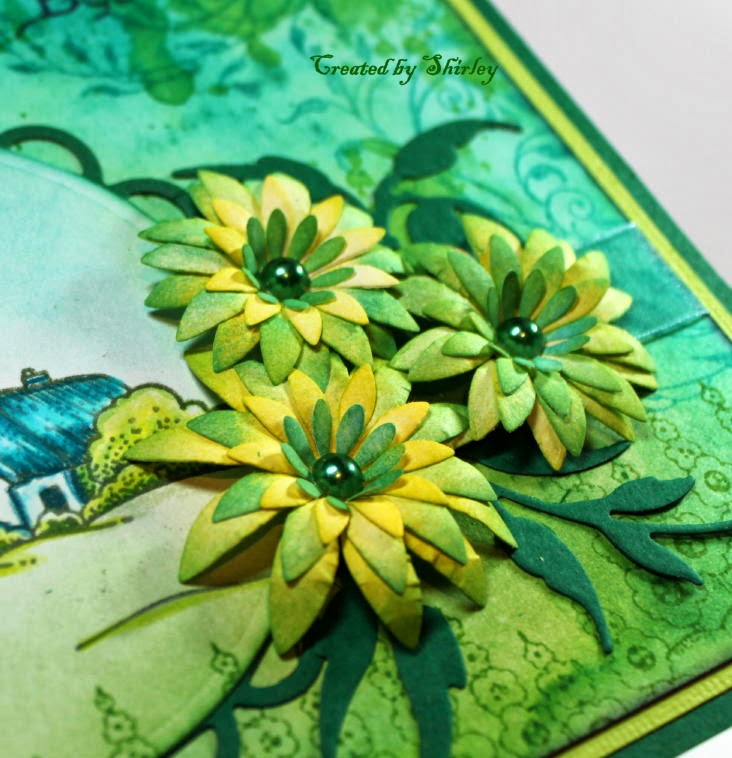
The background was created with Mowed Lawn and Peacock Feathers Distress Inks using the Acrylic Block technique.     I stamped part of the flourish tree from Fantasy Woodland at the top and the flowers from Patchwork Landscape at the bottom.  The cottage was stamped with Olive Archival Ink and coloured with Prisma pencils.    I blended a little Distress Inks around the image.  Best Wishes is from Loving Sentiments.    I coloured the Crealie die cut flowers with Mustard Seed and Mowed Lawn Distress Inks.

Dies:  Crealies Flowers CL CF 25 and Marianne Design Flourish LR0150


Thanks for your visit and please come back often as I'm sure you will enjoy seeing what my talented teammates have been creating.

Have a great day!
Shirley

Sunday, 30 March 2014

Serengeti Inspired Patchwork Landscape (by Asha)

Hello everyone and welcome to my very first post for the Design Team. I have 2 cards to show you:

Inspired by the stunning Serengeti sky at sunrise, I'm using one of the brand new April release stamp sets called Patchwork Landscape to create the focal image on my first card. The sentiment on the side is from the Loving Sentiments set, stamped with Memento Potters Clay. For an extra special touch, a little bow in sheer peach ribbon.


About this image: First, I did a colour wash on a piece of heavyweight watercolour paper using several coordinating Tim Holtz Distress Inks. When completely dry, I stamped the scene using VersaFine Black Onyx and coloured the tree trunk and other bits with some Vintage Photo. To finish, I did some paper piecing with scraps of patterned papers and added some bling in the middle of the flowers.


My second project  features a quaint little cottage, also from the Patchwork Landscape set. I stamped my own background paper using one of the stamps from this set. The sentiment is from Birthday Words.


Unlike my first project, there are no crazy colour combos here. I'm using a very light hand with Tim Holtz Distress Inks to blend the colours for the sky and the grassy foreground, while the cottage and bushes got a touch of alcohol markers.


I know you are going to love the stamps from the April release. In the meantime, there'll be more inspiration from the rest of the team coming your way. Spring has never looked so good!

Beijinhos,
Asha

Saturday, 29 March 2014

Just for Mum (posted by Judith)

Hi Folks, I have two cards for you today, using the lovely stamp of the month sets and the For Mum clear stamp set.

My first card was created using a wrinkle free distress background on watercolour paper. I added some detail by using a mask and sponging some colour with Distress Ink. I stamped the small honesuckle stamp from the Elegant Edges stamp set over the background in toning colours. I used the large honeysuckle stamp from Fragrant Honeysuckle which I stamped onto a piece of oval watercolour paper and coloured with Distress Markers.

I added some ribbon, and embossed Crealie butterflies to finish.


My second card was created by stamping the two Hollyhock stamps across a pencil line onto some green paper. I coloured the images using Polychromos pencils. I stamped the central image onto a piece of white card, and again coloured this with pencils. I wanted to hint at the patchwork nature of the stamps, so added stitching, using my sewing machine, lace, and buttons, to the centre of my flowers. The flowers are made from handmade paper, simply brushed lightly with Distress inkpads. The stamps, other than the sentiment were taken from the Patchwork Landscape stamp set.


These beautiful stamps have made creating my Mother's Day cards very easy this year, and I hope that they will make two Mums very happy. Thanks for stopping by, Judith xx

Friday, 28 March 2014

Spring (posted by Maria)

Hello everyone, welcome to my first creation as  a  member of the CB design team, I hope I can inspire some of you with my always colourful cards!!!


It's really Spring in CB stampland, aren't they wonderfull!!?? This card is created with the new CB stamps "Patchwork Landscape" and Dylusion ink!!!

Greetings
Maria

Thursday, 27 March 2014

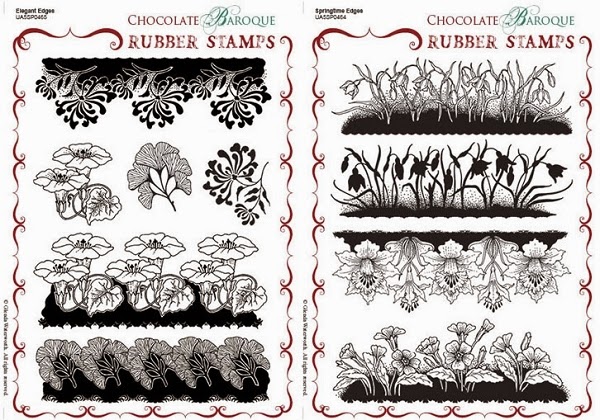
Introducing Patchwork Landscape and new edges


We have some beautiful new stamps for you this month - classic Chocolate Baroque designs from the pen of our very talented artist, Sue.

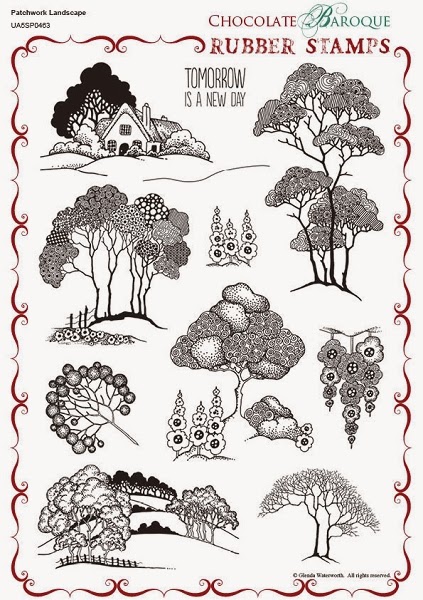
Our stamp of the month is Patchwork Landscape, a large A4 set full of intricate doodles and landscape elements.

http://www.chocolatebaroque.com/Patchwork-Landscape-Unmounted-Rubber-stamp-sheet--A4_p_5999.html


Then we have two new A5 sets of edges - Springtime Edges with primulas, snowdrops and daffodils

http://www.chocolatebaroque.com/Springtime-Edges-Unmounted-Rubber-stamp-sheet--A5_p_6000.html

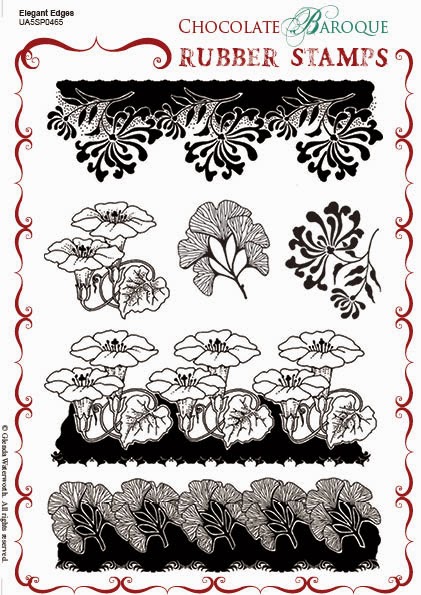
 and Elegant Edges with a lovely mix of more exotic leaves and flowers.

http://www.chocolatebaroque.com/Elegant-Edges-Unmounted-Rubber-stamp-sheet--A5_p_6001.html

The edges are also available as a multibuy.

http://www.chocolatebaroque.com/Springtime-EdgesElegant-Edges-Unmounted-Rubber-stamps-Multi-buy--A5-_p_6002.html#

I have a couple of cards to show you with these stamps - the first uses PanPastels.


I created a background landscape using masking tissue to mask off the sun and make some hill shapes, but kept all the colours very soft so there are no very hard edges.  I stamped the little house and coloured it with Coloursoft pencils, then stamped the snowdrop edge along the bottom and coloured with pencils and a white sharpie.

This next card is a very simple, one layer resist card with the honeysuckle edge stamped in Versamark and embossed with clear embossing powder.  I sponged Lilac Posies and Rose Bud Memento inks at the bottom and Canteloupe at the top, then stamped the sentiment from Amazing Birthday. 


If you've never tried resist before, it's wonderful to watch your stamped image emerge as you add colour over it.  When you've finished, wipe over the embossing lightly with a baby wipe to clean the ink off the embossed areas and make the design really stand out.

As always, our new stamps have special prices for their first month, so do take advantage while they're on offer.  You'll always find details of our latest stamps in our New Stamps department over at the Chocolate Baroque shop.

You're in for a real treat this month with artwork from all of our superstar Design Team so watch this space for lots of inspiration. And at some point early in April, Shirley will be announcing which of our lovely commenter's from March has won our monthly gift voucher - it's our way of saying thank you for leaving comments, we all appreciate you taking the time.

Happy crafting!


Monday, 24 March 2014

Sprinkled with Fairy Dust (posted by Claire)

Good morning, Claire here with another sample using the beautiful Spring Fairy stamps and the Fairyland Words which complement them perfectly.


I began by brayering the scene by masking the moon and using torn paper masks and Memento Inks in Pear Tart and Elderberry. I love memento inks for brayer work, the colours are lovely (they are on offer at the minute too, you can find them here). I wanted to create a distressed look to the scene so I splashed on some water and blotted it off with kitchen roll and then set to with a Crafters Workshop Harlequin stencil and Memento Tuxedo Black ink. Next I stamped the images, again with Memento Tuxedo Black and added some colour with Graph'It Markers. For a little sparkle, I stamped the images again on acetate and embossed with black EP and glittered the back. Once the wings were dry I added them with a little silicone glue for dimension.

The sentiment was stamped on white card using Memento Elderberry ink. I then brushed Matte medium over the image, sprinkled with glitter and popped the acrylic tag on the medium while it was still wet. Once it was dry I trimmed the excess card and added a little green ribbon.


To finish off I've matted on white, lilac and then black card and added some green silk ribbon and a lilac paper rose.

Thanks for visiting today
Claire xx

Sunday, 23 March 2014

Spring Fairy and Flowers (posted by Shirley)

Hello everyone, I hope you are enjoying the weekend.

I have a design today using the gorgeous new Spring Fairy Collection.  


The background is a sheet that I printed from the beautiful Leafy Brocade Printable Papers.   The  May Fairy was stamped on water colour paper with Cobalt Archival ink, coloured with Tom Bow markers and cut out.   I added holograph glitter to parts of her dress.  I coloured the die cut flowers with Distress Inks.

Dies:  Crealie Creative Flowers CL CF 20 & CL CF 19 and Memory Box - Pierson Corner.


Thanks for your visit and have a great week,
Shirley

Thursday, 20 March 2014

Magical Birthday Card (by Debbie)

Good Morning. I have another card using the Fairy Castles stamps, Alcohol pens and Distress Inks.
 
 
I cut two pieces of white card and stamped the castle and coloured the trees and the castle walls with pens. Next, I stamped the castle on a post it and drew a circle for the moon. I cut it out and laid over the top of the already stamped castle. I used Broken China for the sky and Peeled Paint for the hills. The clouds were stamped using the Broken China for a subtle addition. Before mounting onto the black I marked two dots on the larger piece of white card so I knew where to colour for the sky and hills. I mounted both pieces and stamped the sentiment.
 
Thank you for visiting
Debbie
xx

Wednesday, 19 March 2014

Into every life a little rain must fall .... (posted by Claire)

Good morning, Claire here with another sample using the beautiful Fantasy Castles, I love this castle image I combined it with the cloud stamps from Magical Landscapes to create a rainy scene.


I coloured the image with distress markers and used Walnut Stain distress ink around the edges of the image. I matted it up on some dark brown card and layered it up over square of card with a brick effect made using a Crafters Workshop Template and distress inks. Again I matted on brown card and layered up over a more muted background made with more distress inks and a brick stamp from Abstract Fragments. The sentiment is on of my all time favourites and is from Loving Sentiments. To finish of I've added a little seam binding bow and an umbrella charm from my stash.

Thanks for visiting today
Claire xx

Tuesday, 18 March 2014

Fantasy Castle with Blue and Green (by Shirley)

Hello everyone, I hope all is well.

I have another design today using the new beautiful Fantasy Castles set.   These castles have so much wonderful detail, I enjoy colouring them with pencils.


The background behind the castle is Broken China and Mowed Lawn Distress Inks using an acrylic block and water.  I coloured the clouds from Magical Landscapes and castle from Fantasy Castles with Prisma pencils which I used Cobalt Archival ink to stamp.   I added glitter to the rain and water fall.

The larger background was created with Salty Ocean and Mowed Lawn Distress Inks again with an acrylic block.   I stamped Wisteria from Wisteria Lane and the trees from Magical Landscape with Mowed Lawn DI ink.   I stamped the brick work using a fragment from Abstact Fragments with Salty Ocean Distress Ink.

Thanks for stopping by and have a fabulous day,
Shirley

Saturday, 15 March 2014

Eastern Adventure (posted by Judith)

Hi Folks, I wanted to show the versatility of the new MagicalLandscapes/Fantasy Castles Multibuy stamp set and made a card with a bit of an Eastern flavour which I am showing you today.

I created a wrinkle free Distress background , and then stamped a large paisley stamp from Indian Elephant using the same colour Distress Ink. I used a palm tree stamp from Peace on Earth showing that Christmas stamps can be used all year round, not just at Christmas! The sentiment is from the Artistic Affirmations stamp set.

I stamped the main image onto a piece of white card using gold embossing powder, and coloured the image with Distress Markers, sticking to the blue and orange theme of the card as much as possible. Finally, I swirled some blue and orange Distress Ink around the edge of the card to soften the white background. I used some Versamark around the edges of the main background card, and added some gold embossing powder, which I heated to melt. Some dark blue card to mat the layers completed the card.


Thanks for stopping by, Judith xx

Thursday, 13 March 2014

Magical Landscape (by Shirley)

Hello everyone, I hope your week is going well.

I have a castle design to show today from the beautiful new Magical Landscape set.


I created the background with watercolour paints wet on wet.   I have a tutorial using this technique at my blog here.   I sprinkled a little salt over the paint while it was wet which created small watermarks.

I stamped the images with Cobalt Archival ink.   The fairy from May Fairy was stamped on separate paper and decoupaged.   I coloured the castle with Prisma pencils as well as the fairy's dress and wings.  I added lots of glitter on the moon and water, but it's hard to see in the photo. The sentiment is from Fairyland Words.

Thanks for your visit and have a great day,
Shirley

Wednesday, 12 March 2014

Fairy Friends (posted by Claire)

Good morning, Claire here with a sunny card made using the beautiful new Spring Fairy stamps. I love to work with sunny spring colours so I really enjoyed making this card.


I stamped the fairy (from May Fairy) and the bird on the grass (from April Fairy) and coloured them with Graph'It markers, adding the grass by flicking the markers. I used PanPastels to add the sky to the little scene. 


The background was made using distress inks in shades of yellow and green. I used the acrylic block technique and then stencilled over them using the same inks with the Crafters Workshop Punchinella Template. I stamped the delicate flourish from March Fairy around the edges. I added a some lace, gingham ribbon, paper flowers and a little bee charm from my stash to finish off and popped my design on a scalloped card blank.

I hope you're enjoying some sunshine after all the rain we've had here in the UK
Claire xx

Tuesday, 11 March 2014

Have a Fairy Happy Birthday! (posted by Judith)

Hi Folks, here's a project for you using stamps from the new Spring Fairy Collection stamp set combined with some older favourites. I wanted to create a gift set that comprised of a card, gift tag and matching wrapping paper, using soft pastel tones. I picked five shades of Memento Ink, and created a background on my tag, and a large piece of white card. I stamped the fairies and butterflies using Versafine Onyx Black Ink. The extra fairies and buterflies are from the Winter Fairy and Autumn Fairy stamp sets.

For the tag, I added a sprinkling of glitter on the butterfly wings and the trail of stars. The sentiment comes from the Fairyland Words clear stamp set. For the card, I added some clouds from the Magical Landscapes/Fantasy Castles Multibuy stamp set and a flower from the Decadent Brocade stamp set, which has been decoupaged. I have added some die cut leaves, and a sentiment as before.The wrapping paper was created using the same stamps as the tag, stamped with each of the ink colours, graduating across the paper.


Thanks for stopping by, Judith xx

Monday, 10 March 2014

Flying High Fairy (by Debbie)

The weather here yesterday was beautiful and perfect for a little tidying in the garden. The spring bulbs can be shown in their glory with all the fallen leaves swept away. I'm looking forward to seeing sunsets this year when the sky changes to a to a rainbow of colours and sitting in the garden crafting.
I started by stamping the castle with black ink and then cut masks for the sun and the landscape. The sun was placed over the castle and the landscape laid over the bottom third. For the sky I used Dried Marigold, Victorian Velvet and Broken China Distress Inks blending each into the next to avoid lines. With the sun still in place I removed the landscape mask and covered the sky and blended Peeled Paint for the hills then tore and moved the mask to create the small hills. The grass at the sides of the scene are from Eastern Grass, this is one of my go to sets as it is so handy. The flying Fairy is from the January set of Fairies and I searched my stash for Shrink Plastic. I stamped her with Black Archival ink, cut her shape out and I'm proud to say when heating she didn't curl and stick. I attached the fairy and stamped the sentiment in the top corner then matted onto black card and trimmed a border around. Many thanks for visiting, Debbie xx

Saturday, 8 March 2014

Magical Spring Fairy (by Shirley)

Hello Everyone, I hope you are doing well.    I'm dreaming of Spring......but we still have 2 to 4  feet of snow on the ground and it hasn't been mild enough to melt much of it.    

I have two cards to show today using stamps from the beautiful new Spring Fairy Collection.   This first one features the beautiful March Fairy.


The background was created with London Blue, Cut Grass and White Linen Dylusions inks.   To create the water marks, I sprinkled sea salt while it was still wet and when dry, brushed it off.    I stamped the fairy from March Fairy & beautiful sentiment from Fairyland Words with Deep Purple Archival ink (it looks blue in the photo).   I stamped the Winter Aconites from Spring is in the Air with Mowed Lawn Distress Ink.   I coloured the images with my Prisma pencils.    I added glitter to the fairy wings and some tiny pearl flowers that I found in my stash.

I also have a CAS design, that was quick to create.  


I cut a circle in card stock and used the negative for a mask.  I blended Squeezed Lemonade and Peacock Feathers Distress Ink inside the circle.  I stamped 'Spring' from March Fairy and the pretty little Robin from April Fairy with Cobalt Archival Ink and coloured it with my Prisma pencils.  I also added some glitter to the foliage and bird. 


Thanks for your visit and have a great weekend,
Shirley