Pin It button on image hover

Tuesday, 11 January 2022

Teeny Weeny Flowers (by Judith)

Hello everyone, I hope you are keeping well. I have a couple of projects to share with you today featuring stamps that were showcased on The Craft Store last month.

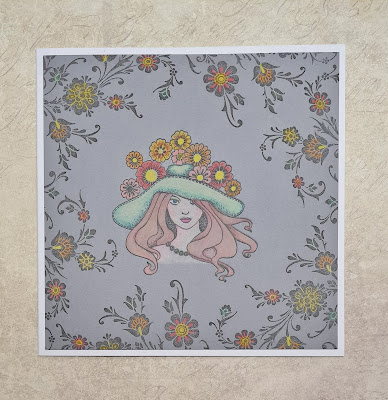
My first project uses the Lady in Hat stamp stamped on grey card, and I stamped a border using an image from Brocade Backgrounds. I coloured these images with pencils.

Using a coloured background like this gives a completely different effect to the images, and the colours really pop.

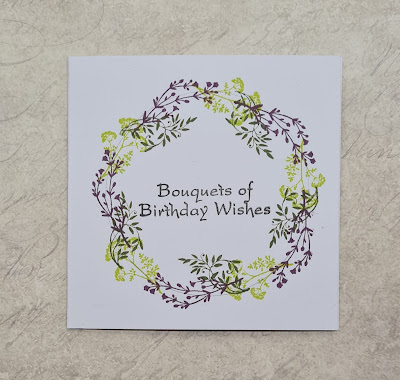
My second card is a really quick project; a little 4" x 4" card. I stamped a sentiment from Birthday Words in the centre of the card, and drew a pencil circle on the card. Using Versafine Clair ink, I stamped some of the images from Teeny Weeny Meadow around the circle to create a wreath.

I will be back later in the month with more projects to share with you, thanks for stopping by,


Judith xx


Monday, 10 January 2022

Three Gardens of splendour by Rachel

 Hello there!

Rachel here today with the first of my posts from the December shows - these samples are all from the show early in December - and involve garden themed stamps.

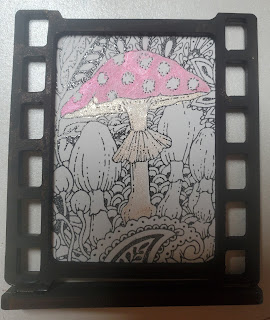
This first one just uses a section of the Toadstool garden and I have put it into a frame from a show many moons ago - the whole this is black and white apart from the main fungi which I coloured using mica powders.


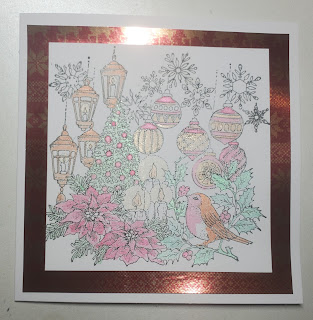
This second sample was simply stamped and coloured using watercolour pencils. Its such a lovely image.


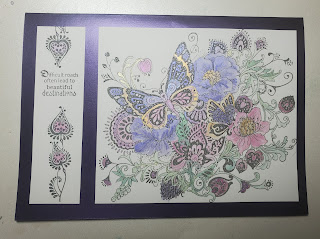
And finally the FolkArt garden - I again coloured this using water colour pencils but I also added some touches of mica powders here and there.


I hope these samples have given you some inspiration in different ways you can used your stamps.
Have a great day!
Hugs
Rachel xx

Sunday, 9 January 2022

Mini Works of Art (by Zoe)

Good morning Lovelies. Happy New Year, I hope you managed to have a happy and healthy festive season. 

Here is my first post this month featuring the fabulous Mini Stamp sets.

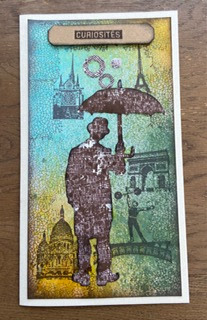
My first card I used die cuts I had lurking around in my stash, I stamped the man and the rings and dot using the mini mesh stamp, my background was created with spray inks and the mini crackle and the mini curiosities stamps.

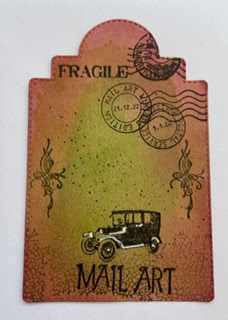
A little craft card tag using a combination of the mini stamp sets.

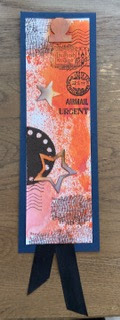
A bookmark which mostly features the mini mail-art stamps. I've also used a few die cuts from my stash.

I hope you like my creations, I shall be back later in the month with more of my samples. Have a wonderful day xx Zoe xx

Saturday, 8 January 2022

The Versatility of Damask by Doreen

The Versatility of Damask 

Firstly I would like to wish everyone a Happy New Year, I do hope you all enjoyed a good Christmas too.

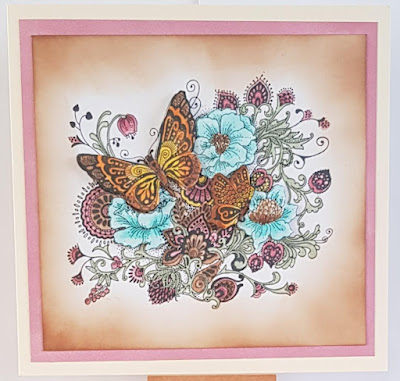
My first projects today use the Damask Panel perfect for using in its own right or as a background which is how I chose to use this background which I have taken from my stash of Brusho pieces. I also used one of the many beautiful butterflies from the Chocolate Baroque selection.

I stamped the butterfly using a Versafine Clair Nocturne inkpad and then covered the whole of the stamp in Versamark the colour comes from Salvaged Patina and Kitsch Flamingo embossing glazes sprinkled onto the Versamark and heat embossed.


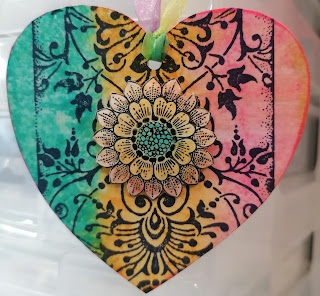
The second is a heart shaped sample using Distress Inkpads on an acrylic block which is spritzed with a little water and a swiping action straight across the Damask Panel onto the  background. Then I stamped the Song Thrush onto  a piece of card and painted using the same Distress Inkpad colours used for the background, then I fussy cut the large flower to decorate the Panel. Shape the flower and apply using Silicone Glue Gel to apply to the heart. Use a light varnish or spray to give a sheen and then put ribbon through hole to hang.


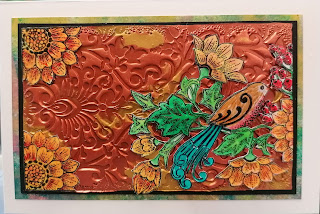
The final sample shows a background using a Soft Form Copper and a Gold Relief Paste applied directly to the stamp and left to dry overnight. I also used the Song Thrush to decorate this card just cutting out desired elements and applying to the background using a strong PVA glue.


Thank you for looking in today

Love Doreen

Friday, 7 January 2022

Fingerprints (by Magda) - New England Winter, Gothic Fragments, Sketchy Doodle Landscape, Patchwork Landscape

 Hello,

here we are in the New Year and full of positive thoughts I share with you my first project for January.  The colorful background is done with my index finger, printing each row with a different Distress Paint color. On a yellow colored cardstock I stamped with Archival Jet Black the images of the stamps " New England Winter",  "Gothic Fragments", "Sketchy Doodle Landscape", "Patchwork Landscape" and glued all the cuts on the journaling page.

Thanks for reading my post and I wish you all a very happy and healthy 2022. Hugs

Magda 


Thursday, 6 January 2022

Exploring materials: Pop up elements with vellum by Natalie Ballard


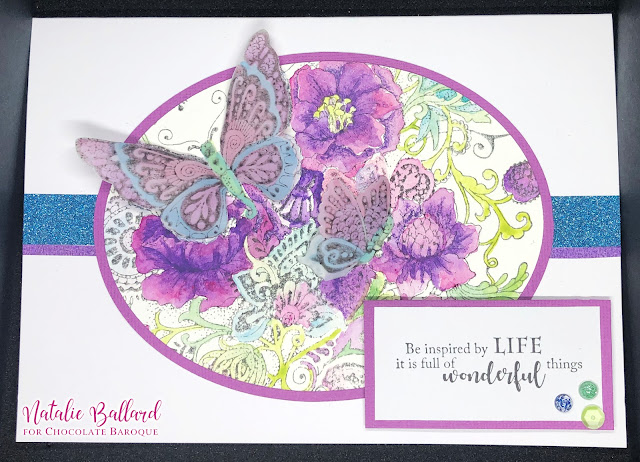
We can use different materials as a way to highlight elements within a design. Here, I used vellum to create a 3D element from out of the stamp. You will need the Folk Art Garden stamp set for this card.

To do this, stamp your design twice; once onto vellum and once onto watercolour card. I used the same watercolours on both the watercolour card and the vellum. You could also use pearlescent paints to add an extra touch of sparkle. On the vellum piece, colour only the butterflies and colour the full design on the watercolour card. When painting on vellum, limit how much water you use to avoid the paper cockling too much.

Set both pieces to one side to dry and resist the urge to heat the vellum to dry it quicker.

Use an oval die to cut the central panel from your watercolour card panel. Nesting dies are great for this project, or you can use an electronic cutter if you have one. Cut a slightly larger oval from some plain coloured card to match the floral elements of your design. Adhere these two pieces together using double-sided adhesive or glue.

Choose a white card blank that fits your oval. Use glitter tape to create a central border for your oval panel to sit on; choose colours from your central design. The oval panel can then be adhered using double-sided adhesive, or use foam for a more dimensional look.

Fussy cut the butterflies from the vellum piece, vellum is quite forgiving when fussy cutting. Fold either side of the butterfly's body on the main butterfly, and down the join in the sideways one. Apply glue all over the body section to adhere it to the card. I wouldn't recommend using tape for this part of the process. I placed a small weight on the body while it was setting in place. Once dried, the wings can then be lifted up away from the card.

Onto a spare piece of white card, stamp your sentiment and mount onto a slightly larger piece in the same colour as the oval border.

Decorate with sequins, pearls or gems.

Wednesday, 5 January 2022

Gardens & Meadows (By Tracy Thompson)


Hello and Happy New Year, this is my first post for this year, and I'm bringing you some creations I did for the December's shows.  We had some fabulous stamps to work with as you can see.  My first is using the stamp The Folk Art Garden, it is a very big and detailed stamp and fantastic to colour.  After I had stamped the image I coloured with Distress Inks, keeping the tones in Vintage shades.  I then stamped the image again, only colouring the butterflies and flowers.  I fussy cut them and decoupaged on to my image, I inked around the edge with Distress ink and then layered onto contrasting card.


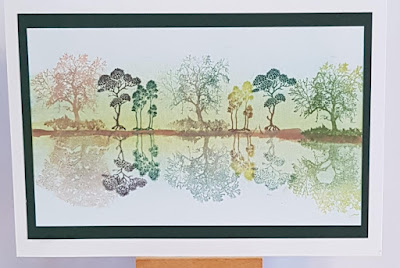
For my second creation I used the Teeny Weeny Meadow stamps,  so I started this one by putting some colour down on to my card with Distress inks in blues, greens and browns.  I stamped my trees in Versafine Clair and as I did the main image I did the reflective image using a Gel Plate.  I mixed and blended my colours for the trees to give some dimension.  It just needed to be matted on some dark green card and it was done.

I will be back around the middle of the month to share some more of my creations from the shows.
Thank you for looking
Happy crafting
Tracy x

Tuesday, 4 January 2022

damask fountain (by Veronica)

Happy new year everyone, I hope you all had a good Christmas and lots of crafty goodies!

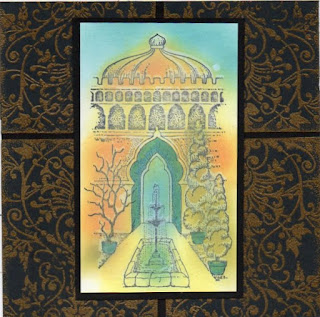
 I have a card to share today from the December shows, using both the Damask  Panel and Fountain Scene stamps - once i started playing with the damask stamp  I realised how it looked like  tiles from thwe moorish palaces in Spain, and the fountain seemed to match this perfectly.

The damask was stamped in versamark onto black card 4 times and gold embossed, then cut out and mounted onto more black card to make the background. thne trimmed down to fit the square card blank.

I sponged distress oxides onto a piece of white card roughly where i hoped the image would go, cossed my fingers, spritzed the stamp with water and stamped the image using a stamping platform. Moppedup with kitchen roll after a few minutes,dried with a heat gun, then overstamped using black versafine.. Added blue to the archway and plant pots, then trimmed it down, matted onto black card then in to the centre of the card.

Monday, 3 January 2022

In the Garden by Sandra

 Hello everyone, I hope you had a lovely and peaceful Christmas and I wish you all a Happy New Year.

I am showing some of my samples from the Craft Store show that was on in December.
These cards feature the Garden range of stamps. 
I have used 8x8 card bases for mine.

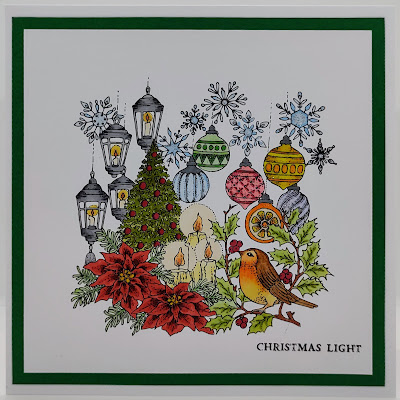
My first card is The Christmas Garden, because it's never too early to start your cards for next Christmas!
I stamped in Memento Ink and coloured in alcohol markers. I added a sentiment from the set and layered onto some dark green card and then onto my card base.


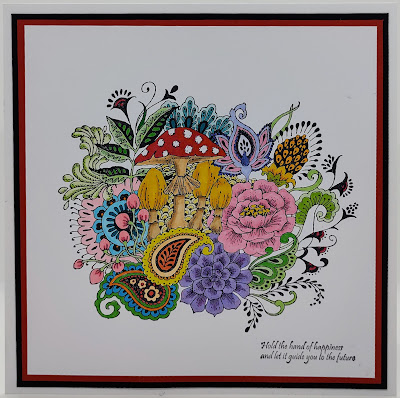
My next card is The Toadstool Garden
There is so much detail in these stamps and are a delight to colour. I have used Memento ink and alcohol markers again as I love the vibrant colours. I added some white gel pen on the toadstool. I have mat and layered in red and black and then onto my card base.


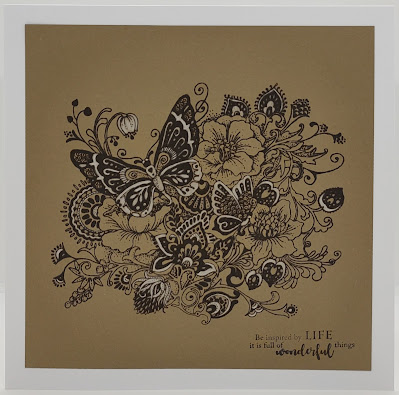
The last one from me today is The Folk Art Garden set.  I stamped onto Kraft card with Archival ink using my stamping platform. I picked out some parts of the design and coloured with a white pencil. I then re-stamped in the Archival to neaten it up
 

These are lovely large stamps that can be used whole or in parts.

Thank you for looking
Sandra x


Sunday, 2 January 2022

Blog Comment Winner for December


Hello and welcome to the Chocolate Baroque Design Team Blog.


We truly appreciate the time you take to let us know your thoughts about our designs, so each and every comment is very important to us.


Each comment in December was assigned a number and we used Random Org to draw a winner.


Congratulations to PAT (Colourful Card Creations) you have won this month's £15.00 voucher to spend on Chocolate Baroque stamps.

To claim your prize, please email here to confirm your email address and Lesley will send your gift certificate.


Lesley will be giving a £15 gift voucher to another lucky winner drawn from the January comments.


The more comments you leave, the better your chances of being the winner.


Thank you so much for all the kind comments you leave.


Good luck from all on the Design Team


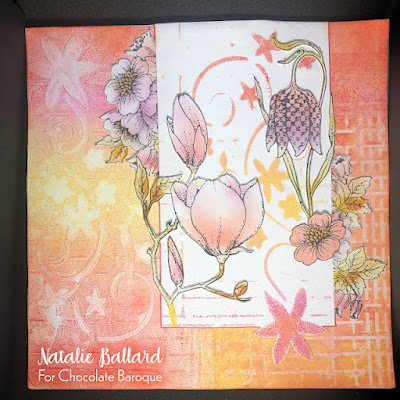
Here is another chance to see the beautiful creation by Natalie


Saturday, 1 January 2022

Happy New Year (by Judith)

Hello everyone, I hope that you are all keeping well and that you have had a good break over the festive period. I want to wish you all a very Happy New Year and all the very best for 2022. 

I am sharing a couple of projects with you today showcasing stamps that were featured on last month's shows on The Craft Store. The first is a little book made from a huge tag and I have used the Damask Panel stamped three times onto a Brusho background, using a metallic embossing powder.

I adhered the pieces onto the tag, and then cut away the excess from the third piece to get the tag shaped end. I added some pretty scrapbook paper on the inside of the tag, and punched the hole again at the top of the tag.


I scored inbetween the pieces, to create the book. I cut a few pages, and sewed them into the book using bookbinding thread. 


I added a piece of teal ribbon through the hole at the top of the tag to allow the book to be closed. This simply wraps around the book, and ties in a bow. These little books make great gifts, and are really quick to make. You could add any kind of pages; old book pages, kraft paper, watercolour paper, whatever you like, to create a mixed media book, but I used drawing cartridge for my sample.

My second project is an old project, which I thought I would share again. I stamped Ophelia onto a piece of Drawing Cartridge and masked the image with Masking Tissue. I coloured the background with Distress Inks and splattered the background with water, which I blotted with tissue. I added some stamping over the top using a stamp from the Texture Fragments stamp set. I stamped and embossed the fronds from the Underwater stamp set before removing the mask. I coloured Ophelia with pencils. I added some foliage from the Song Thrush Silhouette stamp, which coloured this way tie in with the flowers in her hair quite well. I added a bit of Glossy Accents to the centres of the flowers.

I will be back later in the month with more projects to share with you, take care and thanks for stopping by,


Judith xx


Friday, 31 December 2021

Floral Fun

Floral Fun

Hello all, I hope you have now recovered from your Christmas meals and are all suitably satisfied having had a very enjoyable time.

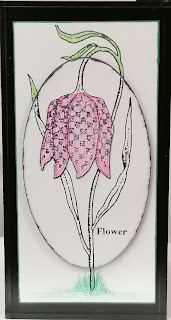
Today I would like to share some of my floral makes from the November Shows. The first shows a simple card using The Snakes Head Fritilary taken from the Happy Flowers Day stamp set. I find it amazing how such a delicate flower can have such beautiful detailed markings, isn't nature just wonderful ?

I stamped this image twice firstly onto a piece of white card and then onto an oval piece of mountboard which I found in my stash.

I coloured just the leaves and some of the stem on the card and just the head of the fritilary on the Mountboard, with a few strokes of the pencil at the bottom of the stem to ground it with some blades of grass. Very easily lined up to mount with double sided foam tape to make a quick, simple but effective card. 


One of my favourite florals so beautiful and needing so little time to make for an effective and easily made card suitable for any number of occasions depending on how you decide to colour it.


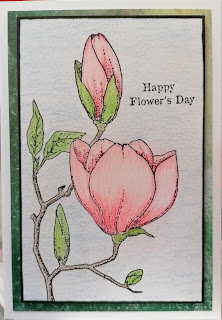
Another of the Magnolias how could I resist this is quite simply stamped onto Chocolate Baroque designed card and coloured using Koh-I-Noor Brilliant Water Colour Palette these paints are such a delight to use and the card accepts the watercolour without a problem.


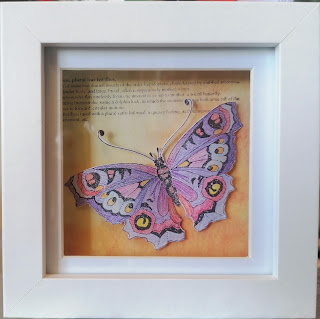
Finally for something a little different from the set, this beautiful Butterfly deserved to be showcased by itself, don't Chocolate Baroque do beautiful butterflies ? 
This is mounted in a small shadow box I have had hanging around for a while now but this stamp was the perfect size to fit it so I stamped, coloured and fussy cut the image and then mounted it into the box having stamped the dictionary explanation of the Butterfly onto a complimentary coloured piece of card. 


Many thanks for popping in today, may I also take this opportunity to wish you all a Very Happy New Year.

Love Doreen

Thursday, 30 December 2021

Magnolia you sweet thing by Rachel

 Hello there! Rachel here today with the last of my makes from November. This first one I really like - a little masking, stamping, watercolour painting and text ...what's not to like. I used the artist trading heart and the happy flowers day stamps.


In this last sample I used the Harmony tree stamp and created a scene around it using inks. 


Hope you have a fabulous New Years eve tomorrow - and all the very best for 2022!
Hugs
Rachel x


Wednesday, 29 December 2021

Snowflakes and mandala's (by Miranda)


Hello crafty people,


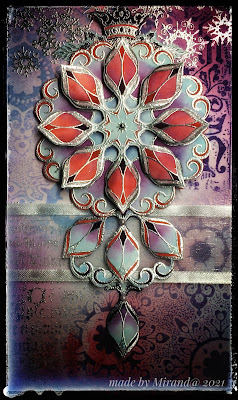
Today another  blogpost from me........I have been playing with Distress Inks, embossing,  big background stamps and the lovely 'Waterlily Mandala set'.  I have changed that into a 'special snowflake pendant  mandala LOL......why not.....it is a lovely versatile stamp which I have decoupaged and added some 'dangles'....using elements of the same stamp.

'Imagination is limitless'

I have made a background using Distress Oxydes and the 'Big bold background Dotty snowflake' which I have stamped in one corner and embossed in another corner with a resist technique.

For me this is an unusual color scheme but in the end I liked it......

I have embossed the two script stamps from the 'Gothic Angels set' ( like in my previous post) and also embossed the snowflake edge from the 'Winter edges set' 


I have embossed the waterlily stamp three times and colored it using Distress inks, applied some Wow sparkles using a glue pen and decoupaged it all. I also embossed and decoupaged the 'crown' stamp from the gothic angels set. You can see it on top of the mandala. 

And I have added some organza ribbon as a nice touch....


Hope you did like my take on this one......and hope to see you again in the new year!

Thanks for watching and always like to read your comments.

Have a good ending of the old year and stay safe,


Monday, 27 December 2021

Kraft Magnolia and A Harmony Notelet Set (By Tracy Thompson)


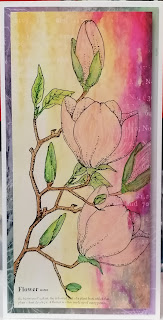
This is my final post for this month and this year here on the Chocolate Baroque blog.  So the last of my creations from the Novembers shows, I love using Kraft card especially to colour on.  I stamped the Magnolia's from the Happy flower's day stamp set,   I coloured with Aqua Pencils, directly on to the Kraft card, but I didn't apply the water to the pencils as I liked leaving the strokes in there.  It was just that simple, but I love it!


Unlike the card above this notelet set isn't quite so simple.  I always start by creating the folder first, with a pocket on the inside to house the notelets and the envelopes..  I created the front using the Harmony Tree stamp set, distress oxide inks and the splatters from the  Numerology stamp set.  I coloured the tree with pencils, and added a ribbon.  I like to decorate the inside flap too, and I did that using the Remembrance Tree stamp set,  then as you can see using a selection of the stamps I have already mentioned I inked, stamped and created notelets and matching envelopes, all using the same method.

I hope you have enjoyed looking at my creations
Happy Crafting
Tracy x


Saturday, 25 December 2021

I'm Grateful (by Judith)

Hello everyone, I'm popping in with a Christmas wish for you all today. Normally Lesley would be here today wishing you all the best for the festive season. As you probably know, our lovely Lesley has very recently been ill, and is currently at home recovering, being looked after by David. Lesley will need to take things slowly for a while. I am sure like myself, you wish her a speedy recovery.

I spoke to Lesley yesterday morning, and a thought for this post had already formed in my mind, two words, 'I'm grateful', grateful that Lesley made it through her heart attacks, and that she is still here with us. We have a lot to be grateful for, don't we? We might moan about the state of the world right now, with Coronavirus, lockdowns, rising food prices, etc., but we still have friends, family, crafting, a smile, our pets, there is always something that we can be grateful for. 

I have not made anything new to share with you for this blog post, but I looked through my old blog posts, and found these projects to share with you:

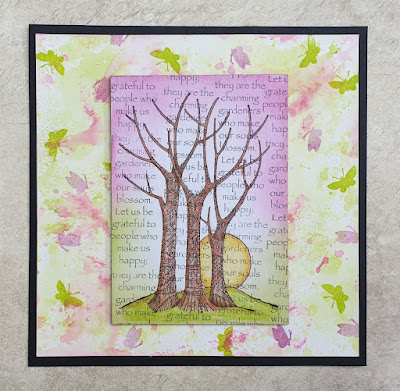
I have used a sentiment from the Words of Gratitude stamp set to create a background, (very apt on this occasion), for the Tangled Birch tree. I used soft pinks and greens on the whiteboard panel and the larger background behind. The little butterflies are from the Baroque Meadow stamp set.

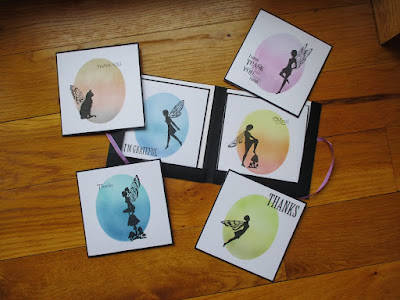
Here is a very quick set of thank you cards using the same Words of Gratitude stamp set of sentiments, plus a variety of fairies across the whole range of fairy stamp sets from Chocolate Baroque. These are perfect for any time of year but great for sending out after Christmas.

Thank you to all of you, our customers, for supporting us this year, for visiting the blog and Facebook Group, buying our stamps and other products, watching the TV shows, and leaving so many friendly supportive comments. We appreciate every single one of them.

Thank you to the rest of the Design Team for your hard work over the past year, your beautiful samples and support, you help make Chocolate Baroque shine. 

Finally because I can, I want to commend David and Lesley on their hard work this year, ensuring that the stamps have been top quality and the service to you the customer has been first class. They work so hard to make Chocolate Baroque an outstanding business, but they make us feel part of the family too.

Wishing all of you health and happiness over the coming season and for the year ahead. Sending lots of love to Lesley as she rests and starts to recover.

 

Sign of spring by Veronica

Wishing everybody a very happy Christmas and all the best for a happy and healthy New Year!

Today I'm sharing the last of my samples from the November shows "Happy Flower's Day". The backgrounds were distress inks and images coloured with either distress inks or watercolour pencils. 

Apologies, I have just discovered I cannot input this from my tablet so have had to remotely control my daughter. I will update the details when I am mobile enough to get to the actual computer.


Friday, 24 December 2021

Happy Christmas Eve (by Sandra)

Hello and Happy Christmas Eve!
I'm sharing the last of my cards from the November show on the Craft Store.

These cards all use stamps from Frosty Trees set.


For my first card I made a background using Distress Inks and a stencil. I blended the inks off the stencil onto the card each time using a darker colour and not quite covering the previous colour ink. I also blended some ink for the sky which I spritzed with water and blotted to make it look snowy. I stamped the swirly tree in Versamark and embossed in silver. I stamped some background trees from Trees a Crowd using my background colours. I stamped a sentiment onto a die cut. I mat and layered my piece onto a 8x8 card base.


For my next card I used Brushos on a piece of  water colour card. When it was dry I stamped the trees with Versamark and embossed in white. I trimmed the image and layered onto a 7x5 card base. I added a sentiment from the stamp set.


For my last card I made an aperture easel card. I stamped "snow" using the splatter stamp from Numerology. I stamped the Swirly tree onto a piece of vellum and embossed in white. I added a sentiment as a stopper. The second picture shows it lit up.


I hope you all have a happy and healthy Christmas and I'll be back next year.

Sandra x