Pin It button on image hover

Friday, 12 June 2015

Mixed Media Frames (by Julie)

Today I want to show you two frames that I have made using the new Rustic Fragments stamp set. 
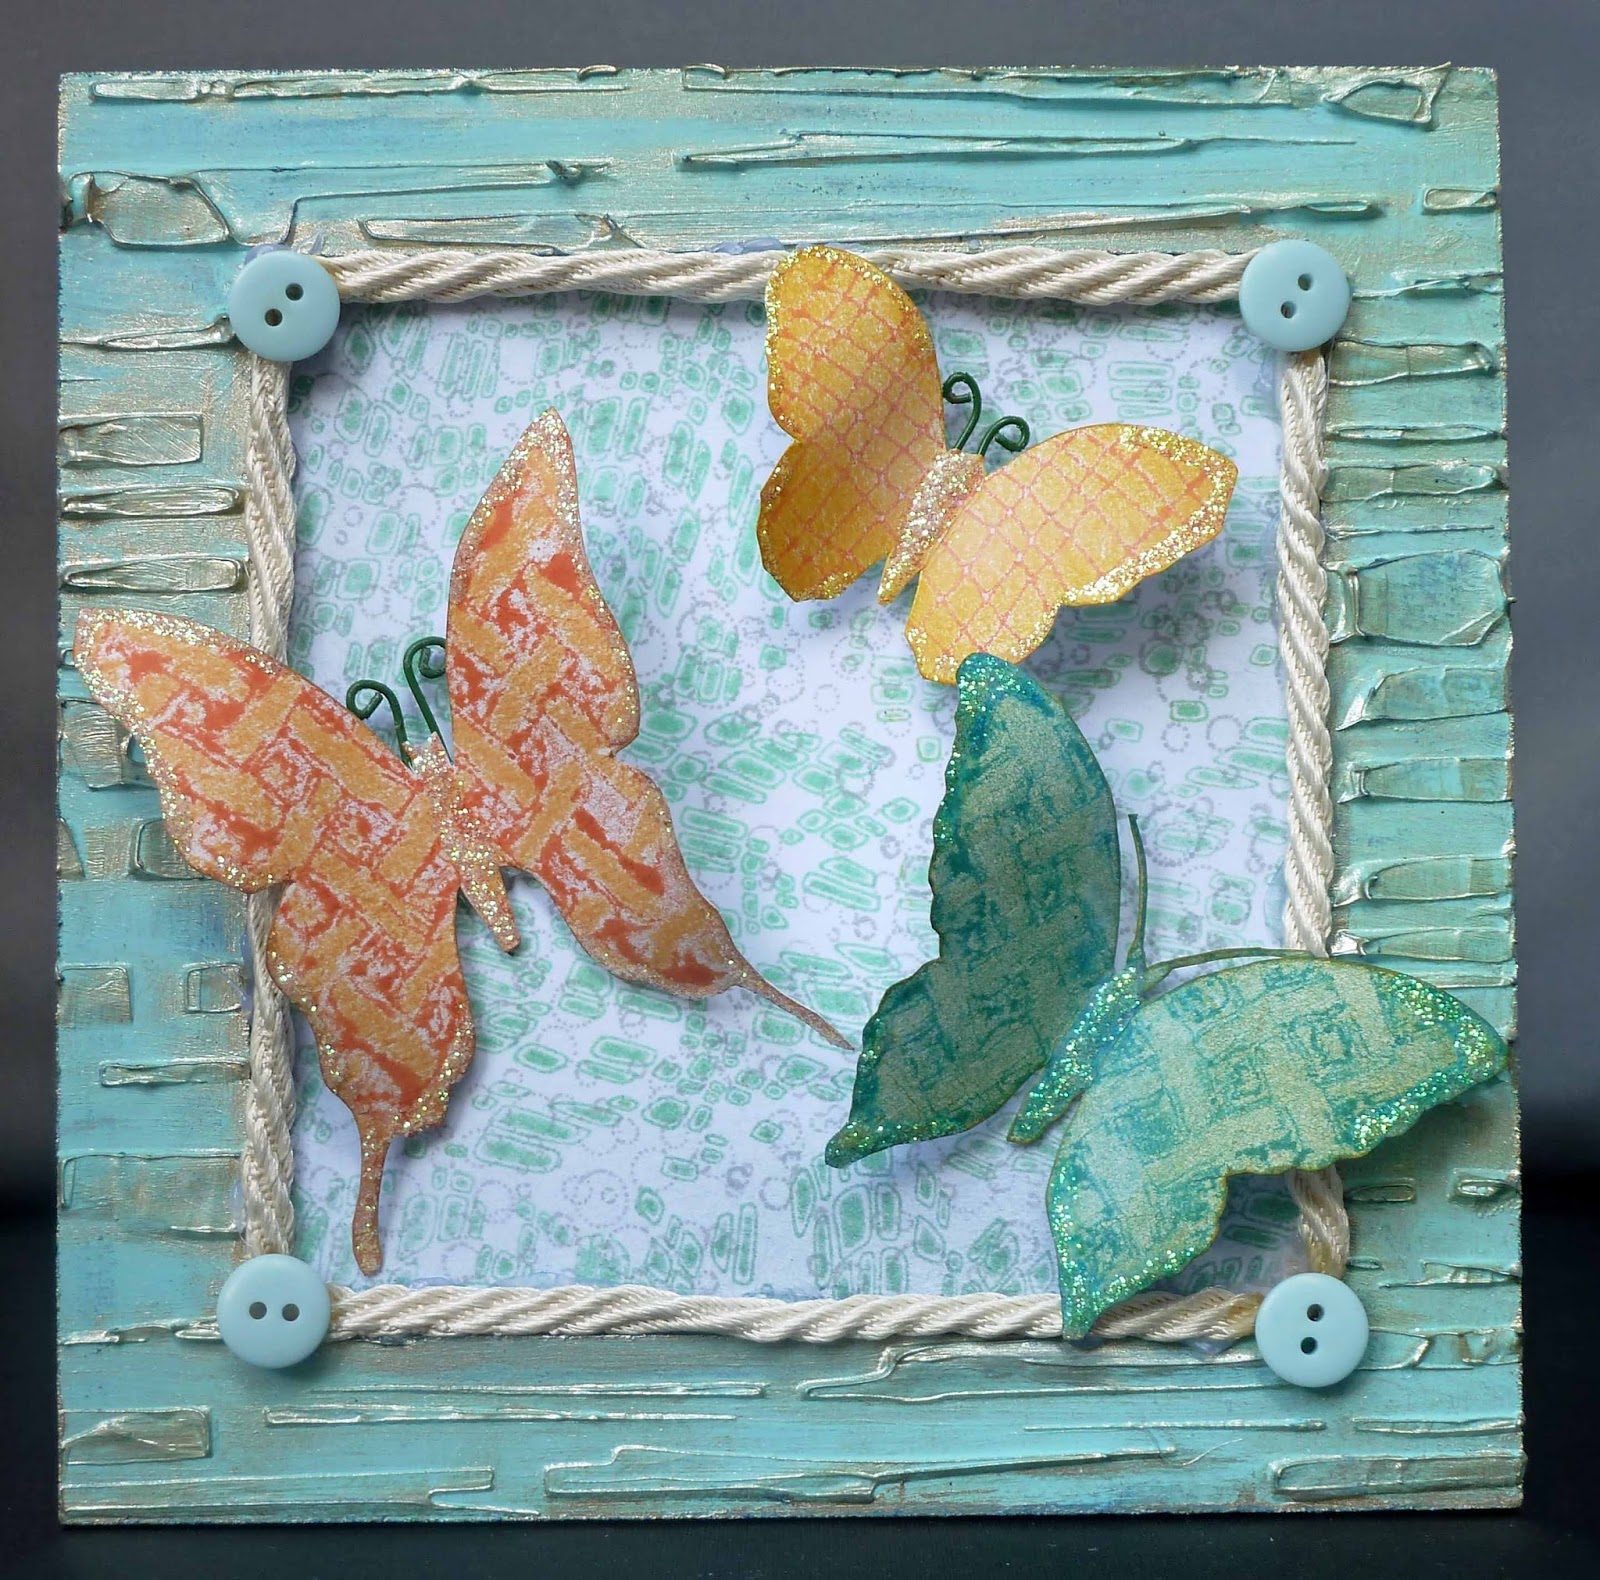
 

I started by spreading molding paste through a Prima Stencil (Bamboo) and when dry, painted the whole frame with a pale blue acrylic paint, followed by some gold gilding wax to highlight the stencil.
The background was created by stamping two of the Rustic Fragment stamps on top of each other, using Cracked Pistachio and Weathered Wood Distress ink.
I used the lovely Butterfly Blush  set and kiss stamped with the Rustic Fragments to get the texture on the butterflies. I found that inking up the solid stamp and then stamping onto scrap card, before kissing with the fragment stamp provided a much crisper design.
As you can see I have finished the frame with some cream cord and pale blue buttons that I had in my stash.


For my second frame I decided to just spread the molding paste straight onto the frame and then pulled a Contour Tool through the paste to create the squiggles. Once dry I painted with a light brown acrylic paint, followed by gold gilding wax and a touch of a pale-blue pearl paint to highlight the contours.
The flower is from the Fresh Blooms stamp set. I stamped three of the images from the set and then over stamped them with some of the Rustic Fragments  using blue, red and orange dye ink. I then cut them out and layered them up to create the 3D flower.
The background was stamped with the large woven Fragment stamp and then water-coloured with brown and blue pencils, however I felt the patterns clashed too much so over-painted a square panel with the pale-blue pearl paint for the flower to sit on, just leaving a border of the fragment stamp instead.
As before I finished the frame off with some brown cord and buttons from my stash.

Thanks for stopping by xx

Thursday, 11 June 2015

A Little Summer Rain (by Asha)

Good morning, fellow Chocoholics! It's my turn to show you a project using one of the new stamp sets released in June called Seasonal Fragments. There are 12 adorable stamps in this set, each with a seasonal connection. And that mean you'll get plenty of use from it all year 'round.

Today's card is a simple make. I've used the water droplets as falling rain and paired it with little blooms form the same set. First I heat embossed the rain in white followed by some background blending with Distress Inks. Next I stamped the sentiment from the Loving Sentiments sheet, followed by the little blooms from Seasonal Fragments. I added a little colour to the flowers with pencils and finished the card with a fabric flower, held in place by a brad.


So there you have it - a little summer rain can be a good thing! Thanks for dropping in today. Do swing by tomorrow for more wonderful ideas from the rest of the Team. As always, products and tools are listed on my blog.

Beijinhos,
Asha


Wednesday, 10 June 2015

A Colourful Challenge (by Judith)

Hello everyone, it's my turn to hijack the Design Team blog this week to talk to you about the Chocolate Baroque Challenge Blog. As we are nearing the first Anniversary of the challenge blog, we are making lots of preparations for the occasion. We hope that you will all share the occasion with us, and stop by to see what is going on, there is bound to be some excitement along the way!

Each week during the month, the Challenge Blog offers something different for the our visitors, some Design Team inspiration, a step by step tutorial, or a look at some of your entries into the competition. This week, there are two free digital downloads designed by Lesley. The downloads are all available on the blog for you to collect and use in your own projects, and full instructions on how to save them are included within the blog posts. Take a look on the blog at the downloads and the Design Team inspiration that has been made using the downloads for you.

This week we are showcasing some entries from the second challenge set in August of last year. These cards are all based on a floral theme, but have very different end results. Enjoy this blast from the past from Janice, Crafty, Kate and Sally:

Janice

Crafty

Sally

Kate
It has been great fun revisiting one of our older challenges, and looking at all of the amazing artwork again.

If you have not entered one of our challenges yet, then do think about having a go. It's a great opportunity to stretch yourself working with different colour options that you might not have considered. Sometimes we need to kickstart our imaginations, and the colour swatches are a great way to do just that. There is the chance to win a £15.00 voucher to spend on Chocolate Baroque stamps. Why not hop over to the blog by clicking on this link, you can see the current colour selection and find out how you can enter. We look forward to seeing your entry.

We will be back next week with another look at past challenges and some of your artwork.


Tuesday, 9 June 2015

Fairy Wishes (posted by Judith)

Hello everyone, I have a card to share with you today, using some of the new Seasonal Fragments stamps.I wanted to create a little scene using one of the older dandelion clock images from the Fragrant Honeysuckle stamp set and add the clock seeds as if a fairy was blowing them off the flower head.

I stamped the main flower image onto a piece of card, and then added the flower fragment across the bottom of the card. I added some colour to the background using Distress Inks. I stamped the seed fragment, and added a fairy from the Spring Fairy stamp set. I coloured the images with watercolour pencils, and added a little bit of Stickles glue here and there as an accent. I stamped a sentiment from the Card Sentiments clear stamp set to finish.

I created a larger mount for my image using Distress Ink once again to colour the background card, and stamped the seed stamp around the edges using the same colour for a tone on tone effect. I attached both pieces of card to a large white card blank.

 Thanks for stopping by, Judith xx

Monday, 8 June 2015

A Positive start to your day (by Lesley)

I haven't made any ATCs for quite a long time and I really love these miniature works of art. Being a small canvas you can make them fairly quickly and you feel a fabulous sense of achievement when you have a pile of colourful pieces in front of you.


All the backgrounds on these ATCs were made with a Gelli plate then over stamped with images from both of the sets in the latest in our fragments series; Rustic Fragments and Seasonal Fragments.

I then decided to add words from the Positive Beauty and Awesome Diva to start a set of Affirmation Cards.  I love the idea of picking one of these cards at random first thing in the morning and then carrying it around with me as my 'theme' for the day.

How about you? Why not create your own affirmation cards or design a 'pack' of them to give to someone special, maybe someone who needs a little positivity in their life right now.

Thanks for dropping in today and keep watching for more imaginative creations from the rest of the Design Team.

Sunday, 7 June 2015

Squares and Seasonal fragments by Miranda

Hi there,

Today I want to show you my first play with those gorgeous new fragments stamps from Chocolate Baroque. I had a play with the Seasonal fragments and there is also the Rustic Fragments. If I had to buy them I really could not choose so there is also a great multi-buy available. Treat yourself!
I have also combined this pattern with a matching pattern from the Tangled Fragments.
All the fragment/structure stamp sheets from Chocolate Baroque are so versatile and great to play with! For all kind of styles, classic stamping, CAS cards, Mixed media, Art journaling, and much more techniques!

Here is my card.......

 I went for a simple card with a great contrast. Black& white with a splash of green and turquoise. Coloured with alcohol based markers.
I've used a grid die cut for the center frame. It cuts out the frame as well as the squares. I have also a larger version of this one, very handy!
At last I've added accents with pearl pens.


At the last moment I've also created a similar version but with lots of embossed layers......I have embossed the frame also and added some glitter embossing powder here and there for a nice sparkle. I've embossed all the patterns with WOW white pearl and sponged afterwards with Distress inks.
The sentiment is from the Amazing Birthday sheet. In the center of the frame I have triple embossed a square tile and pressed the pattern into it. Finally added some perfect pearl powders.
Here it is.......


Well, I have been playing with more shapes and frames....so keep watching if you like this style!
Thanks for visiting and always nice to read your comments! Don't forget to look here  for more inspirations of our talented bunch of designers!


Saturday, 6 June 2015

Rustic Bubbles (posted by Claire)

Good morning folks, I hope you're having a good weekend so far. The new Rustic Fragments stamps are fab, they will work beautifully with so many of the other stamps and I needed no excuse at all to ink up one of my old favourites,from Seadragon and Seaside Dreams with the lovely bubbly stamp from Rustic Fragments.


I began by using my distress markers to colour directly to the sea bed stamp from Seaside Dreams, I spritzed the stamp with a mist of water and stamped the image. I used a water brush to pull the colour out and add some shading. I inked in the background using distress inks in shades of blue and green and then stamped the mermaid with black archival ink. I stamped the 'bubbles with Brilliance White ink and once that was dry I used my water brush to life some of the ink from some of the bubbles and also from around the mermaid.

I've distressed all the edges and layerd the little scene up on some kraft card adding some pearls, a paper flower and a pretty brad from my stash.

Thanks for visiting today
Claire xx

Friday, 5 June 2015

Rustic Fragments By Florence

Hi everyone

Today I would like to share with you a card made using the new Rustic Fragments rubber stamp set.

Like many of you, I am a huge fan of the Chocolate Baroque's fragment stamps.  If, this is your first visit to this blog and if you would like to see other fragment stamp sets in the range please click on the link.

These stamps are so versatile and have many uses.
They are ideal for card making, ATCs, Mixed Media projects.
They also compliment other Chocolate Baroque stamps beautifully.

 I have used a very simple version of the serendipity technique in making this card.


To make this card

You will need a piece of thin card or thick paper 15 cm x 15 cm as a backing piece.
Cover the backing piece randomly with small scraps of paper using wet glue to attach the pieces.
Overlap the pieces and build up the collage until you are happy with the design.
Give the whole piece a thin coat of Gesso and leave to dry.
Stamp the images randomly over the collage. 
Cut the collage into 5 cm squares.
Optional:  Highlight any overlapping seems with gold relief wax.
Move and turn the pieces around until you are happy with the layout.
Attach the square tiles to your base card with foam tabs.
Attach the embellishments using glue or silicon.

An Alternative to the above would be to work on a larger piece of paper say, A4 in size.
Add fibers and ephemera to the collage as well as paper.
Stamp and emboss the images to give them more definition.
Using a larger canvas, gives you more choice when cutting out the squares.


Thank you for looking
Happy Stamping
Florence x

Thursday, 4 June 2015

Seasonal Fragments Tree (by Debbie)

Good morning.
 
I have thoroughly enjoyed playing with the new Seasonal Fragments and have enjoyed making a wide range of backgrounds with them.


I started with a piece of Kraft card and stamped with black versafine ink then coloured with Prima watercolour pencils in autumnal shades. I was delighted with the colours on the card.
 
Using cream card I stamped the Woodland Design-a-Tree stamp with brown ink and the leaves were stamped using various colours. I started with the lightest colour then filling the branched with the darker inks. I chose colours from the stamping to matt the tree image and background stamping.
 
Thanks for stopping by
 
Debbie

Wednesday, 3 June 2015

Have you joined in with our Challenge Blog? (by Lesley)

Hello there and welcome to Wednesday.  It occurred to me the other day that our Challenge Blog is almost a year old, I can't believe how the time has flown. We have had some fabulous entries over the last eleven months and all the Design Team have thoroughly enjoyed seeing your wonderful and diverse artwork. The use of the selected colours, together with Chocolate Baroque stamps, has been an inspiration to us; we hope you have been equally inspired.

So each Wednesday in the run up to the Challenge Blog's first birthday Judith and I are going to hijack the DT blog by showcasing some of the stunning artwork we have seen over the last year.

This week we are featuring three entries from the very first challenge which was set way back in July of last year. Elizabeth, Janny and Robyn were amongst it's contributors and here are their glorious designs.

Elizabeth


Janny


Robyn


It's great to see their work again isn't it?  Thank you for your support ladies.

So have you entered one of our challenges yet? Apart from the fun of working with colours you may not have thought of putting together yourself there is the chance to win a £15.00 voucher to spend on Chocolate Baroque stamps.  Why not hop over to our Challenge Blog by clicking on this link to see the current colour selection and to find out how you can enter.

More reminiscing next week when we could be featuring one of your entries.


May Blog Comments Winner

Hello everyone, I hope you are doing well.

Once again we would like to thank you all for your visits here at the Design Team blog.  We truly appreciate the time you take to let us know your thoughts about our designs.  

Each comment in May was assigned a number and we used Random Org to draw a winner.  Congratulations to Paula  you have won a £15.00 voucher to spend on Chocolate Baroque stamps!  Please send a quick email to lesley@chocolatebaroque.com confirming your email address and she will send you your gift certificate.

Lesley will be giving a £15 gift voucher to another lucky winner drawn from June’s comments. The more comments you leave the better your chances to win!   We hope you enjoy our designs using the new Rustic and Seasonal Fragment stamps. This month there are also six sets of new clear stamps which are great for card making and journaling.

Thank you for your kind words and comments,
Good luck from the Design Team!

Tuesday, 2 June 2015

Masked Men's Fragment Cards (by Julie)

Hello and thank you for stopping by. Today I have two cards that would suit a masculine theme, such as Fathers Day that is fast approaching. The stamp set used is the wonderful new Rustic Fragment set and as the title suggests, both cards have been made using masking techniques.


I started off by gently applying masking tape at various intervals across the card and colouring the gaps with Distress Inks, followed by stamping my chosen fragment stamps over the top before carefully removing the masking tape.
I then inked up the large, woven design, fragment stamp with Versamark and then stamped and gold embossed with a heat gun, before die cutting, three times with a circle.
 I covered the base with green textured card and die-cut circle mats for the stamped circles from the green card as well.
The Mackintosh Sentiment, With Love was added to finish the card off but of course you can add anything you like.


The masking tape came out again for my second card when I created a border around the edge of the base card, leaving a square in the middle. More strips of masking tape were arranged in the square to section parts off before I started stamping my chosen fragment stamps. You may find that you need a sheet of copier paper to add extra coverage so that you do not end up stamping in an area you didn't intend to. 
Tea Dye, Antique Linen, Old Paper and Dried Marigold Distress Ink were sponged into the masked off areas and a darker shade added along the edges to create the depth and shade.
Once the masking tape was removed I went around the edge of the large square design with a grey pencil, before applying Weathered Wood and dabs of Vintage Photo Distress Ink.
The little hearts were punched from spare card that I had stamped with the mesh fragment and glued with silicone to a strip of brown card.
As before the With Love sentiment was added from the Mackintosh Sentiment Clear stamp set.

Many thanks for looking and hope to see you here again tomorrow xx

Monday, 1 June 2015

A Little Sunshine (by Asha)

Good morning, friends! Have you seen the new stamps for June 2015? They are AWESOME! I'm playing with the Seasonal Fragments A4 sheet. There are twelve designs, each group of 3 depicting the seasons in the year. 

My card features one of the two leafy fragments from the sheet. I've paired it with a bold sunflower from the Sunny Sunflowers A4 sheet and a sentiment from the Loving Sentiments A5 sheet.  I blended a couple of green Distress Inks in the background and coloured the images with Polychromos. Finally, for some texture, I added little dots of Liquid Pearls in the middle of the sunflower, which I fussy cut and adhered to the card with some foam tape.


As the name suggests, the entire sheet is made up of little fragments but there's so much you can do with them. I hope you'll have fun with your Seasonal Fragments stamps too. Come back tomorrow for more amazing ideas from the rest of the team.

Beijinhos,
Asha

Sunday, 31 May 2015

A supporting role (posted by Judith)

Hello everyone, I have a couple of cards to show you today using the sewing stamps in a supporting role, stretching their uses and hopefully letting you see how versatile they can be.

My first card uses one of the lacy borders on a wrinkle free distress background. I added some background stamping using a stamp from the Harlequin Fragments stamp set. I stamped a heart image from the Punky Hearts stamp set onto a piece of scrapbook paper, colouring in some of the details with watercolour pencils, and finally added a sentiment from the Sweet Nothings stamp set onto a die cut.


My second card uses another one of the borders to create a masculine romantic card using the Key to my Dreams stamp set. I stamped one of the locks onto the background before adding the border on either side. I coloured the background with an acrylic wash, and added some shading with Distress Ink around the edges. I coloured the images with pencils and added some background detail with a stamp from the Lace Fragments stamp set.


Thanks for stopping by, Judith xx

Saturday, 30 May 2015

Making a Frame of it (by Lesley)

I love the versatility of our stamps and today I want to show you how you can turn the Dressmaker's Window into a picture frame.


  • Stamp the Dressmaker's Window onto white cardstock using Versafine Black Onyx. Cut out and then cut out the 'window panes', leaving just the frame.
  • Paint the frame using Vintage Photo Distress ink and when dry use a coloured pencil to add shade and dimension.
  • Adhere frame to a background paper taken from a dictionary, old book etc and trim off the excess paper around the edge of the frame.
  • Stamp the mannequin from the Floral Mannequin set onto white cardstock and colour using a combination of Barn Door, Spice Marmalade, Mustard Seed, Mowed Lawn and Tea Dye Distress inks. Cut out.
  • Cover a 5" square card with patterned paper, run a charcoal pencil around the edges and rub over with your finger to give a smudged effect.
  • Attach the frame to the card and then the mannequin using 3d foam pads and finish by stamping the word 'Delight' from Artistic Expressions.
I hope this inspires you to explore the possibilities in your stamps, you may be surprised by the results.

Please drop in again to see more wonderful creations from the Design Team.


Friday, 29 May 2015

Painted Floral Mannequins


Hi there,

Today another idea  stamping the Floral Mannequins. 
Chocolate Baroque has lovely elegant designs but they are also suitable to use them in mixed media projects. I was visiting a friend and we had a play with some Chalk paints. I like the chalky finish of these paints, but you have to work fast because they dry almost instantly. Of course there are painting mediums which can help but I did not have that.

I worked on canvas paper and that creates a real painted effect. This time I really did paint.......not with a brush but a sponge.

I've made two cards, here they are....


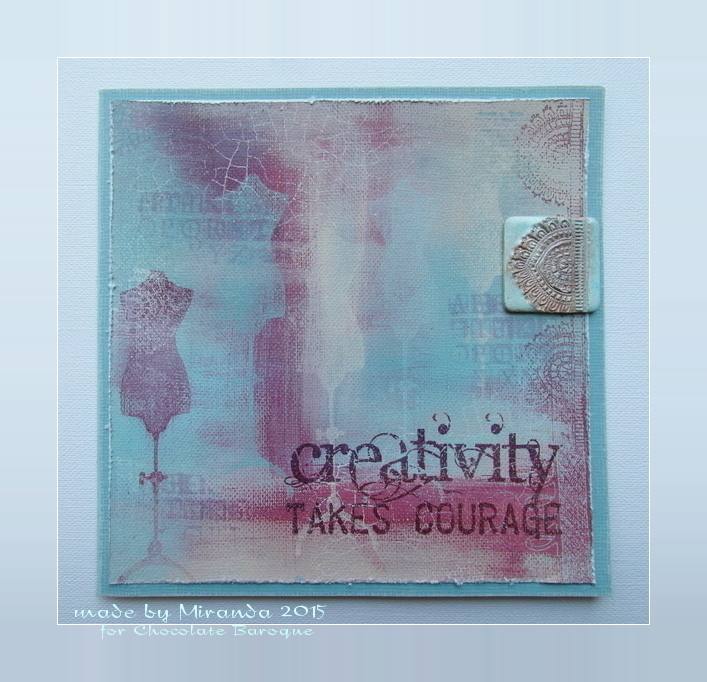
I stamped the dress form using the same paint and stamped some fragments of the lace and the lace flower. The lace flower is also embossed on vellum and I've used 3 matching colors of the WOW embossing powders. The word is from the Artistic Expressions, a sheet that matches this style very much.


And the 2nd one........I decided after I stamped the dress form several times to use the craquele stamp from the Echoes of Italy and a small stamp from the Mini Scripts. I've stamped the lace border at the right edge and pressed it also onto a technique tile which I've triple embossed with WOW embossing powder.(Glacier Mint) I've added also some perfect pearl powder onto it to create some lovely shine. I think it looks a bit like old Turkoois ........wouldn't it be a lovely to create a necklace or earrings with that?


The words are from another favorite sheet of mine called Artistic Affirmations and is even more suitable for Mixed media projects. I distressed the edges of the canvas paper and sanded the card stock beneath for a worn look.

Well, this time another style using these stamps, hope you liked it.........
Thanks for visiting and till next time!


Thursday, 28 May 2015

New Fragment Stamps launched today

Well here we are almost the end of another month and it's time to launch some fabulous new stamps.  We are continually being told by you that you love our range of Fragment related stamps so this month we're adding to the series with two more stunning examples.


First there is Rustic Fragments


closely followed by Seasonal Fragments.

Both these A4 sets are available individually or as one of our ever popular multi-buys.

There are loads of brilliant images on these stamps ranging from fabric to basket weave and snowflakes to leaves. All of these stamps can be used with many other crafty products; I stamped through a stencil for the card featured here today but you can use them with paints, inks, clay, UTEE, there are so many possibilities.

Also available today are a selection of clear word stamps. These are being released in two sizes, first we have

Awesome Diva
and Positive Beauty
Each of these sets will arrive packed in one of our A5 storage wallets and are excellent for card making etc 

However, for those of you who love journalling and mixed media projects we have decided to also offer these in a larger format, which will really make a statement on your artwork. Once again they are packaged in an A5 wallet for easy storage.

So we have the same words, only much larger, and they are released in the following four sets:

Awesome Today
Rockstar Diva
Positive Pants
and finally See Beauty
Now you can have your own sets of journalling words to complement your creativity. Just please bear in mind that we only have a limited stock of all the clear word set so you may have to wait a little while for more stocks to arrive, but they are definitely worth the wait. If you are concerned on which size may be suitable for your projects the description on the website of each stamp set contains the measurements of both the smallest and largest stamps.

I am really excited about all our new releases as I can see so many ways in which they can be used and I know you are going to just love them.

As usual the Design Team girls have been creating magic with the new Fragment sets so there will be lots of inspirational artwork for you to see over the next month. Hope you can join us and have a thoroughy wonderful stamping time.


Wednesday, 27 May 2015

Christmas Window (posted by Claire)

Good morning, Claire here with another card made using  'Dressmaker's Window'. Its such a useful stamp and one I'll be using again and again. For this card I've teamed it with an old 
favourite stamp from Family Christmas.


I began by stamping the tree and rocking horse stamp with Memento Tuxedo Black ink, I masked the image using masking tissue before stamping the window. I coloured the images and a snowy scene behind the window with Derwent Pencils and added some snow to the sky with a white pen. For a little Christmas sparkle I used stickles to create the lights on the tree.

I used a Sofft Sponge and Ultramarine Blue PanPastel to create the striped 'wallpaper' in the background. Its really easy to do this if you use the square edged Sofft Bar (here) and run it down the edge of a ruler. Use the ruler to 'mask' the white stripes and in a couple of minutes your background is done. I used grey PanPastel to ground the tree and rocking horse.


I used silver mirri card distressed with a craft knife to mat and layer and to finish off I've added little pearls, ribbon, pompom trim and a tiny snowflake button topped with a twine bow. 

Thanks so much for visiting today
Claire xx

Tuesday, 26 May 2015

The Sewing Room and Floral Mannequins - By Florence

Morning everyone

Today I would like to share with you a card made using The Sewing Room and Floral Mannequins rubber stamps sets.

These stamps have been a joy to work with this month.  
The possibilities for cards and craft projects, using these stamps, is endless.  You don't have to take my word for it.  Grab yourself a cup of coffee and see all of the wonderful projects made by the team.  There has been a new post every day this month with inspiring projects and lots of ideas on how to use the stamps.


To make this card

 Color a piece of white card with Distress Inks using the spritzing with water technique.
Stamp the images onto the backing card.
Stamp the ruffled ribbon twice onto white card, color and cut out.
Stamp the sentiment onto a piece of card, trim to size and color with Distress Inks.
Stamp the mannequin twice.  Once onto white card and once onto pretty papers and cut out.
Color the mannequin that has been stamped onto white card.
Glue the two cut out mannequins together.
Make up the card as seen and add the embellishments.
The fabric tape used on this card can be seen here.

Thank you for looking

Take care,
Florence x