Pin It button on image hover

Wednesday, 3 September 2014

Guest Post - Welcome to Fairyland by Lorraine Harrison-Rogers

This week's guest post, designed by Lorraine, is a wonderfully bright and cheerful card featuring Magical Landscapes.  Lorraine has provided a very detailed step by step to sit back and enjoy.

This was such a delightful project to make!  As soon as the stamps arrived I couldn’t wait to use them and kind of knew where I was going with it. So how did I make it?              
  1. I chose which of the beautiful castles I wanted to use - I chose this one for the crenellated top and the onion shaped roofs of the towers - I felt this one was really exotic for the colours I wanted to use.
  2. Cut a piece of white card stock - 6 1/2’ x 6 1/2’ and drew a pencil line approximately 2/3rds towards the bottom of the square. This is to help place the castle on a water line - if you look closely at the stamp the land and rocks go out into the water. I wanted the castle/land to sit on the line I had drawn, or very close to it at least.
  3. Then ink up the stamp with versa mark and stamp the image quickly heat embossing with black embossing powder. On mine I sprinkled a little silver embossing powder around those onion towers too for extra WOW!
  4. Next stamp on to masking paper or post it note and cut out placing it over your stamped image where you want to protect the image from your background colouring.
  5. Now I used brushes, but I might just have easily chosen a brayer, which would give me a similar finish. I find using brushes in a slow, soft circular motion means that I can get an even finish to my colour blending - it takes practice but it is worth the effort and time. For this I brush over the ink pad, I only use water based ink pads for this technique - never the oil based or permanent colour ones. I start in a corner and using soft, gentle circles, I brush across my paper until I have built up my colour in the area that I want it. I then change brushes and move on to my next colour, starting at the edge of my last colour and blending into it and then over the area I am going next. I continue like this until I have built up my colours. I will go back over areas if I think the colour isn't quite right. The key is not to be afraid of colour!!!
  6. When I am starting a project like this I usually test several colours together on scrap card until I am happy with my colour combination.  For this project I chose the strong, bold colours of sunrise for my sky. Starting with an apricot colour, I moved onto a melon colour, soft raisin colour and finished with a strong light plum/purple type colour. I wanted to create light on the horizon without losing the night time colour too much.
  7. Using the same method with my brushes I used a deep midnight blue and the same plum/purple for the water, but I avoided around the rocks and land putting those in separately with a colouring pen.
  8. Colour your castle, trees, land rocks etc, for this I used Copic markers and a white highlighting pen. I went around my land and rocks darkening the area that would be away from the light. I also drew in a small skyline of mountains with a black pen; in a real sunrise those mountains would not have any light before the sun rose above them so would appear very dark.
  9. For the edges I cut strips approx 1 1/4” wide and used the tree line stamp, alternating it upside down and heat embossing with both black and silver embossing powder. To colour them I used the same techniques with the brushes and built up just two colours - the melon and the soft raisin.
  10. Finally I stamped the ‘Welcome to Fairyland’ text, again heat embossing this, building up my colour with the brushes and finishing with a couple of rhinestones.
Thank you so much for this gorgeous card Lorranie and for the time and effort taken in writing up the mini tutorial and the insight into your colouring techniques.  I am sure you'll all find this very informative and will want to leave a comment to let Lorraine know how fab this post has been. And if you want to catch up with more of her beautiful work then visit her blog at travellingcolours.wordpress.com



Tuesday, 2 September 2014

While Shepherds Watched (by Asha)

Good morning, fellow Chocoholics.  Have you seen the new September release stamps? Lesley calls it "an abundance of glorious stamps" and boy, is she right! This set is full of beautiful ... seriously stunning swoon-worthy images.

For my sample today, I picked the image of two shepherds (having a natter) from the "A Child Is Born" A4 sheet. To create the background, I first masked a little circle for the moon and lightly blended several shades of purple and blue Distress Inks. Then I added some subtle sparkle with Stickles. Nothing fancy here. The image is so gorgeous as is that it really doesn't need bells and whistles.

Now for the best part - colouring the image... and what a joy that was! I used alcohol markers to dress these shepherds, restraining myself to simple neutral colours.


A full description of the inks and colours used in this project will be available on my blog tomorrow. Over the course of this month the Design Team and I will be posting more samples from the September release stamps on our blogs. Swing by for a magical Christmas!
Thank you for stopping by today. Please drop in regularly to see more inspirational work from the rest of the Design Team.

Beijinhos,
Asha

Monday, 1 September 2014

August Blog Comment Winner

Hello everyone, we would like to thank you all for your visits here at the Design Team blog.  We appreciate the time you take to let us know your thoughts about our designs.  

Each comment in August was assigned a number and we used Random Org to draw a winner.  Congratulations to Gerrina you have won a £15.00 voucher to spend on Chocolate Baroque stamps! Please send a quick email here to confirm your email address and Lesley will send you your gift certificate.

Lesley will be giving a £15 gift voucher to another lucky winner drawn from September's comments. The more comments you leave the better your chances to win!   

Thank you for your kind words and comments,
Good luck from the Design Team!

Christmas Night (posted by Judith)

Hello Folks, I'd like to show you a card using the newly released Santa Baby stamp set. I wanted to use the sleigh flying through the air pulled by a reindeer, and so I looked through my older christmas stamp sets and found the perfect match on the Damask Reindeer stamp set. I stamped both of the images onto a piece of smooth watercolour paper, and then covered them with a mask. I also added a circle mask at this point. I coloured the background with a variety of blue Distress Inks, graduating to a deep purple at the bottom of the page. Around the circle, I added some yellow, to create a glowing effect. I spritzed the background with water to create a starry feel to the background, and added a little bit of pearl spray for some extra shimmer.

I removed the masks, and coloured the images with water based markers and a water brush. I stamped a tree from the Stained Glass Christmas stamp set along the bottom of the background, using green ink and clear embossing powder. I added some grey shading to the moon, and stamped a sentiment taken from the Christmas Magic clear stamp set using black ink.


I have also created a card using the A Child is Born stamp set. I stamped the corner snowflake stamp around the edges of some watercolour paper using white embossing powder, and filled in the gaps with one of the smaller snowflakes to create a frame. I created a watercolour background using lots of blue tones. I stamped the angel onto a separate piece of card, and coloured the image with pencils. Finally, I added the word 'Joy' to the background.


Full details of how I made this card can be found over on My Blog

 My Team mates have some beautiful inspiration for you over the coming month, so please keep checking back. Thanks for stopping by, Judith xx

Sunday, 31 August 2014

Butterfly love!!( by maria)

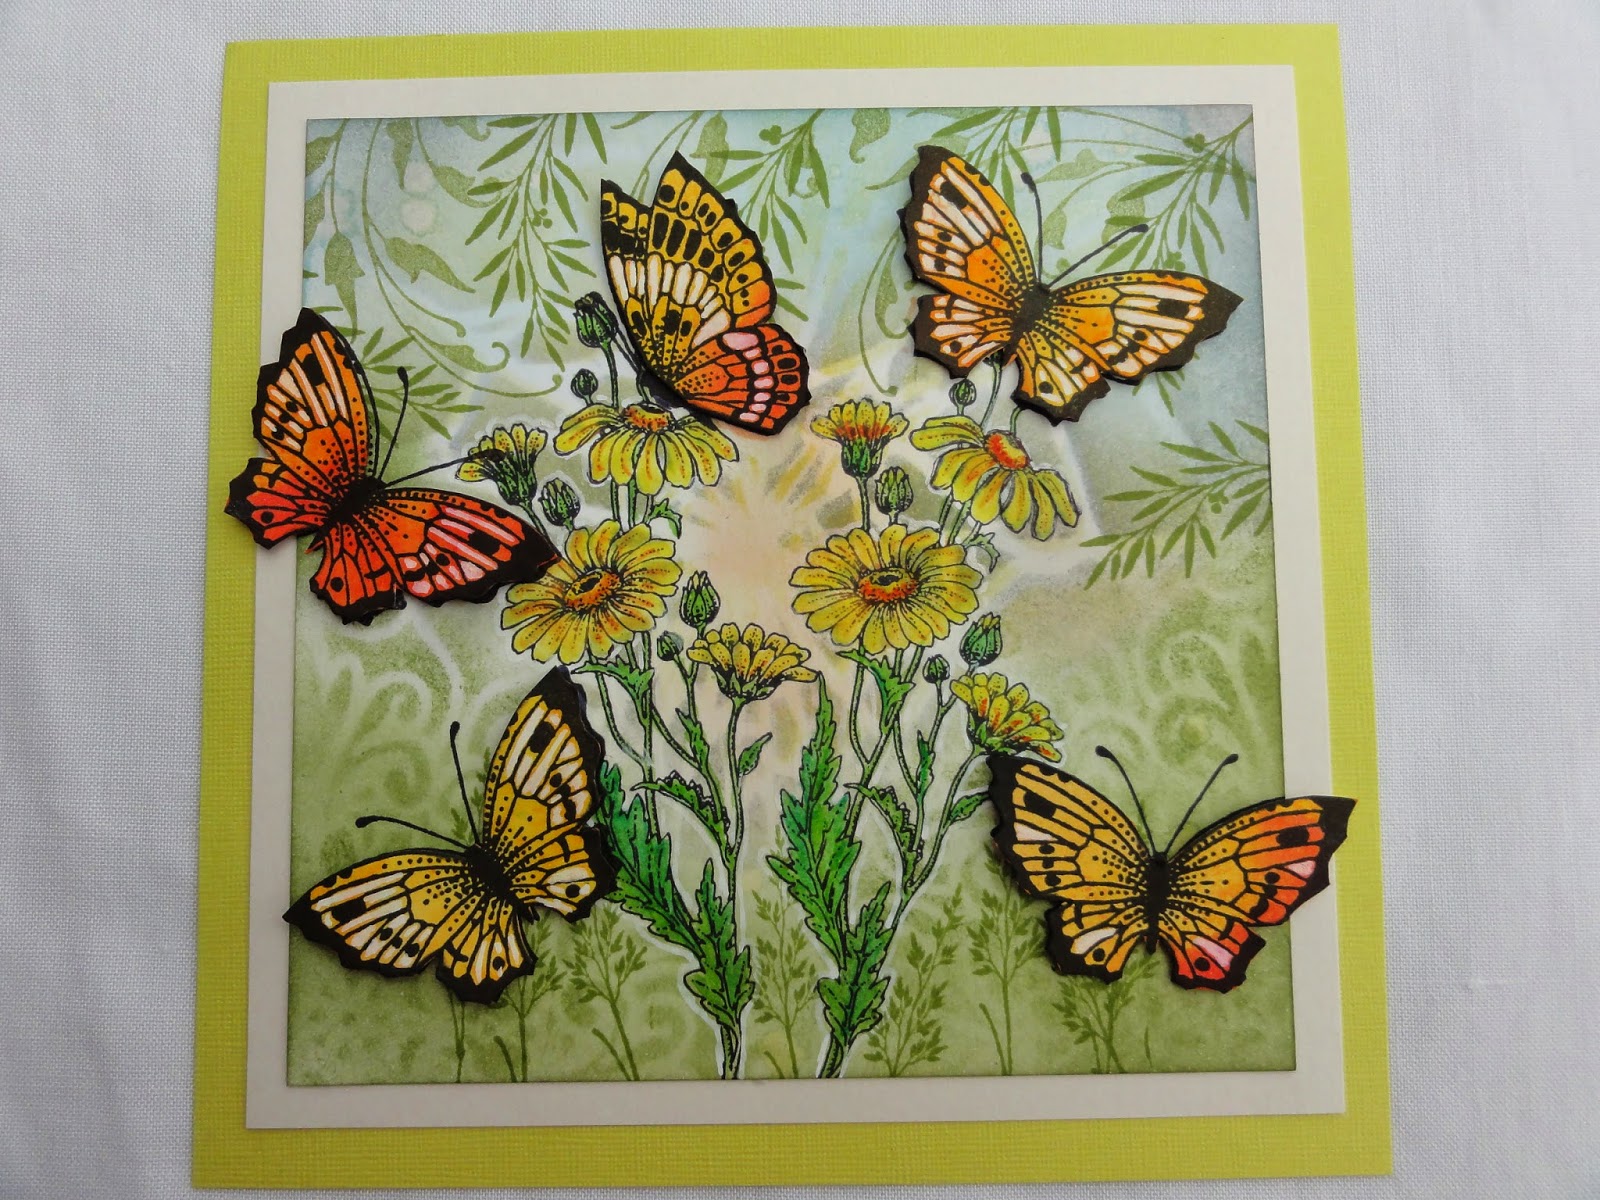
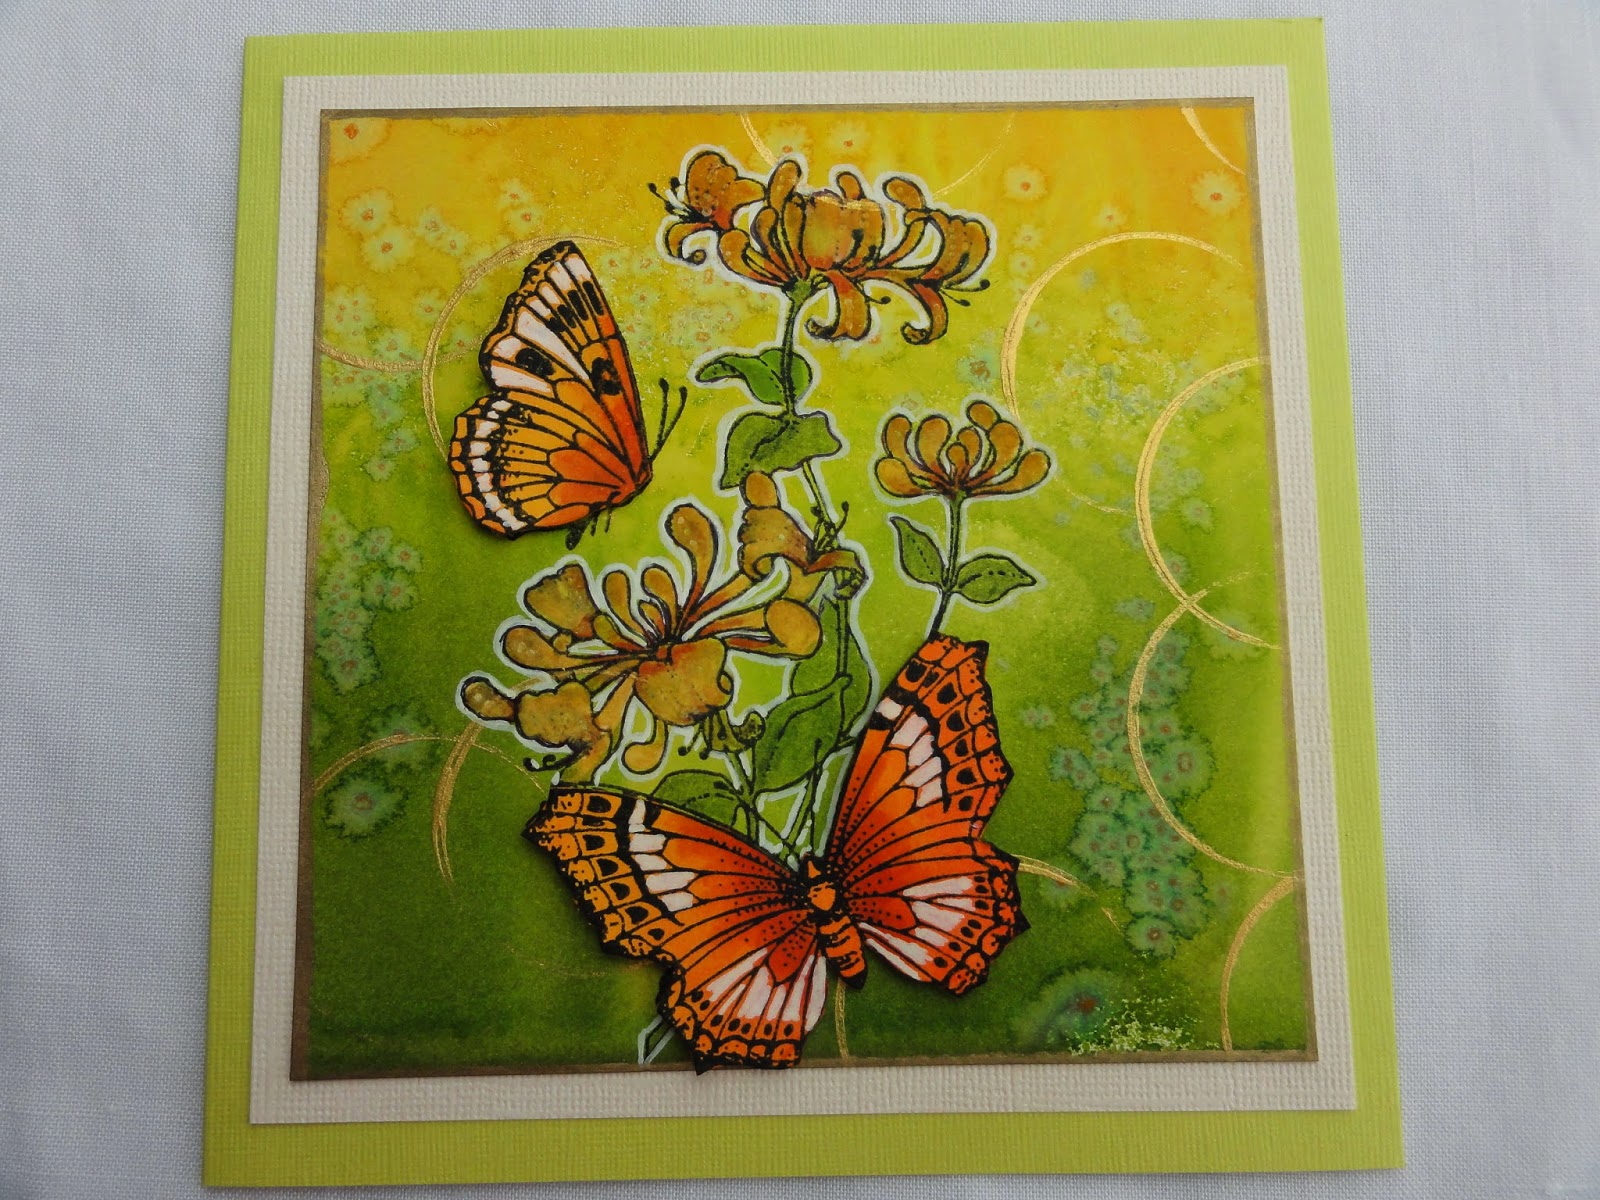
Hello everyone, here are some more samples with the "Honeysuckle butterfly" and the Thistle Butterfly" stamp sets.


For the first and the second card I started again with my favorite dylusions ink background and the salt technique. In the middle of the cards I stamped the big flowers. I took away the colours of the flowers with bleach, then when everything was dry I coloured the flowers with some water colour paints in the colours that I liked.  I stamped the butterflies on a paper that I had already coloured in advance with the dylusion inks. I cut them out and raised them with some 3D tape and put them in the places where they belong. I took some golden acrylic paint and with the lid of my embossing powder box I made some golden circles on both cards. I also made some accents with a white jelly pen.
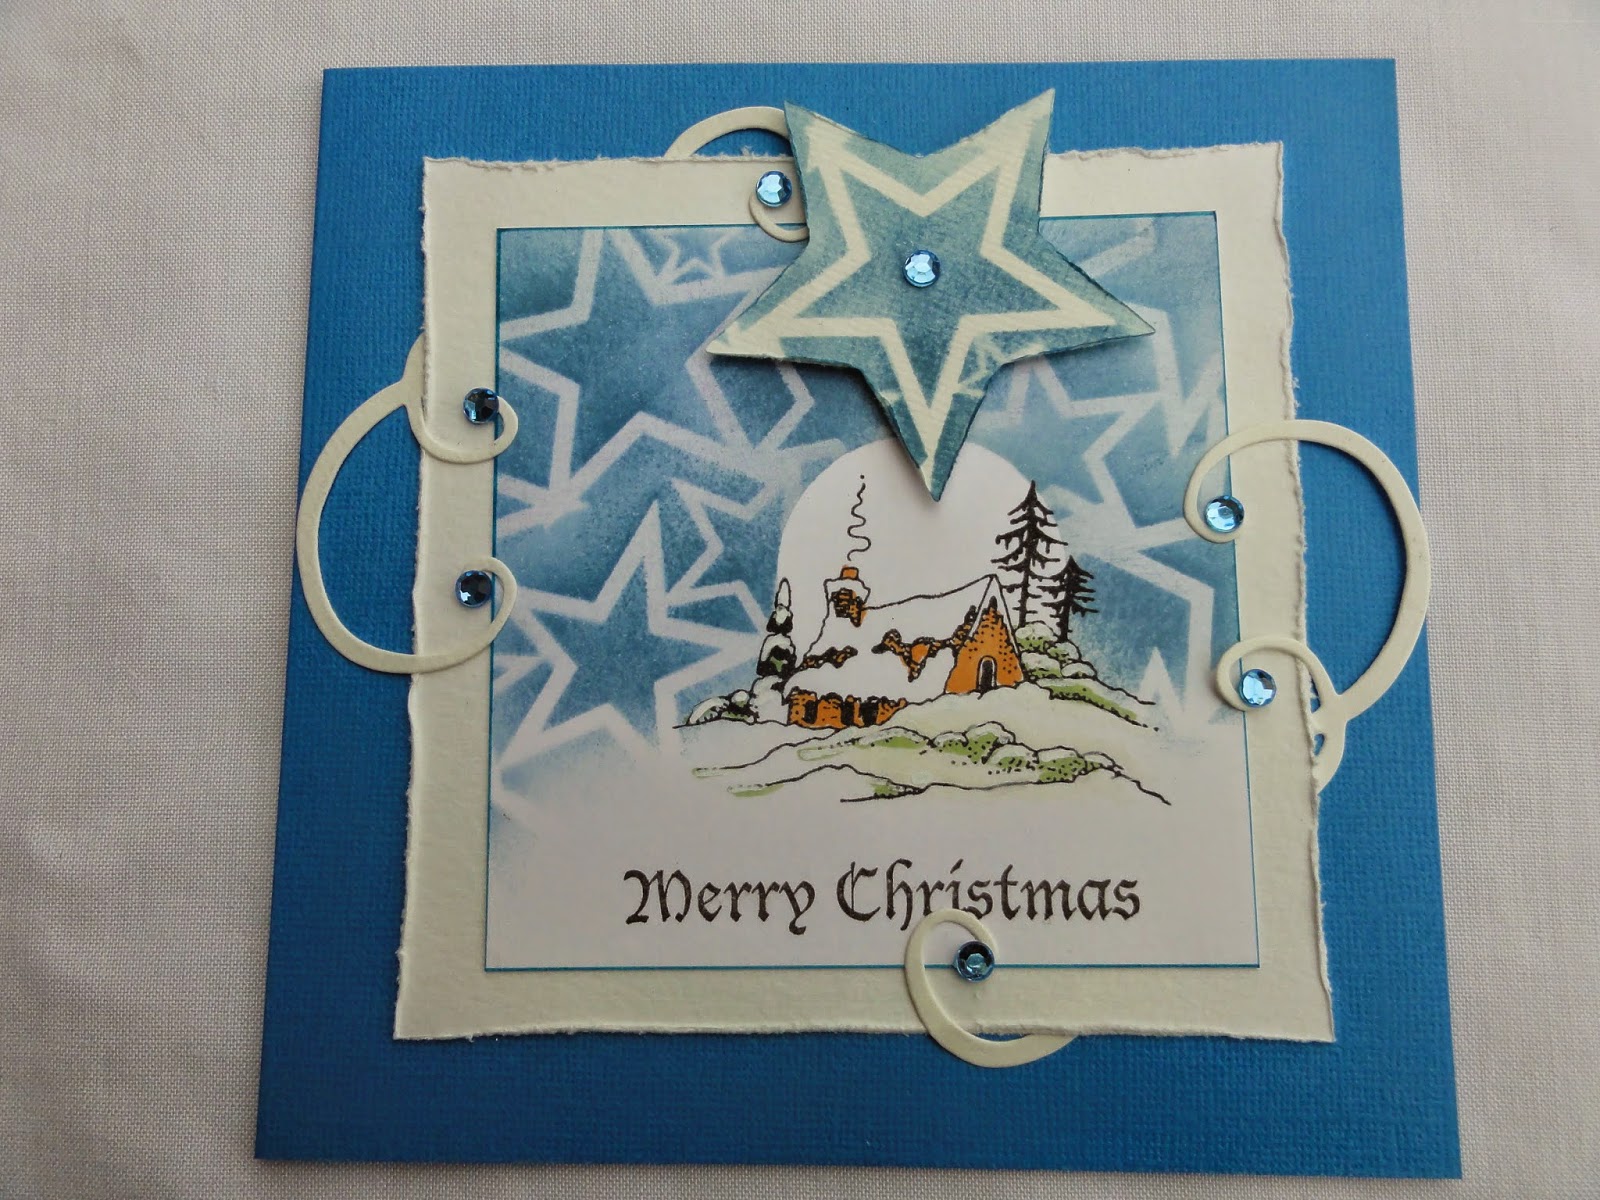
The 3rd card is made with distress ink.

I hope you enjoy my samples and I hope I give you some inspiration to make your own Art!

Greetings
Maria

Saturday, 30 August 2014

Honeysuckle Butterfly and a Pear Tree (posted by Claire)

Good morning everyone, another couple of samples made with the beautiful Honeysuckle Butterfly and  Turtle Doves stamp sets. 

My first card features this lovely image stamped with Memeno Tuxedo Black ink and coloured with pencils. I've die cut the bottom of the card and dusted around the edges with Picked Raspberry Distress ink.


The background was made by simply applying distress inks (Picked Raspberry, Wild Honey and Ripe Persimmon) to my craft mat, misting with water and swooshing my card though the ink. To finish off I've added a hot pink bow and a pretty button from my stash. 

All the gorgeous new Christmas stamps have really got my Christmas crafting off to a good start. This card features another distress ink background.  The image has been stamped with Memento Tuxedo Black and coloured with Graph'It Markers. I've added some glossy accents to the pears and matted the image on some green card distressed with a craft knife. I've added the two birds (gold embossed on green card) and one of the lovely sentiments from Christmas Magic


Thanks for visiting today
Claire xx

Friday, 29 August 2014

Honeysuckle Butterfly and Turtle Doves - By Florence

Hi everyone
 

Today I would like to share two card that I made using the fantastic Honeysuckle Butterfly Set and the beautiful Turtle Doves Set.


To make my card, I dapped some Distress Ink onto a plain old plastic file wallet, spritzed it with water and swished a piece of white coated card stock over it.
I then stamped the leaf pattern using Hydrangea and Plum colored Archival Ink.
I stamped the sentiment "With Love" using one of the stamps from the Mackintosh Sentiments set.
I stamped the little butterflies onto white coated card stock and colored them in with felt pens and added some little wires.
I made up the card as seen adding a small piece of plasters tape and attaching the butterflies with foam tabs.


I made this card in exactly the same way as mentioned above but this time just adding a die cut with  "Thanks for being a True Friend" stamped onto it and a few gems.  The sentiment is from the Mackintosh Sentiments Set.


This was such a quick card.  
I stamped the Partridge in a Pear Tree image onto white Coated Card Stock and colored the partridge and pears with a damp paint brush and felt pens.  I fussy cut the image and then added some diamond glaze over the pears.

I then assembled the card as seen using a die cut snowflake boarder, a piece of my own two tone backing paper and a strip of bling down the edge. I used foam tabs to attach the tree to make it 3D.


Have a wonderful weekend.  
I hope you have time to fit in some crafting. 

Thank you for looking
Florence x

Thursday, 28 August 2014

An abundance of glorious stamps released today

Today we are launching the remainder of our range of 2014 Christmas stamps, and what a collection we have. There is everything from the traditional to cute and fun.

Our September Stamp of the Month is an A4 set, A Child is Born


Next are two A5 sets, Holly Bells and Santa Baby

Both of which are available as our usual money saving multi-buy


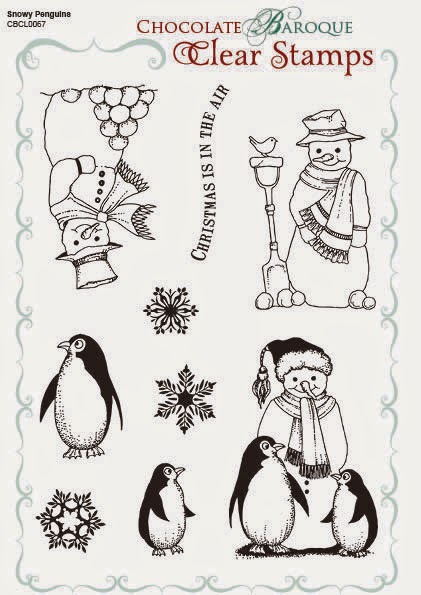
Finally, we have a really fun A5 clear set, Snowy Penguins


Here are a couple of cards from Glenda using the gorgeous penguins and snowman.


And if you are all Christmassed out, then we have something to remind you of summer. Seaside Dreams is another A5 set that it is going to be hard to resist. Glenda and I had a ball with these at the weekend (David and I were lucky enough to be up in bonny Scotland over the bank holiday), and here are just two of our creations. 

First Glenda has made her beach huts from Kraft card, don't they look cute


And from me, the seashells on a gelli plate background

I think we just about cover all bases here, and the Design Team have been working their little arty socks off to come up with some wonderful Christmas creations. So keep viewing and reading to see a new piece of artwork every day.

Wednesday, 27 August 2014

Guest Post - Festive Cheer by Pauline Orr

This week is the final in our series of guest posts by Pauline who has designed this colourful card using the Turtle Doves.


This is the last of my August GDT using the fab new Christmas stamps from Chocolate Baroque, Snowy Scenes and Turtle Doves.

Materials
Turtle Dove stamp set
Distress ink
Versamark
Gold acrylic paint
WOW Clear embossing powder
Diamond Stickles
Seam binding ribbon
Matt black card, Stamping card and Kraft card
3d Glue gel
Layering dies


  1. Starting with an 8"x 8" card blank, I cut a matt black layer slightly smaller than the 8x8 and a Kraft card layer smaller than the black.  I then painted around the Kraft card layer with Gold acrylic paint and then cut stamp card just slightly smaller (so it became a gold frame)
  2. Using the Stamping card to make a background, I splodged on distress ink in Festive Berries and Mowed Lawn with Cut and Dry foam. Then, using a small turtle dove stamp, I stamped randomly with Mowed Lawn. I also stamped using just water and one of the corner branch stamps dabbing with a paper towel to lift off the ink.
  3. I dyed the ribbon in Festive Berries distress ink and when all was dry I stuck this to background layer and made a bow.
  4. For the topper I stamped the berry branch stamp randomly around the edge of the card in Versamark, added Clear embossing powder and blasted with the heat gun. I then splodged Mowed Lawn and Festive Berries onto the topper with Cut and Dry foam. I then stamped the same branch stamp using the Festive Berries distress ink and highlighted the berries using Diamond Stickles.
  5. I stamped out the pear tree and painted with distress ink and gold acrylic paint, cut out and stuck using 3d gel. I also wanted to add something to the ribbon so used another of the turtle dove stamps, which I cut out and coloured with distress ink and gold acrylic. I dotted Stickles to the swirls just because I love it! So there you have it.
It's been a huge honour to GDT for Glenda and the Chocolate Baroque team, thank you for having me. I've loved these stamps and I've had fun showing you how I created my pieces. You can catch me at https://mrsocraftyblog.blogspot.co.uk/

Crafty hugs
Pauline xx

A huge dose of thanks from us all at Chocolate Baroque Pauline for your beautiful cards, I am sure that you have inspired many people over the past three weeks. Don't forget to take a look at Pauline's blog where she continues to share her creations.

Tuesday, 26 August 2014

Turtle Dove Easel Fold Card (by Debbie)


For the Christmas Season we probably send the most cards of the year so I'm always looking for ways to make cards that are as not going to cost a fortune in the post. An easel card is a great way to achieve dimension but to fold flat to go in an envelope.
 
 
I carefully stamped the pear tree from Turtle Doves with brown ink and
the star was inked with orange.
The tree was coloured with Coloursoft pencils.
 I trimmed and matted with red and cream to make a topper for the card.
 A strip of card was stamped with red Doves to make a border. I used a piece of A4 card, scored it in half and placed the topper on to see where I was to cut down from the centre fold to the next score lines. The sentiment from Christmas Magic Clear stamps was stamped onto cream, matted onto red and fixed to the inside fold. The border was attached then the tree topper and a couple of gems to finish.


The Honeysuckle is one of my favourite flowers
and couldn't resist colouring this one with oranges and the purples.
 
 
Many thanks for stopping by
Debbie


Monday, 25 August 2014

Just a Note by (Doreen)

Hello to you all, I am back with another sample made from the new stamps that have just been released for August  My card uses one of the stamps from the "Thistle Butterfly" stamp sheet.


My background has been inked up with Bundled Sage and Scattered Straw distress inks,then I inked up my image with Black Versafine and coloured with a mix of Distress ink and Acrylic Paint. The butterflies have been decoupaged and last of all came my sentiment.xxx

Sunday, 24 August 2014

Partridges, Turtle Doves, Pears and an Elegant Tree (by Shirley)

Hello everyone,  I hope you are doing well.

I had great fun last month creating Christmas cards and have two designs to show you today that feature stamps from the new Turtle Doves set.


The background above was created with Raspberry & Persimmon Distress Inks using the acrylic block technique.   I stamped a flourish from Fancy Flourishes with Raspberry DI.

The pear tree branches & turtle doves from Turtle Doves and pear from Pears and Baubles were stamped with Imperial Purple Versafine ink.   I coloured the background branches with Prisma pencils.  The pear and birds were coloured with distress inks (using a mat, water & brush), decoupaged and popped up over the background.  I also added glitter paint to the larger birds and outlined with a white Gelly Roll pen.   Merry Christmas is from Warm Christmas Greetings.

And the card below is in a clean style:


I embossed a tree from the Turtle Doves set with gold and embellished with lots of little half pearls.  I added gold embossing to the edge of the background.  The die is from Spellbinder - Elegant Labels 4.


This will be my last post here for a couple of months as my husband and I are moving into a new home.   We found it was time for us to downsize (or 'rightsize').   We had a lot of work with purging and digging to move garden plants.   It's been a very busy time for us and I am very appreciative and thank Glenda & Lesley for allowing me a break while we get settled.   I can't wait to be back again working with Chocolate Baroque's gorgeous stamps again this Fall.

Thanks for your visit and have a great day,
Shirley

Saturday, 23 August 2014

Lazy Summer Day (by Asha)

Good morning, fellow Chocoholics! I'm back with another crafty inspiration showcasing the fab August release stamps. Today I'm playing with the Honeysuckle Butterfly A5 sheet.

I started by heat embossing the butterfly from the Honeysuckle Butterfly A5 sheet using white EP. Next I inked the background, blending Distress Inks in several shades of yellow. Over the butterflies, I dabbed a darker shade of orange to make them pop. Then I carefully stitched down a layer of vellum. This softens the background and gives it depth too.

For the foreground, I stamped the stalk of daisies from the Honeysuckle Butterfly set on white CS, coloured it with alcohol markers, fussy cut and adhered it over the vellum. The sentiment is from Birthday Words 


I also stamped a couple of butterflies from the same A5 set onto vellum and fussy cut those too.
(A full description of the inks and colours used in this project is available on my blog).


Thank you for stopping by today. Please drop in regularly to see more inspirational work from the rest of the Design Team.

Beijinhos,
Asha

Friday, 22 August 2014

Fun with Florals (posted by Judith)

Hi Folks, I have some more projects for you today showcasing the Thistle Butterfly/Honeysuckle Butterfly multi-buy stamp sets. I have really enjoyed working with these pretty stamps, and I hope that you have enjoyed the inspiration that my Design Team mates have been providing for you this month.

My first sample was created by using Pan Pastels for my background over a mask. I then stamped the image and coloured it with pencils. I used the floral spray stamp from the Honeysuckle stamp set to stamp around the edges using a soft lilac coloured ink. The sentiment is taken from the Amazing Birthday clear stamp set.


My second project was created using a water coloured background, onto which I stamped the large honeysuckle image. I stamped the image again onto a scrap piece of card. I coloured the image with water based markers and a water brush, and then coloured the butterflies from the second image. I decoupaged these onto the main image. I stamped the small honeysuckle stamp from the Elegant Edges stamp set around the edge of the background.


Full details of how I made these cards can be found on my blog. Thanks for stopping by, Judith xx

Thursday, 21 August 2014

Merry Chrismas in August! (by Maria)

Hello there everyone!


I hope it's still warm enough because I bring you some coolness with some Christmas cards using the
"Snowy scenes" "Turtle Doves" stamp sets" and I hope you like them.
The stamps were already introduced in July so high time to show you, my samples. I made my cards with not such traditional colours but I hope you can enjoy them anyway. I think Christmas cards don't always need to be in red and green, I love them in bright colours too!

Greetings!
Maria