Pin It button on image hover

Wednesday, 16 December 2020

Gerbera Delights (by Anne)

 Hi everyone. I am delighted to be a guest designer for you this month. For my second set of projects I have had a play with the lovely new Gerbera and Friends stamps from Annabel. Love this set. Hope that these give you a few more ideas and fun playing with some of your stash.

I have also finally finished the last of my Christmas card batch making - phew. Why do I always leave them until the last minute! Ha ha.

Lots of hugs, Anne.

GERBERA AND FRIENDS

Materials List

  • Stamp sets (Chocolate Baroque): Gerbera and Friends (main images), Words to Dazzle & Sparkle (sentiments), Glorious (leaf stamp)
  • Card blanks and smooth card (sky blue, white or black)
  • Inkpads: Stazon (Jet Black), Versafine (Onyx Black), Distress Ink (Gathered Twigs), Versamark
  • Versamark embossing pen
  • Embossing powders: detail white and metallic gold
  • Mica powders: yellow gold, pink and purple
  • Water based inks: Turquoise, yellow, green, red and magenta (I used Spectrum Noir Aquatints)
  • Acrylic paint metallic pink (Starlight)
  • Acrylic mat medium (clear drying)
  • Colouring pencils (pink, green, yellow)
  • Alcohol in pens (pink, purple, yellow)
  • PVA pearls and Glossy Accents
  • Acetate and translucent shrink plastic
  • Decorative circle dies (Tonic)

Make a Wish Cards

I created a couple of cards using the lovely dandelion clocks. I remember as a child how we would blow the seeds from the flower heads whilst making a wish. Happy memories.

My card blank measured approx. 13 X 17.5cm. I trimmed my stamping card to 12 X 16.5cm and rounded off the corners.

I painted on the water based inks, blending them wet in wet (working from the top down). When dry I flicked with water and lifted out colour with tissue to add texture. I also applied a circle of water and lifted it out to create the moon.

The dandelions, sentiment and foreground texture were stamped with Versafine. I lifted out some of the colour from the seed head bases).

I also used Distress Ink to stamp more texture at the base and to blend around the card edges. Black alcohol ink pen was used to edge and frame the card before mounting.


My next card was more clean and simple. The card blank was 15cm square and the blue background mat was trimmed to 14.5cm.

I used dies to cut the decorative circle (approx. 14cm diameter) and circular centre (approx. 9cm). A white paper doily would also look good if you don’t have decorative dies.

The images were stamped with Versamark and embossed with white powder. I mounted with 3D foam for added dimension. Finally finished with PVA pearls.

Bright Gerbera Cards

I adore this huge Gerbera stamp and wanted to make something really bright and cheery.


My card blank was 15cm square. I trimmed black card to 14.5cm to create the background mount, and white stamping card to 13.5cm.

The card was painted with the yellow, red and magenta inks, blending them outward from the centre. Versafine was used to stamp the images.

Oh that Gerbera!

Again I used a 15cm square card blank and trimmed a black mat to 14.5cm. The background texture was stamped with Versamark and yellow/gold mica brushed over with a soft brush. Excess mica was removed with a microfiber cloth. Versamark was then applied around the edges which were embossed with metallic gold powder.

The sentiment and leaves were stamped and embossed onto black card. An embossing pen was used to edge the sentiment plate.

The Gerbera was stamped onto acetate and shrink plastic using Stazon which were then cut out.

The back of the shrink plastic was coloured with alcohol pens before shrinking with a heat gun. Coloured pencil was used to enhance the colour on the front before covering with Glossy Accents.

The back of the acetate image was coloured with mica powders mixed with mat medium. When dry the back was then painted with the metallic acrylic.

The photo really doesn’t do justice to the shine and mica sparkle on the Gerbera. Love this one.


LAST OF MY CHRISTMAS MAKES

Materials List

How it was done (including my boo boo)

I love these collage panel style stamps for creating quick and easy batch makes – one stamp does all the work for you. I have stamped and coloured these but they would look equally good without colouring or perhaps stamped and embossed with a pretty metallic powder. I like to use a stamping platform for batch making as it makes it easy to line up and repeat stamp in a production line.

Stamped with Majestic Blue Versafine and coloured with Distress Ink (Chipped Sapphire).

I just had to make a blue and white set. Those of you that know me will know that I love making these. However, I have been a little out of practice with my stamping and colouring this year and my first attempt was a flop – ha ha.  I have shown my blooper as I thought it may be helpful if you have struggled with colouring.

This was my first attempt – eeek! Initially I tried to colour with watercolour pen and attempted blending out with a damp brush. It wouldn’t work very well and my watercolour just sucked straight into the card. This really shows the importance of choosing the correct type of card for the techniques that you wish to use. For watercolouring you need a card that will hold the pigment without it bleeding out too much, but then release it again when water is applied to allow blending and shading. This brand of card used to work well but recent batches really have not worked as well so I suspect they have changed the ‘formulation’.

As my watercolour pens were not behaving well with my card I tried switching to Distress Ink. Applying to my mat, diluting out and picking up with a damp brush. Distress Inks are specifically formulated to stay wet longer and to blend more easily. It worked out much better on this card. The two flowers on the left were my quick trial with Chipped Sapphire Distress Ink.

Another mistake I made was to go in far too heavily with the colour. I was aiming for a softer colouring more suitable for the delicate flower petals. This is achieved by using a more diluted colour and gradually building up the layers and shading.

This shows the first stage of Distress Ink colouring using very dilute ink.

Deeper colour was then added to give shading. Working more heavily on the leaves and stems helped the delicate flowers to stand out more.

The edges of the card were distressed (using the edge of my scissors) to give a soft textured border before mounting onto the card blank. Lastly sparkly glitter glue was added to the flower stamens and around the edges. Cannot have Christmas without at least a little bling.

My next set were also coloured with Distress Inks. I went quite dark on the leaves to enhance the delicate flowers.
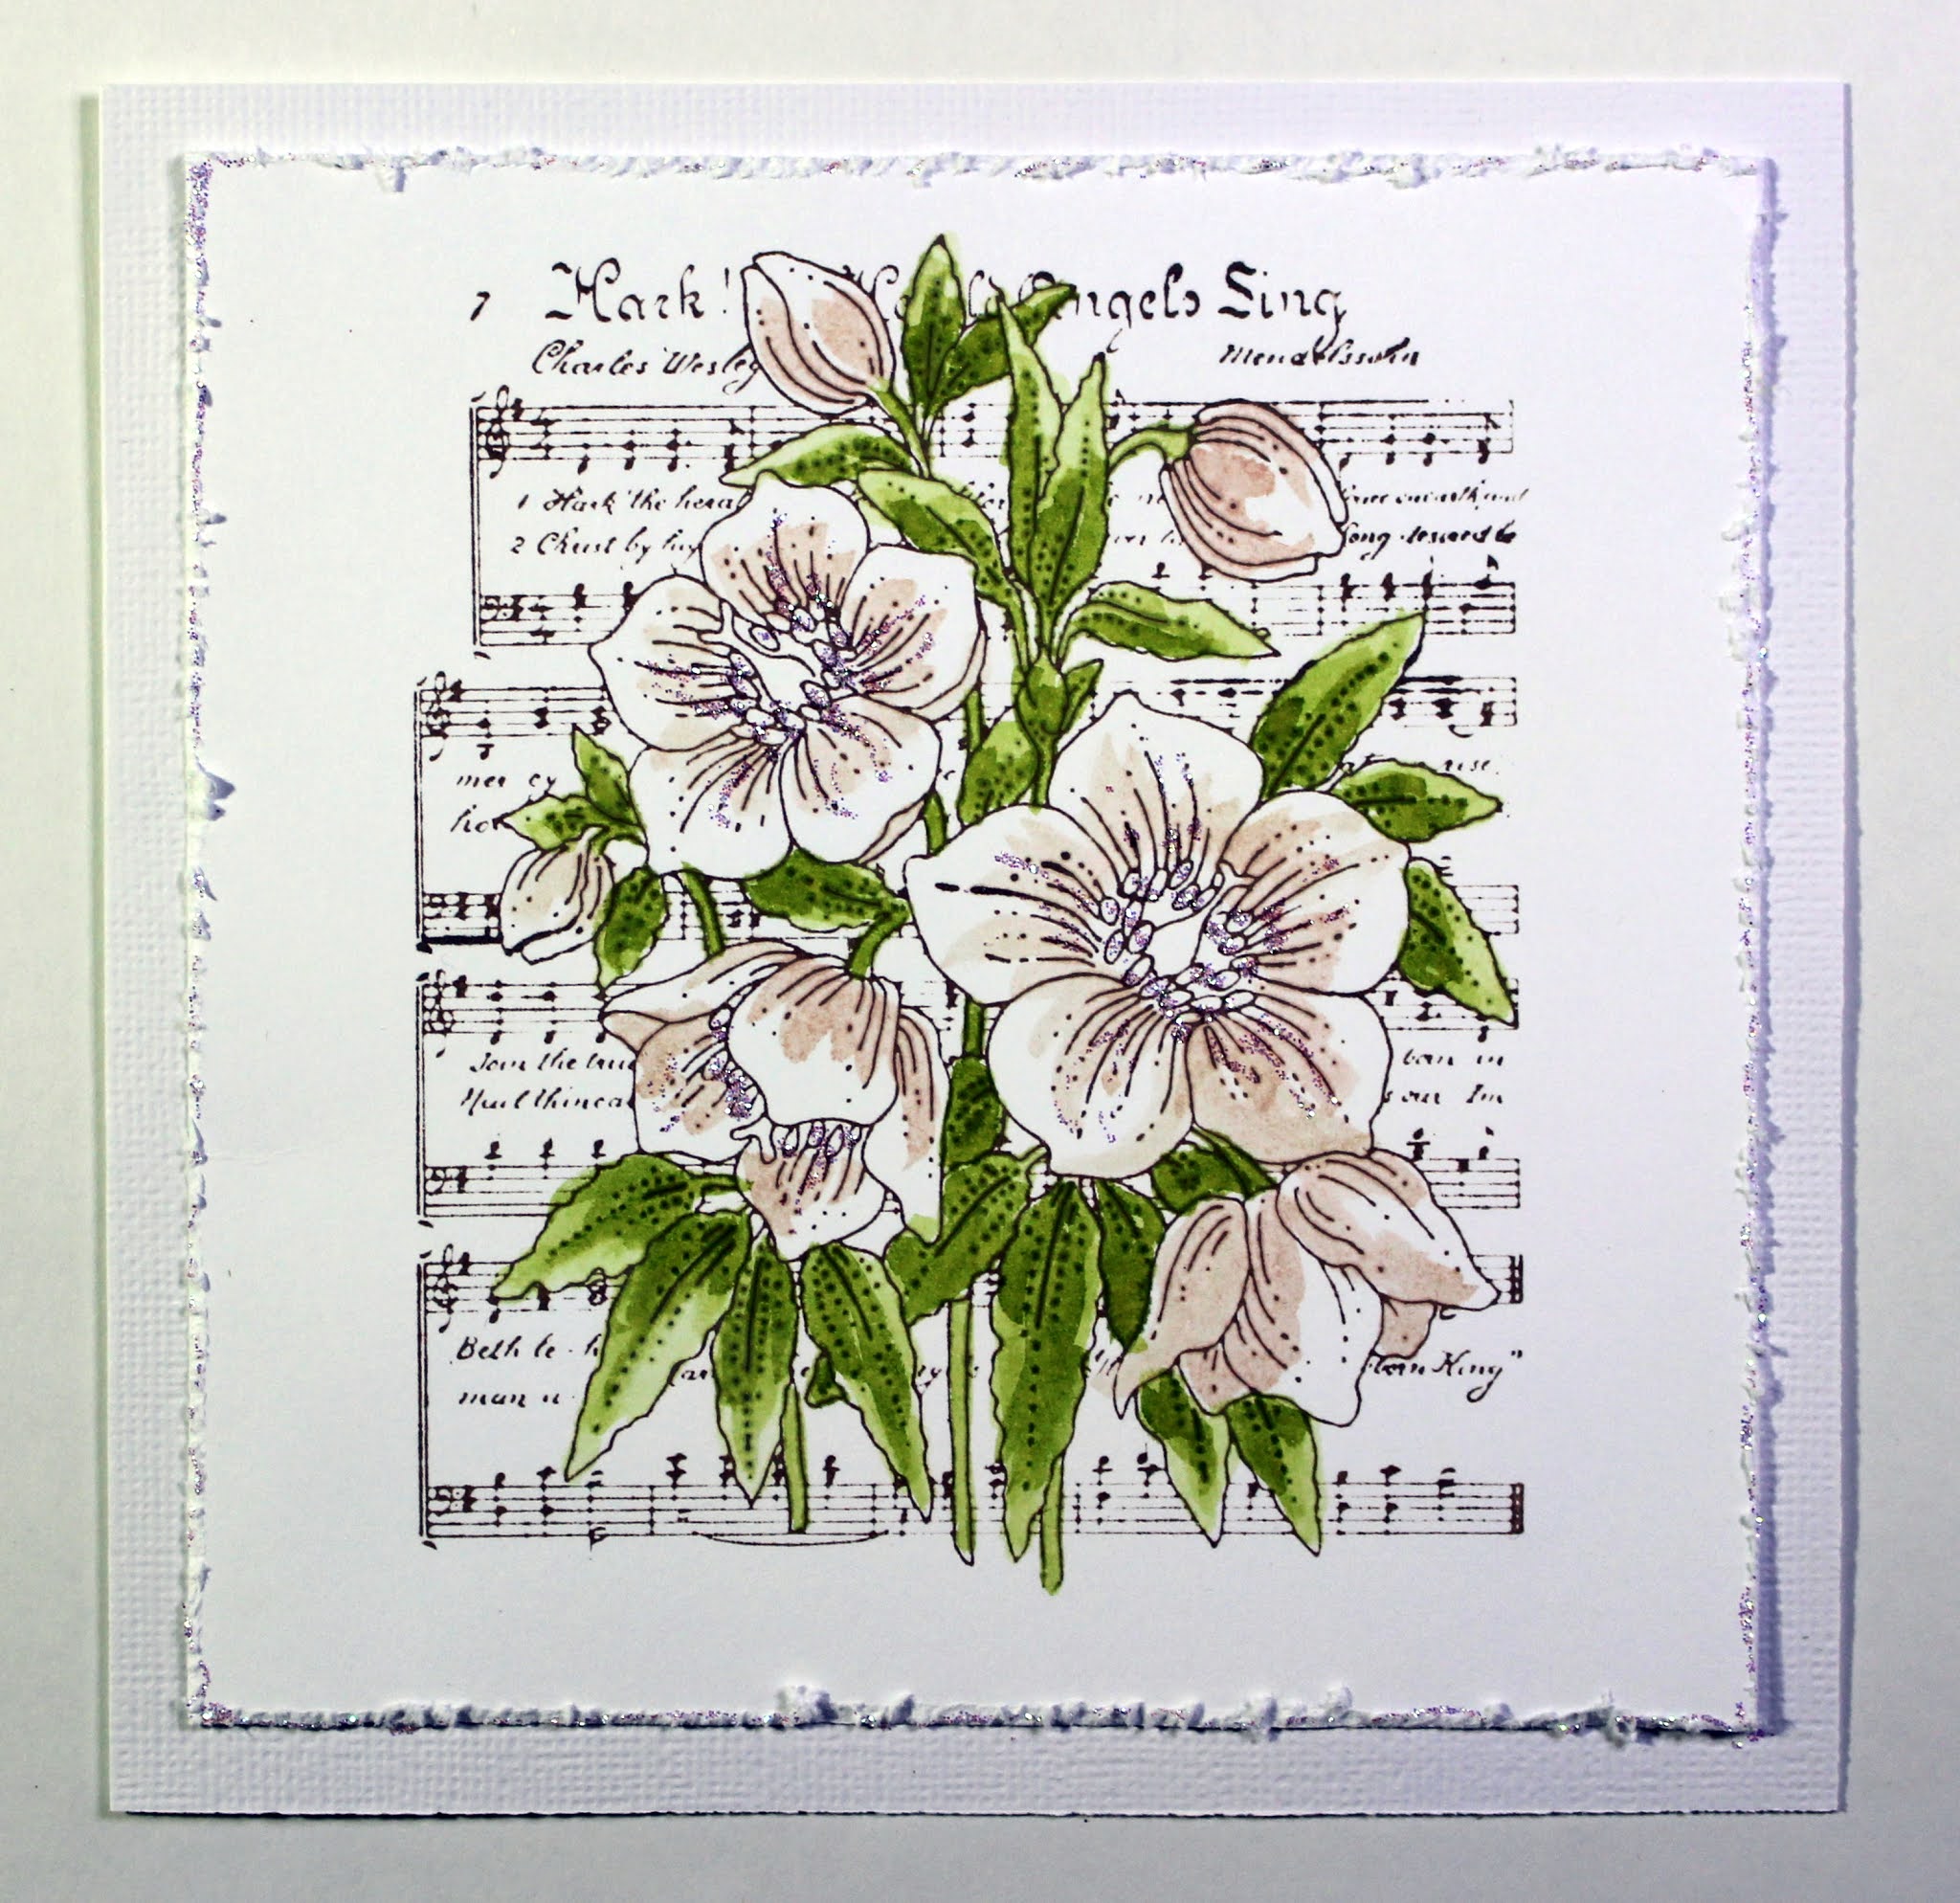

I was pleased with the delicate vintage look.


Next I coloured with soft pastel coloured alcohol ink pens.


Again my first attempt at colouring this batch was not really what I wanted. I felt that the flowers were a bit too much, too Summery and had lost their delicacy. Despite this I mounted this one as good enough.


I was happier with this colouring for the wintery theme. Coloured pencil details (outlines, leaf & petal veins) were added in to enhance the soft colouring.

Glad to have finally finished my Christmas cards – now to get them all written up and posted.

I will be back again next week with some more stamping play x.


Tuesday, 15 December 2020

Tomte bauble 2 (by Veronica)


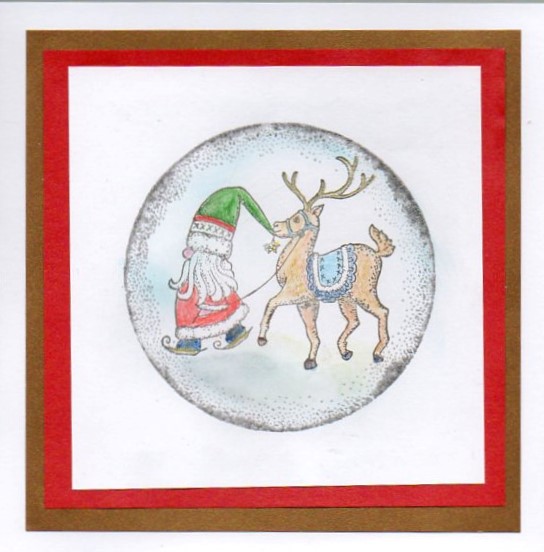
 A very quick version of the baubles to share today, still using the tomte gnomes.

I needed to make quick cards to send to all the members of my WI, (we have not been able to meet since February), and the gnomes added a cheerful note.

I used small kraft card blanks, and a bauble stencil from my stash that would fit the card.

I sponged white pigment ink round the stencil working from the edges inwards to create the bauble, and stamped the gnomes in versafine black once the white was dry -  as I needed 20 of these, by the time I had finished inking the shapes the first ones were dry enough to stamp on. 

I coloured the gnomes with distress marker pens and added some glitter to the stocking one.

Monday, 14 December 2020

Live Life in the Clouds

Hello, I'm sharing some more of my cards from the Hochanda show in November.

My first cards feature stamps from the Tree House stamp set. I have used Distress Oxides for the background, stamped with an archival ink pad and coloured with Distress Markers. I used a foliage stamp from Wild Meadow to frame the lower edge of the card.


On this card I stamped the image twice and used a fine liner pen to extend the stamp lines to make it into one scene.


My next cards are from Floral Perfumery stamp set.
I used watercolours with a lot of water to make a soft background. I then stamped the main image from the set  with the lovely sentiment. I used watercolour pencils to colour the perfume bottle and flowers.


For  this card I used my stamping platform to make a wreath shape with  the single flower and leaf stamps, masking where needed. I used watercolour pencils and mat and layered a sentiment for the centre

 
Thanks for looking
Sandra x

Sunday, 13 December 2020

A Compilation of Favourites (by Judith)

Hello everyone, I hope that you are all keeping well. I am going to share a few golden oldie projects with you today that feature stamps from last month's TV shows on Hochanda. These projects are favourites of mine using these stamps, and I thought that you would not mind seeing them again.

The first three projects feature stamps from the perfumery range of stamps:

Butterfly Perfumery

Floral Perfumery

Rose Perfumery

The final projects are from A Tomte Christmas stamp set:


These little gnomes are so versatile for cards and tags, and I know that you have been busy making cards and tags yourselves this year with them.


I will be back later in the month with some new projects to share with you, thanks so much for stopping by. Take care, and stay safe,


Judith xx


Friday, 11 December 2020

My favourite makes of 2020 part 1 by Zoe

Good morning Lovelies, I hope you’re all keeping well.

Welcome to my first post this month.

I didn’t contribute to last months Hochanda show. As many of you know, we are Foster Carers and our gorgeous 7 month old baby boy’s adoption was about to start, it’s a very emotional process as I’m sure you can imagine, so unfortunately my crafting took a back seat. So my posts this month are featuring my personal favourite makes from this year. I’m sorry if you’ve seen them already.

The adoption went well by the way, as heartbroken as we always are at saying “goodbye” to these little darlings, it was an amazing match, to 2 amazing Daddies, he is going to have the most wonderful life.


Thank you so much for visiting today, see you later this month.
Have a wonderful day xx Zoe xx

Thursday, 10 December 2020

A little scent of paradise ...by Rachel

 Hello there,

Rachel here today with some inspiration from the November shows.  Two cards I made using the very beautiful perfumery stamps - this first one was created using the Floral perfumery stamp. I created the background using distress oxides and used these also to paint the bottle and flowers in the stamped image. I alo did repeat stamping all over the background before ading a layer of hessian to set off the stamped image properly.


My second piece was largely inspired by Di's project from the Comfy Pyjamas Retreat. I used the same technique to create the image on the acetate and made the background using distress inks.


I hope you have found some inspiration here. Wishing you a joyous and safe Festive season.
Hugs
Rachel x

Wednesday, 9 December 2020

Christmas is coming (by Anne)


Hi everyone. I am delighted to be a guest designer for you this month. My first offerings are some Christmas makes. It's been a tough year for us all and this Christmas is not really going to be usual. However, lets hope that time goes by quickly and that we can look forward to better times ahead with our friends and family in 2021. Lots of hugs, Anne.

CHRISTMAS LANTERN

My first project is a pretty Christmas lantern. I mixed & matched lots of stamps on this one but just had to include my absolute fave reindeer stamp.

Woohoo – all lit up.

This one is to be gifted to my 96 year old friend who I help care for. We are having Christmas together as I am in her support bubble. I think that she will love it.

Materials List

Pretty 3D scene with house and trees.

A close up – oh that reindeer!

Adding the acetate baubles helps to blur and disguise the side edges of the card cut outs creating the scene.

How it was made:

  1.  The bare MDF lantern was coated with white Gesso (primer).
  2.   When dry it was painted with acrylics. Gilding wax was added around the ledges.
  3.  Versamark was applied through the stencil onto heat resistant acetate to create the Winter sentiment. It was heat embossed with sparkly white powder, cut out and attached to the lantern with strong tape.
  4. The snowflakes border was stamped and embossed with white glitter powder 4 times, cut out and taped to the top portion of the lantern arches. Two large baubles were also stamped, embossed and cut out.
  5. Extra snowflakes were stamped and embossed with white or blue glitter powders, along with a few twiggy branches, and cut out ready to use as embellishments.
  6. The main images; 2 large background trees, the building scene, smaller foreground tree and reindeer were stamped with Versafine and cut out. In addition pine cones were cut out from the stamped pine branch stamp.
  7.  Images were coloured with watercolour, glitter and gel pens.
  8.  Now for the messy bit – ha ha. The glitter gel was used to coat the base and spread on top of the ledges. Some was also applied behind the acetate to help glue it in place securely. I had this heavy bodied thick glitter gel in my stash for years. It really needed using up as it had started to set in the pot. Some of the half set chunks were stuck down into the wet gel for added dimension. For added sparkle I also dropped in some of the chunky mica flakes. You could substitute heavy bodied acrylic medium and add glitter for similar results.
  9. The stamped images were anchored into the wet gel to create the scene. I just had to add a little bit more sparkle over the images with clear glitter glue too.
  10. Once the glitter gel medium had dried I did a bit of dry brushing with white Gesso in some areas to add more snowy effects.
  11. The light string was then arranged to light up the background house and trees, and to light up the foreground tree. The wires were anchored with strong tape at the back of the images to help hold them in place. The switch was hidden behind the large background scene images.
  12. The acetate bauble images were added to the sides with red tape. This helped blur the view through the sides of the lantern where just side on edges of the card elements were visible. It may have been better to stamp the sides as one complete panel but I found that I needed easy access to the inside in order to arrange the stamps and lights.
The ribbon bow was added to the top. The acetate snowy sprigs and pine cones were added to embellish the bow. The glitter glue gel was used to anchor everything in place. Extra snowflakes used to embellish too.

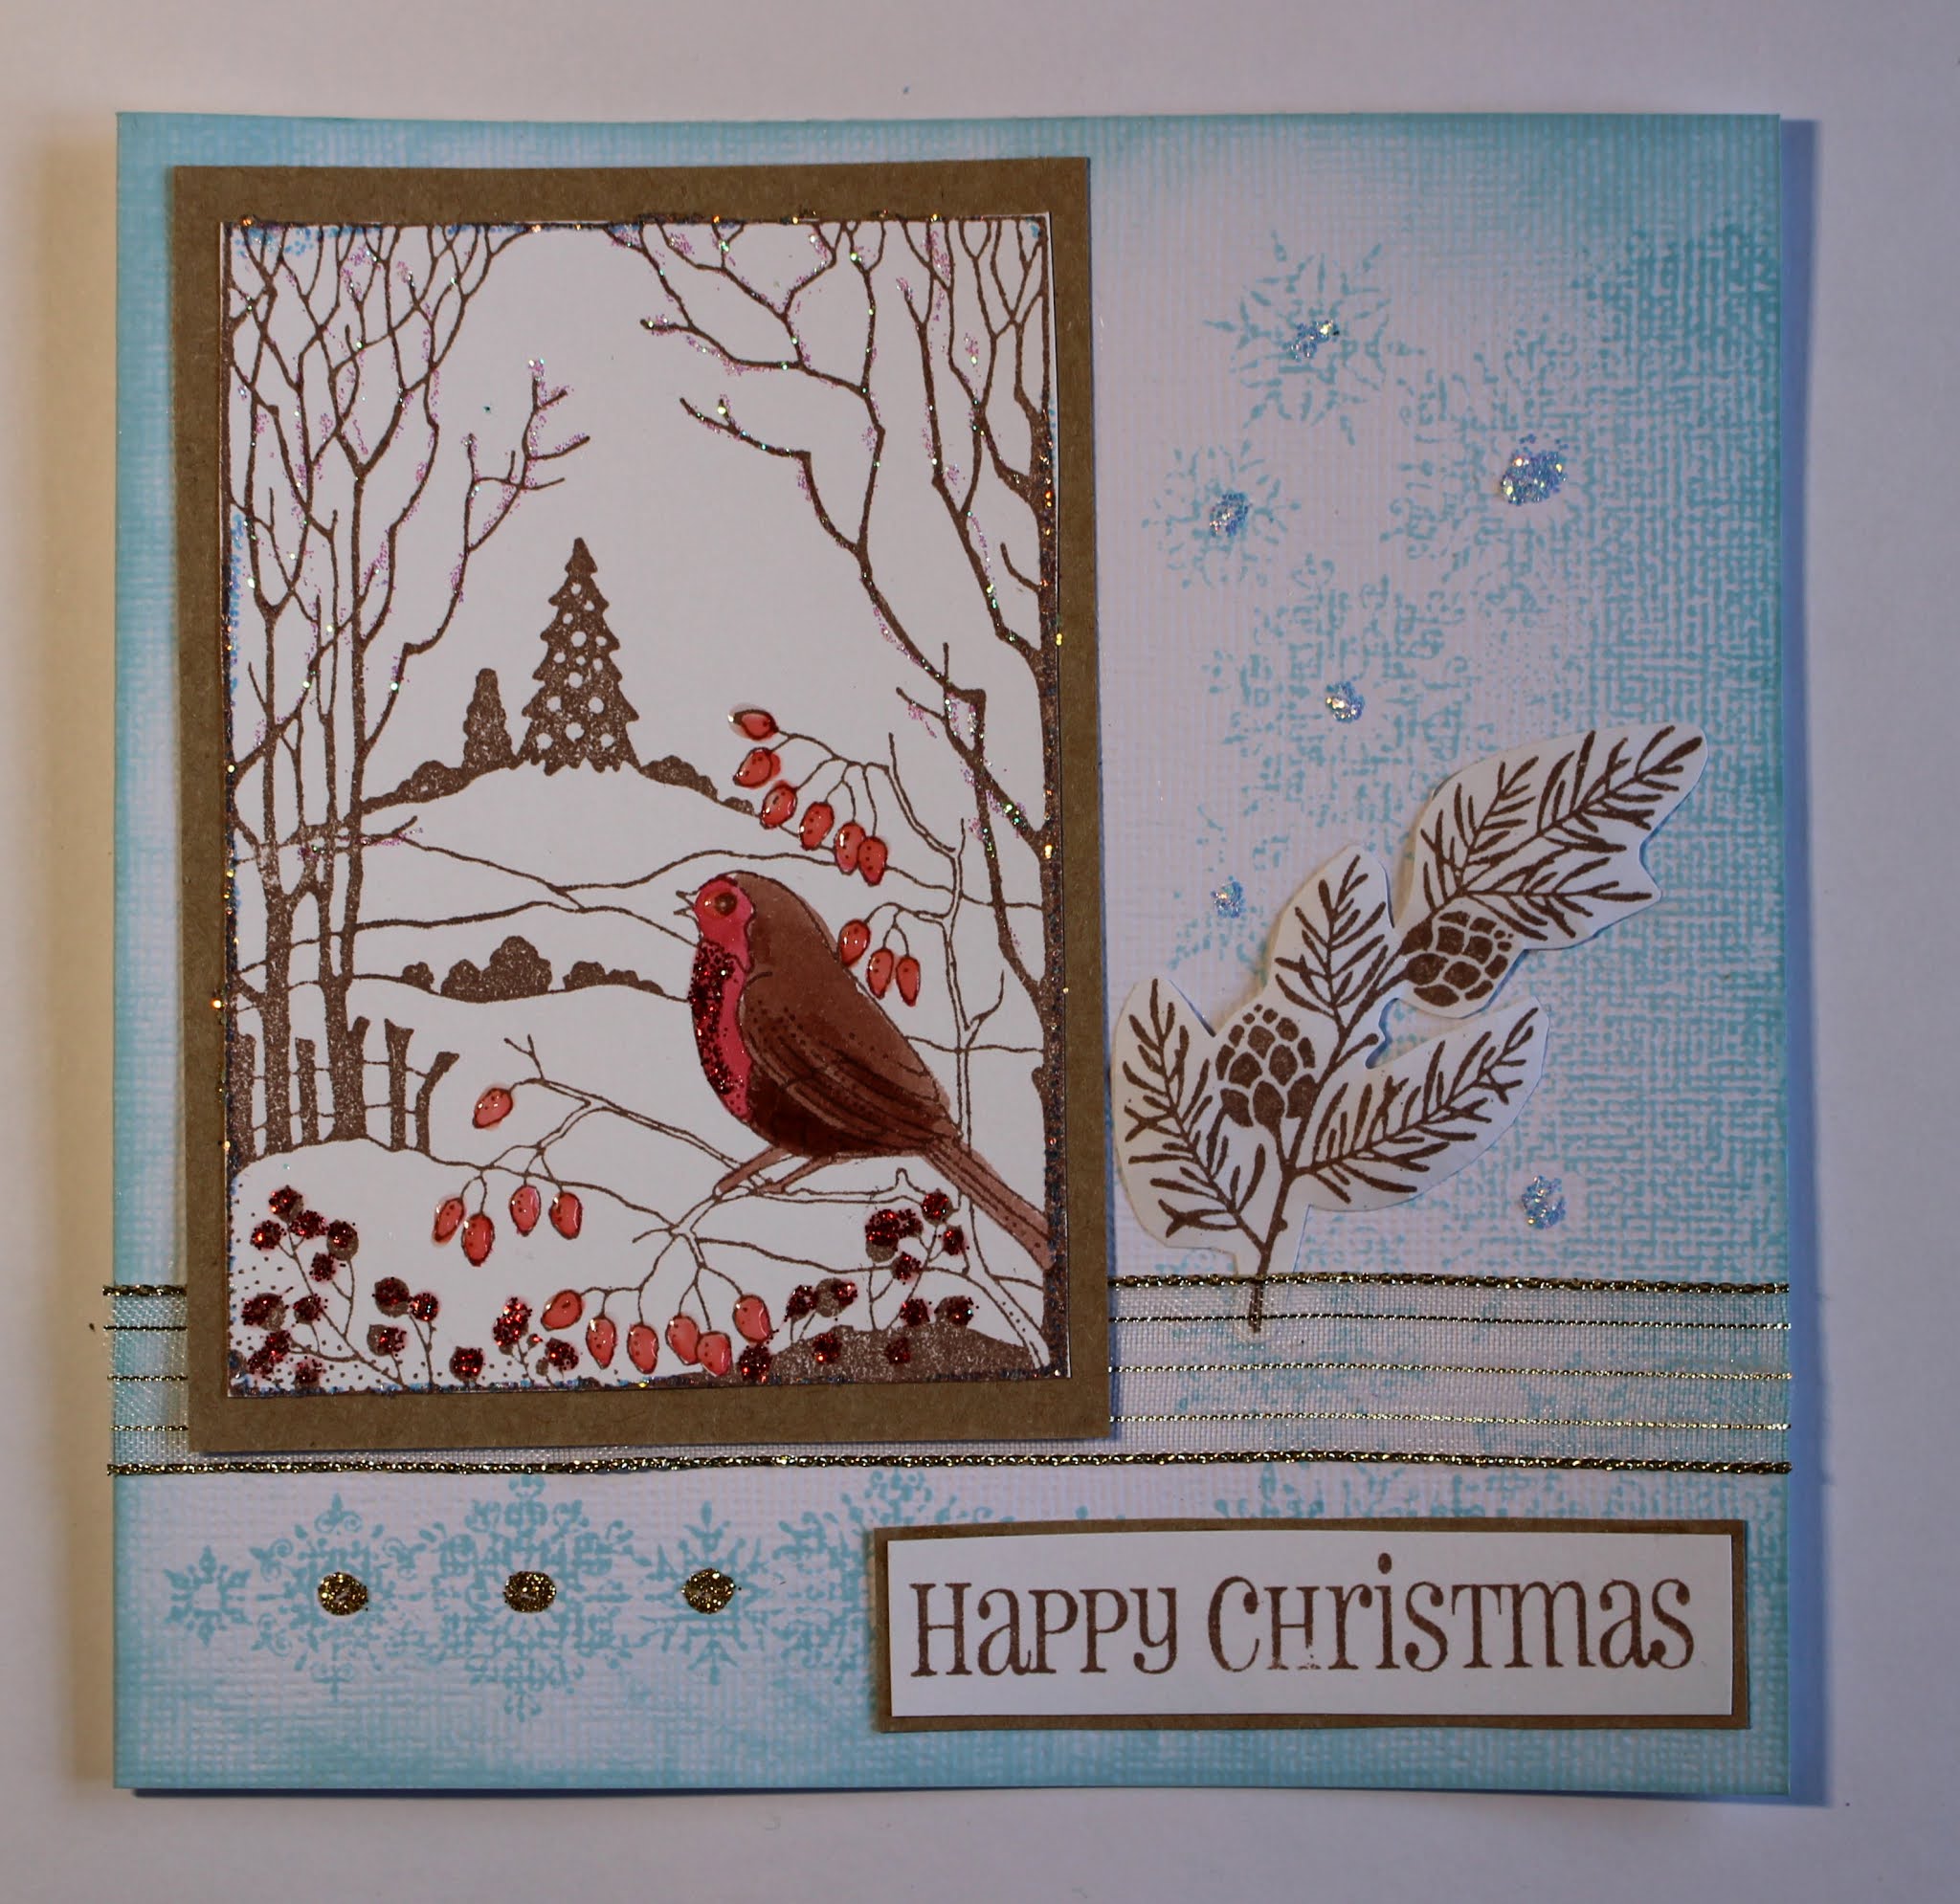
ROBIN SCENE CARD

Every year I end up leaving my Christmas cards until the last minute so I decided to do a couple of projects that would be fairly quick and easy for batch making. I always use my stamping press for batch making – it makes it so much easier to line everything up and repeat stamp multiple times.

I hope that you like this robin scene card.


I added extra inking around the outer edges of this one but decided that it really didn’t need it so didn’t do it on the rest. I just had to get on with that batch making! Ha ha.

Materials list

How it was done

  1.        Images were stamped with Versafine and cut out.
  2.      The main image was coloured with watercolour pens and mounted onto Kraft card. Glossy Accents was used to add shine to the Rosehips, and glitter glues added for sparkle.
  3.         The snowflake borders were stamped directly onto the card blank with  Distress Ink.
  4.      The ribbon was glued down and the main topper added. The sentiment was also mounted onto Kraft card and glued in place. The branch was lightly shaped before gluing.
  5.           Finished with more dots of glitter glue. Hey – you can never have too much bling – tee hee.

Note: I kept these fairly flat for ease of posting. 3D foam could be used for more depth if desired.

CHRISTMAS TREE SHAKER CARDS

Who doesn’t like a shaker card? Scenic panel stamps make them really quick and easy for batch making. These were quite tricky to photo due to shiny acetate and all that bling. Hopefully you can see enough detail of the lovely glittery snow behind the acetate windows.

Materials list:

  • Frosty Trees stamp set (Chocolate Baroque)
  • 15 X 9cm white linen textured card blanks
  • Heavy weight textured white card (for frames)
  • Heat resistant acetate
  • Versamark Inkpad
  • Embossing powders: Detail white, white with silver glitter, metallic silver
  • Glitter for inside shaker (I used Pinflair Ice Diamond – non static glass glitter)
  • Stickles glitter glue (Icicle)
  • Foam tape and red liner tape (strong double sided tape)
  • Optional: Die to cut decorative aperture approx. 12 X 6cm (or cut a plain frame by hand). I used a die from Tonic (Kaleidoscope Box Panel set)

How it was done:

  1.         Cut a frame to fit the card front and surround the stamped scene.
  2.       Stamped the image onto acetate and heat embossed with choice of powder. Trimmed and attach behind the frame with strong tape.
  3.           Next attached foam tape ensuring that no gaps were left (to contain the glitter).
  4.         Laid card flat and placed glitter in the middle before placing the framed acetate scene.
  5.         Finished with dots of glitter glue.

MORE CHRISTMAS TREE CARDS

Finally I made another batch of quick and easy cards using the reverse scene image and blue ink. I do love monochrome blue & white cards.

Materials list:

How it was done:

  1. Images were stamped with Versafine. Note: images on the textured card blanks will not be sharp. This is fine for the backgrounds.
  2. Scene panels were cut out and stuck down with foam tape for added dimension.
  3.    Finished with glitter glue sparkles. Sorry but had to do it.


Tuesday, 8 December 2020

Perfume is the art by Brenda

Good morning, today it's my turn to share some cards from last months Hochanda shows. 

And firs tup is the lovely Butterfly Perfumery stamped onto an Oxide background and coloured in with Distress Marker. I have used a few worker stamps from other sets to build up the background and a sentiment from Floral Perfumery.

I thought I would also share my first Chocolate Baroque Youtube video, I need to polish my act a bit but reasonably happy with it as a starting point and I plan to do another for my next post later in the month.


Here is the finished card...........


For the following card I used a piece of linen fabric for the base, a mixture of Oxides and Acrylic pain and stamped Tree House allowing the ink to bleed a little before blotting it off. Using a stencil and texture paste I added some script and a sentiment cut into several pieces.


Have a good day everyone as as always many thanks for your visit and words of encouragement.


Sunday, 6 December 2020

Masterboard for a Gift card (by Magda) - Winter Birds, Frosty Trees, Let's get festive

 Hi girls

As promised here for you my second Xmas Post. This time I will use a blue self-made master board for this gift card.

Step by step:

1. Stamp on A4 copy paper a script stamp in black Archival and do some black Acrylic Distress Paint brush strokes to have a different texture.

2. Tear the sheet off and glue the pieces on a white cardstock 


3. Colour with Distress Paint randomly with blue and brown colors. 


4. Cover all with white gesso 

5. Stamp with a blue Distress Ink Pad   the stamps of Frosty Trees and Winter Birds


6. Cover all again with white gesso to have a soft look and stencil some trees 


7. Repeat nr 2 to 7 on the other side of the cardstock and fold in three your masterbord


8.  Colour a piece of white cardstock  33x10 cm with the same blue and brown colour you used before and cut a triangular topper and a card  


9. Now cut the masterboard as the picture below


10. Stamp on the base and on the topper again with Versamark the stamps of Frosty Trees and Winter Birds and emboss them hot with white and gold powder, and glue the topper and repeat nr. 5

11. Stamp the sentiment of  Let's get Festive on a scrap blue piece, decorate it and glue it as shown. 


12. For the inner card, use the blue piece of nr. 8

13. The last three pictures the project


Thank you for reading till the end my long post of today, hugs

Magda  


Saturday, 5 December 2020

tomte bauble (by Veronica)

Good morning everyone, today I have a quick card to share using the tomte and bauble stamps from last months Hochanda shows
The plain shaded bauble was stamped using versarmark ink and silver embossing powder, then sponged round the edges with tumbled glass distress ink. The tomte gnome was stamped in versafine grey ink, and coloured with tumbled glass using a waterbrush. trimmed to a square,  silver and pale blue mats  mounted onto a 6"square card blank and done.
The second is just a variation of the first, but this time coloured using marker pens with red and gold mats - I could have sworn the mats were straight.....fortunately I collect my new glasses today!


Friday, 4 December 2020

Tomte Tree

 Hello

I am sharing one of the cards I made for the Hochanda show in November. Unfortunately it didn't get shown on the TV show, but Lesley did show it on one of her Facebook lives.

First, I cut 2 pieces of A4 Kraft card to 148mm x 297mm and made a simple Cascade Card. 

I then used my stamping platform and stamped the tree image from Be at Peace stamp set onto a piece of polyester. 

With the Cascade Card open, I positioned the card under the polyester and when it was in the right position I stamped onto the card and embossed with white. I repeated this for the other side of the card. I coloured the tree with a white paint pen and added some red glitter.

I stamped the large tree from Trees a Crowd for the next layer of the card, again I embossed in white.


Inside the card  I stamped the trio of tomte from A Tomte Christmas set , I also stamped the larger ones twice and cut them out. I added some foam pads for dimension. I used some gesso at the base of the card for snow.


I added the sentiment and a little red belt to close the card.

I hope you like this card, it took a little bit of working out to get the tree in the right position, but was worth it in the end!

Thanks for looking

Sandra x

Wednesday, 2 December 2020

Blog Comment Winner


Hello and welcome to the Chocolate Baroque Design Team Blog.


We truly appreciate the time you take to let us know your thoughts about our designs, so each and every comment is very important to us.


Each comment in November was assigned a number and we used Random Org to draw a winner.


Congratulations to Pat (Colourful Card Creations) you have won this month's £15.00 voucher to spend on Chocolate Baroque stamps.

To claim your prize, please email here to confirm your email address and Lesley will send your gift certificate.


Lesley will be giving another £15 gift voucher to another lucky winner drawn from December’s comments.


The more comments you leave, the better your chances of being the winner.


Thank you so much for all the kind comments you leave.


Good luck from all on the Design Team


Here is another chance to see the beautiful creation by Brenda


Tuesday, 1 December 2020

Bauble Butterfly (by Judith)

Hello everyone, I hope that you are all keeping well. Today I am celebrating a lockdown Birthday, and like many of you this year, it will be a subdued affair. However, I am thankful for my family around me, and will celebrate properly once we can get out and about again.

I have created a card using stamps from last month's TV shows on Hochanda. There was a fabulous selection, and I was really spolit for choice when I came to creating something for my blog post. I decided to use the plain circle from Shaded Baubles, and added a butterfly from Butterfly Perfumery as a focal point.


I found a spritzed background in my stash, which I cut down to fit a 6" x 6" card, and drew a wiggly frame using a fineliner pen. I added a sentiment, from Butterfly Perfumery once again. The splatters are from the Timeless stamp set, such a useful little stamp. 

 I stamped the bauble image onto a paler version of the spritzed background so that it toned in with the main background, and then stamped the butterfly on top. I stamped the butterfly again on a piece of spare card, and coloured it with Inktense pencils, blending them with a water brush. I added shading around the edge with Distress Ink. I fussy cut the image, and decoupaged it onto the circle. 

Thanks for stopping by, take care, and stay safe,


Judith xx